Network
Overview
CSEntry allows to register networks and hosts.
A network scope defines a range of VLAN and a supernet where networks can be assigned. A host can be of diffent types and includes one or more interfaces.
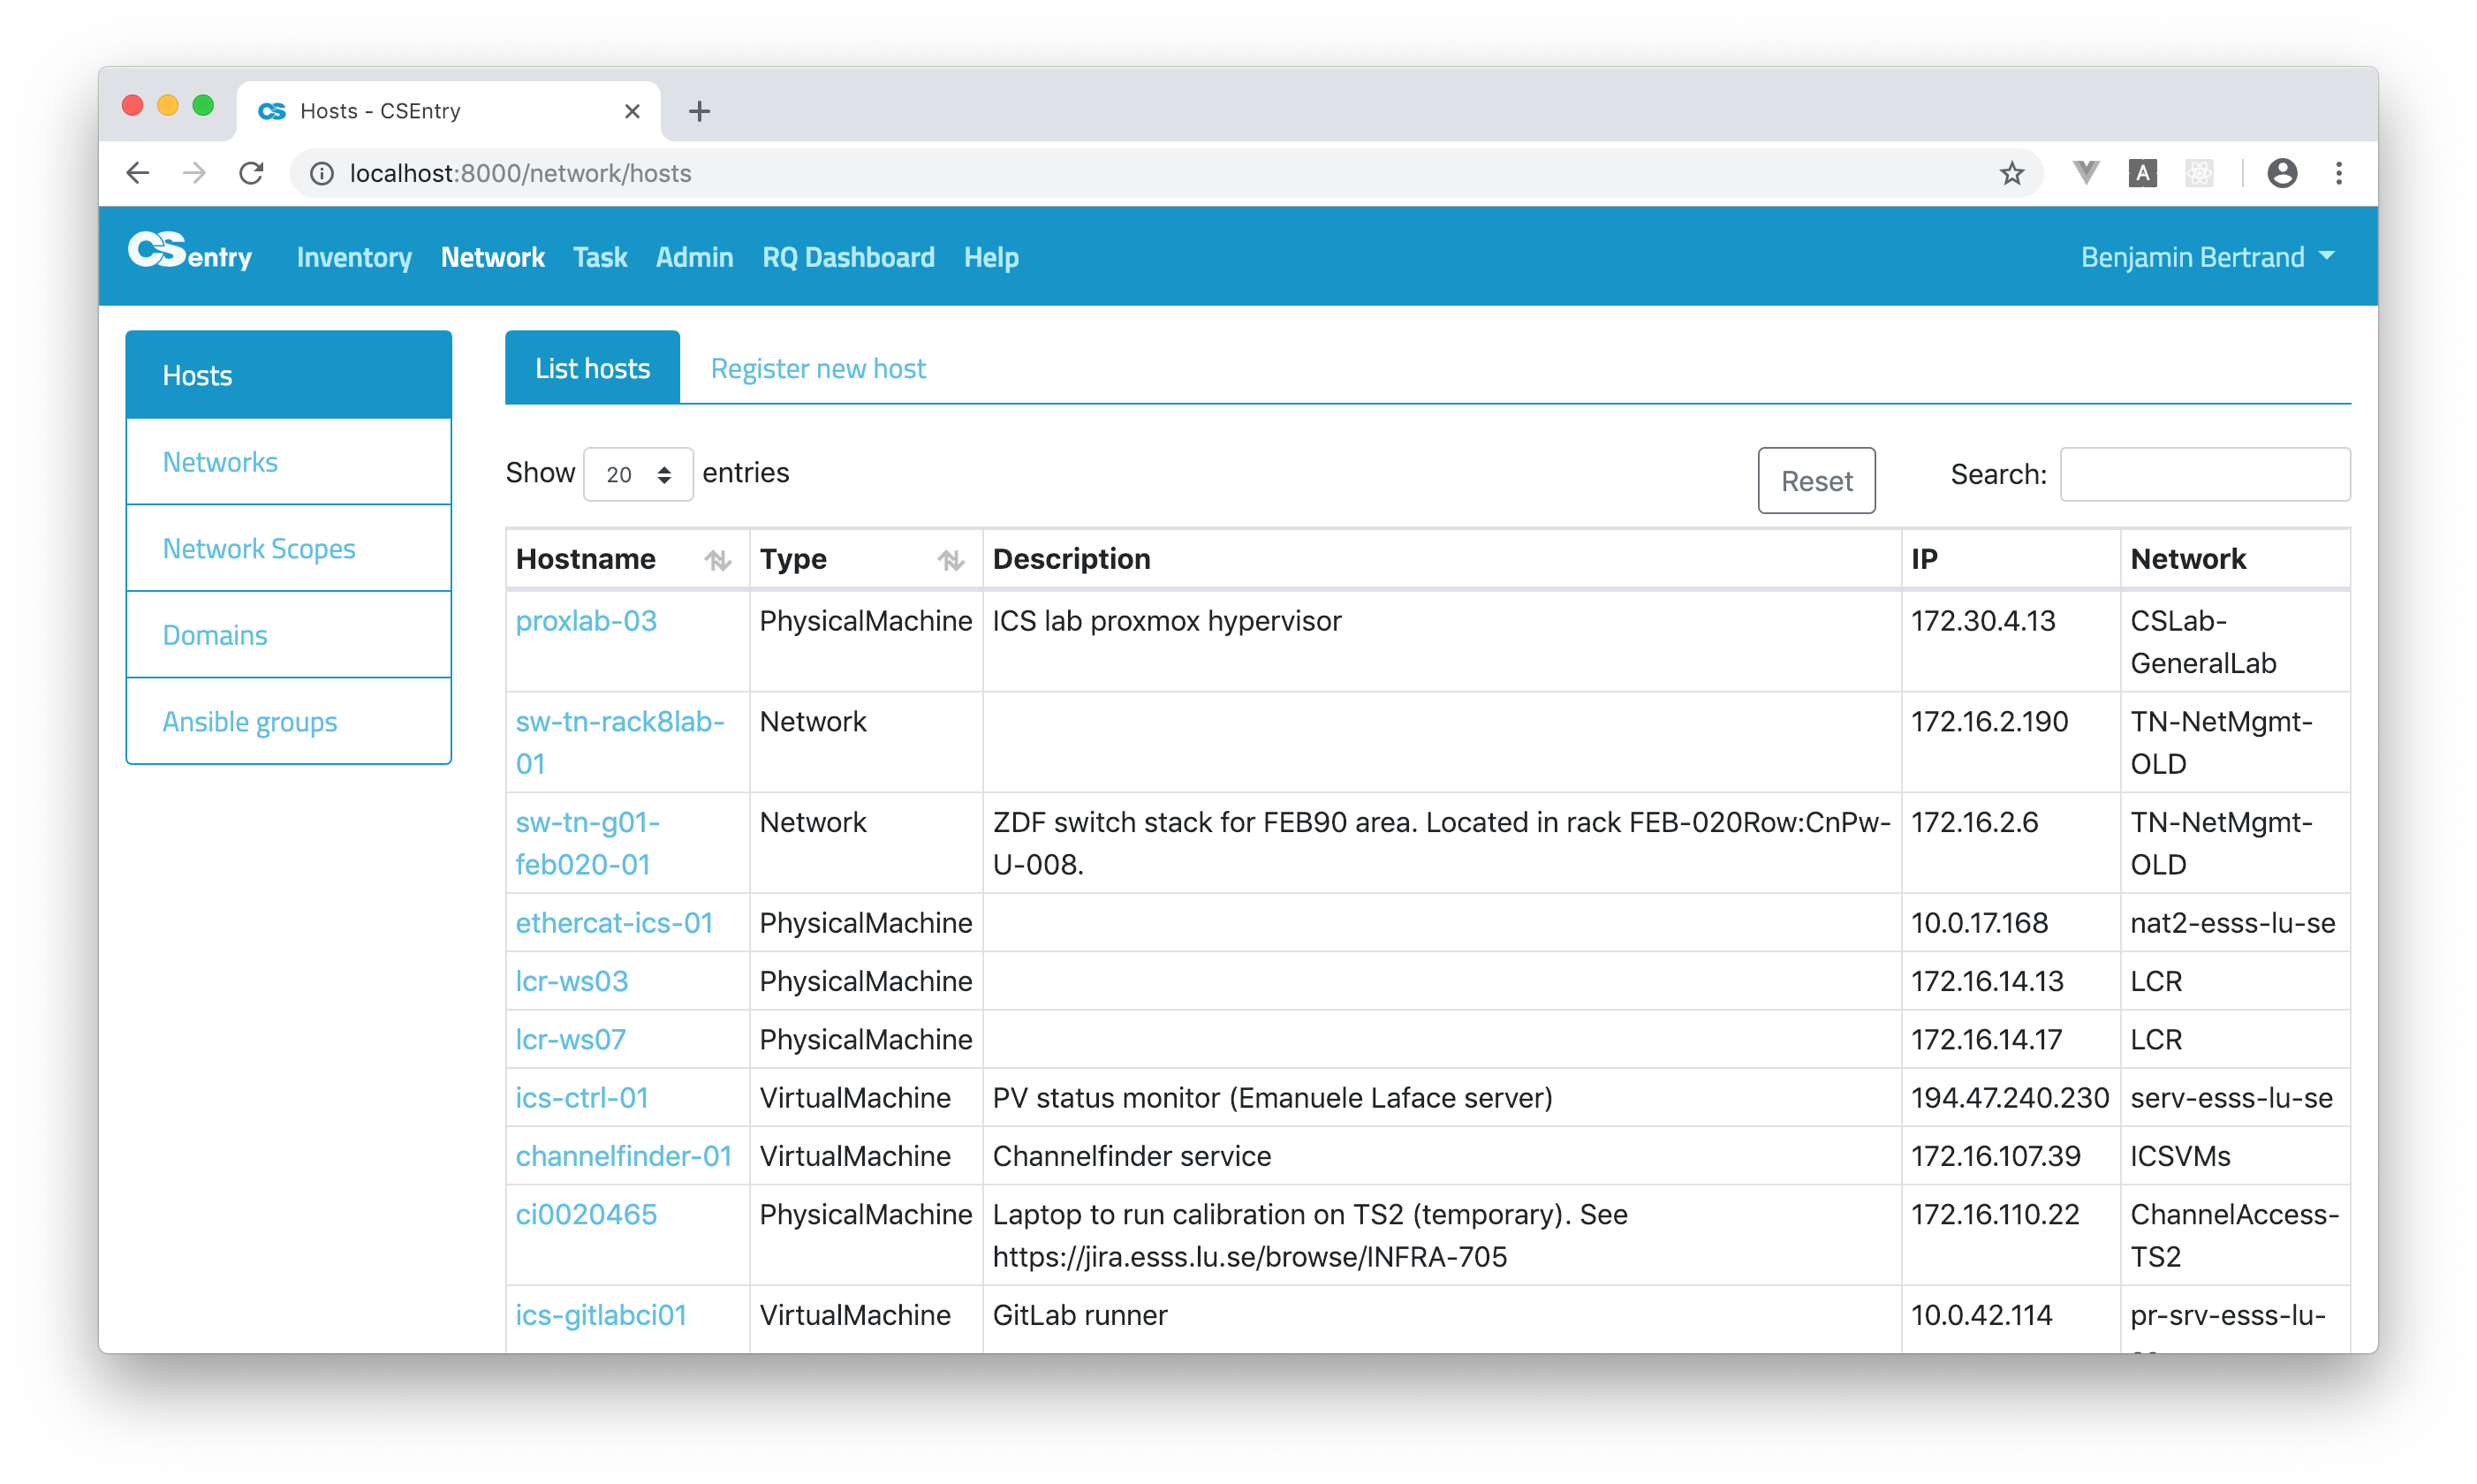
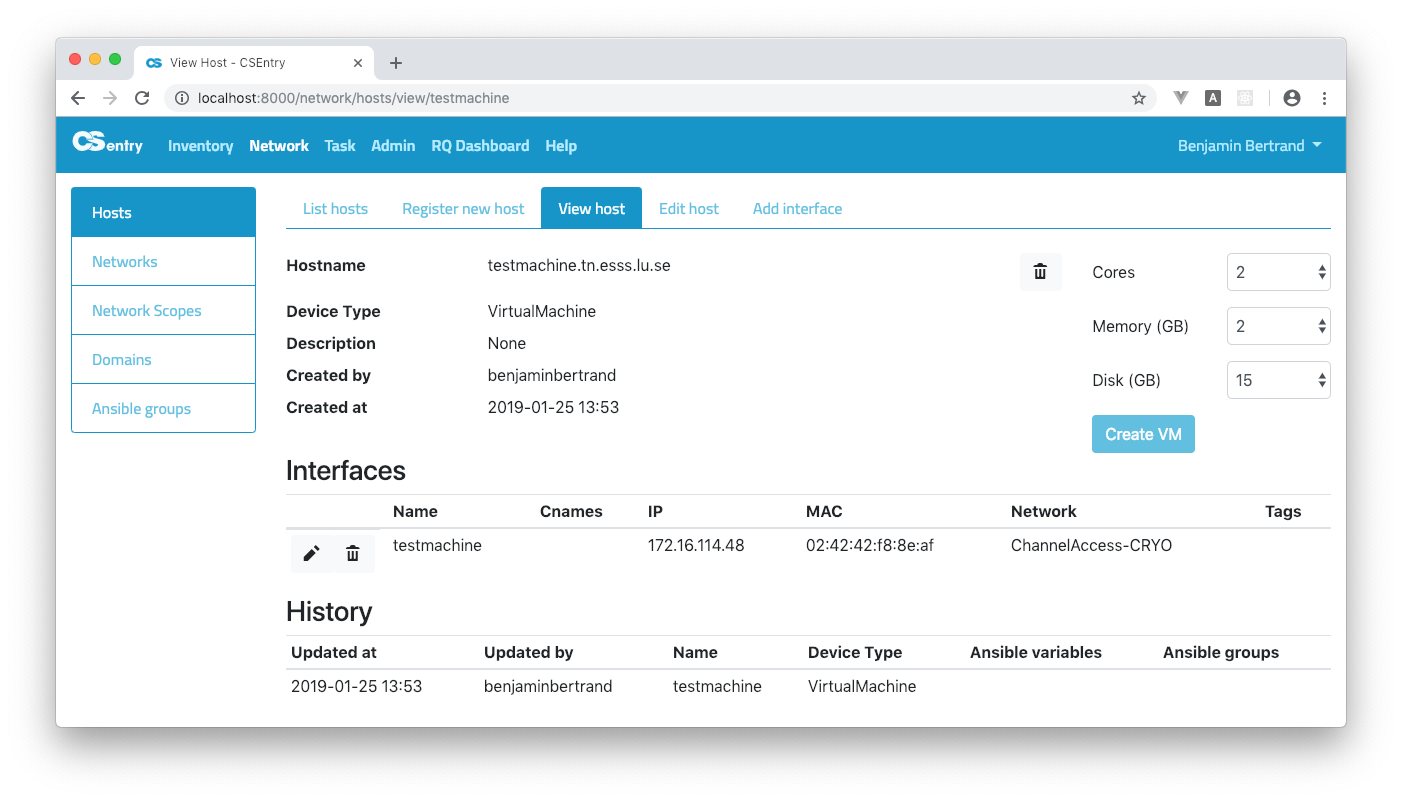
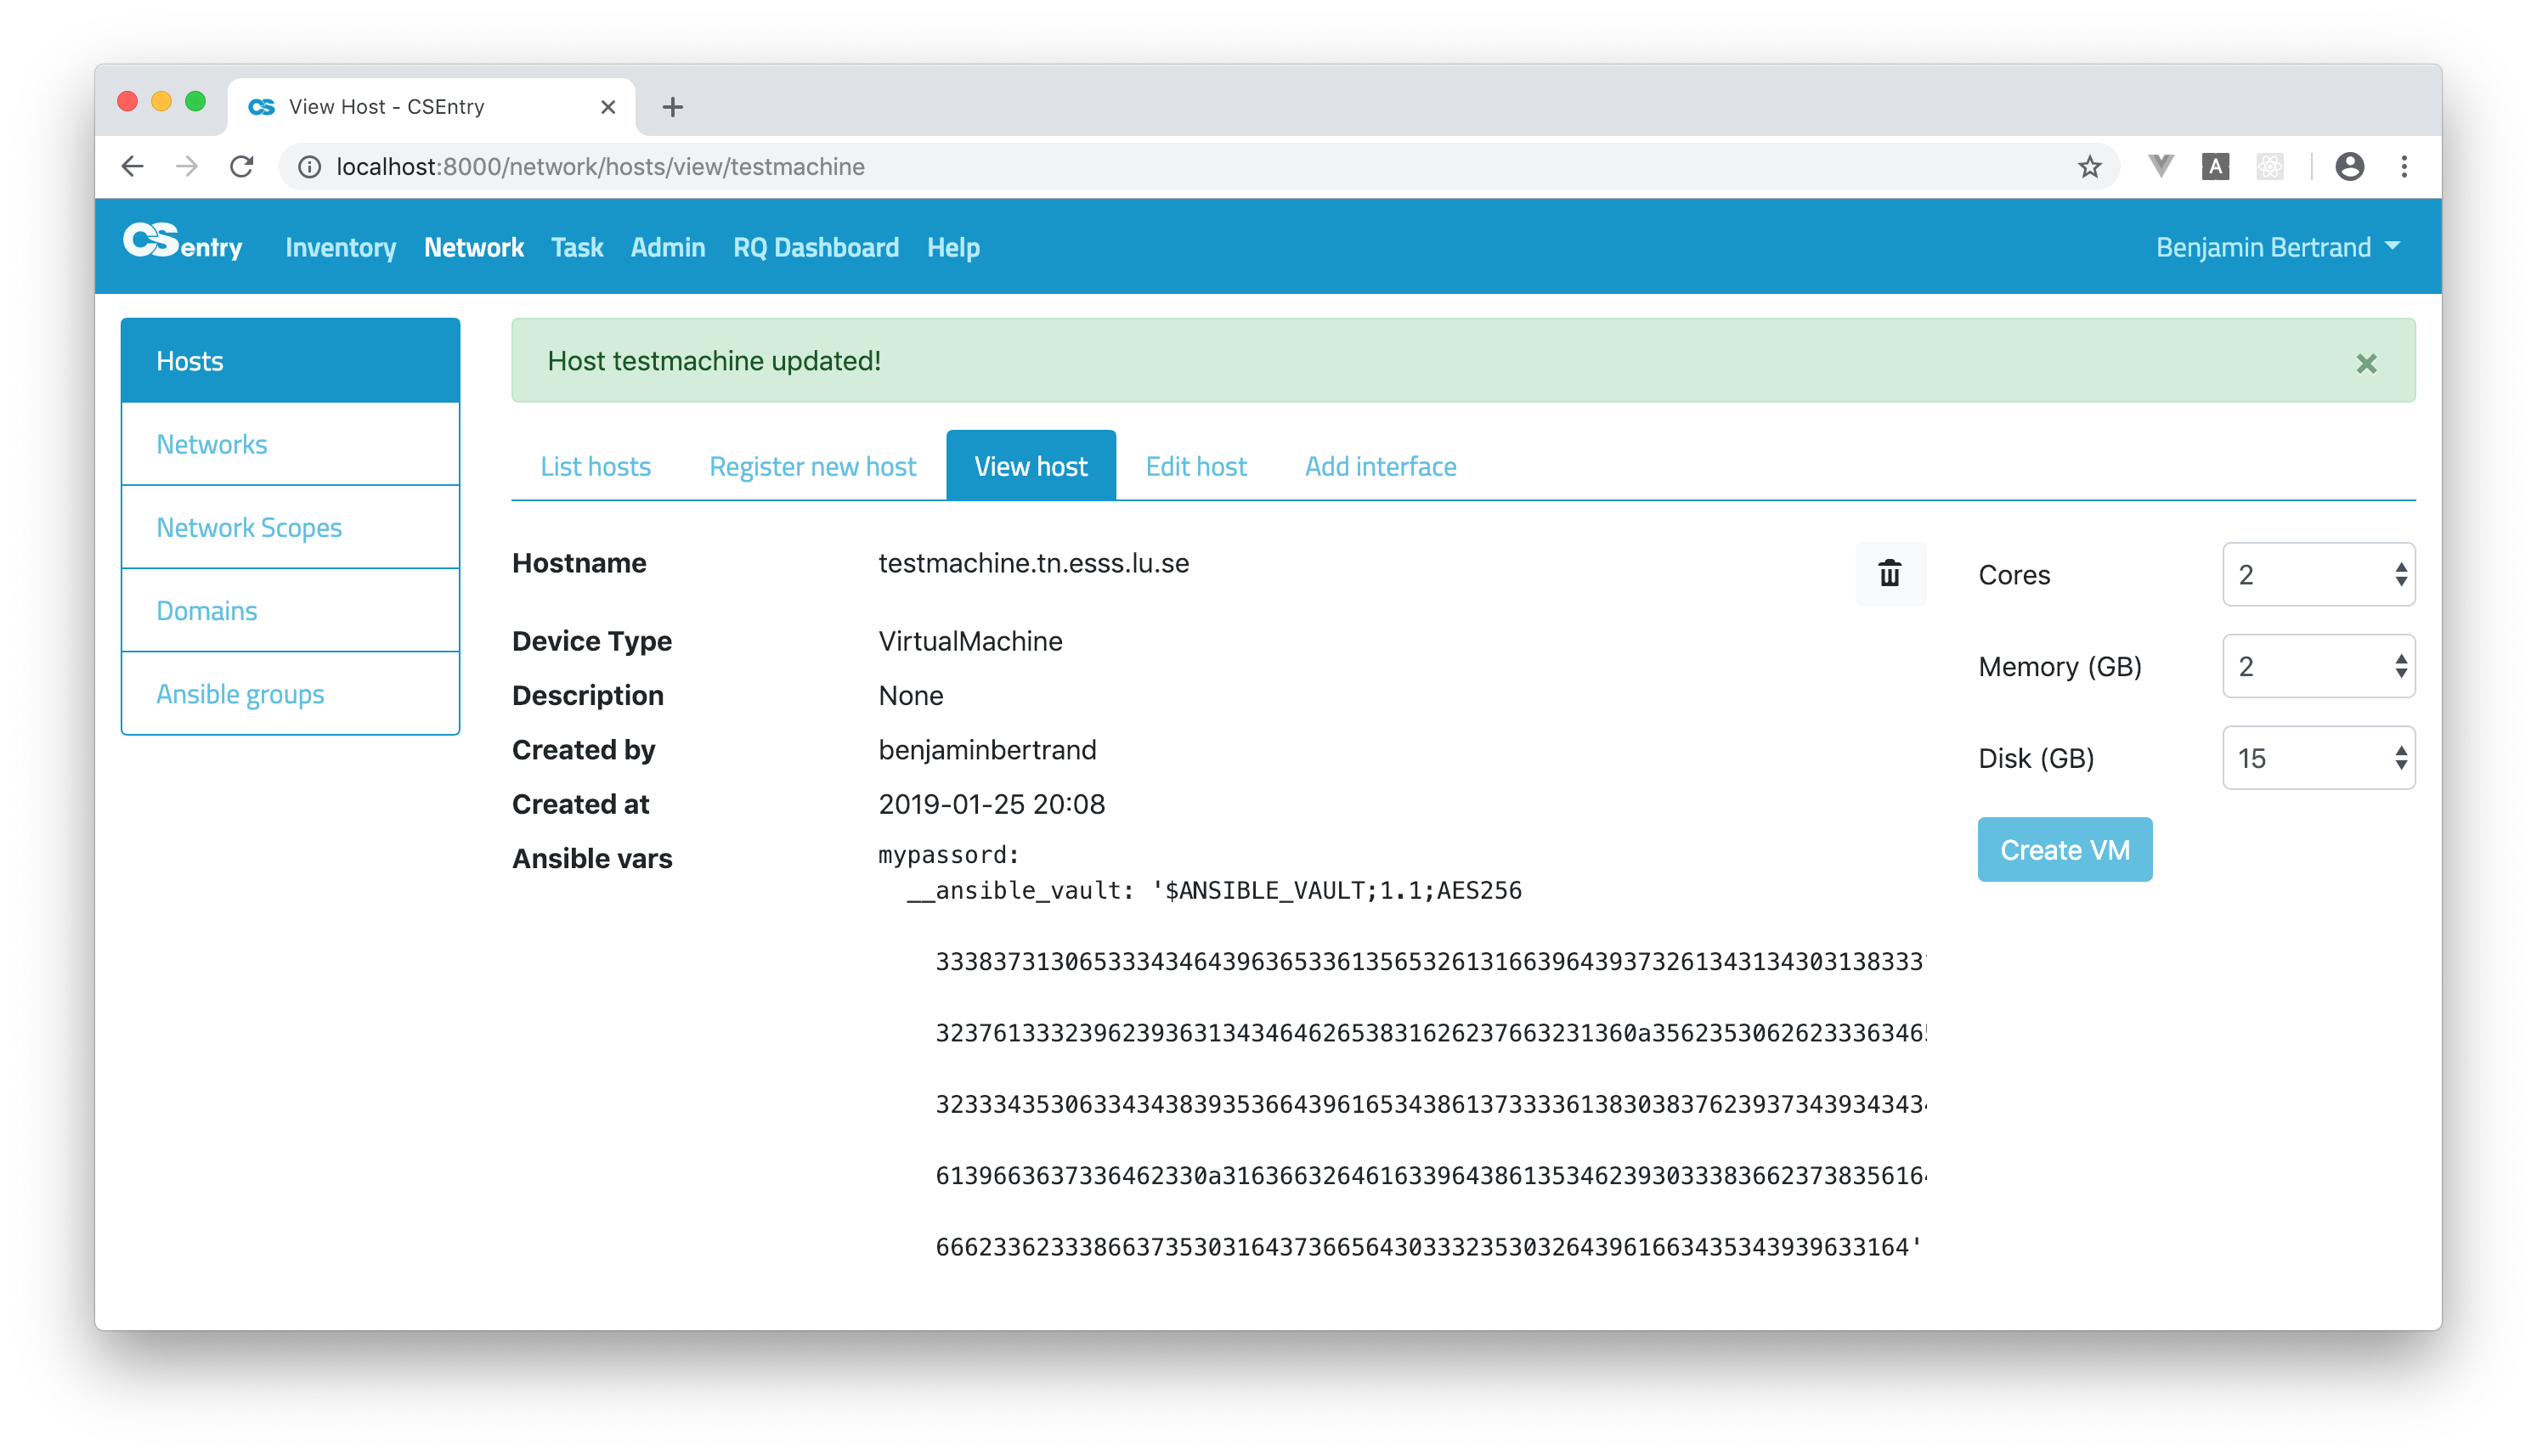
Clicking on an hostname will take you to the View host page.
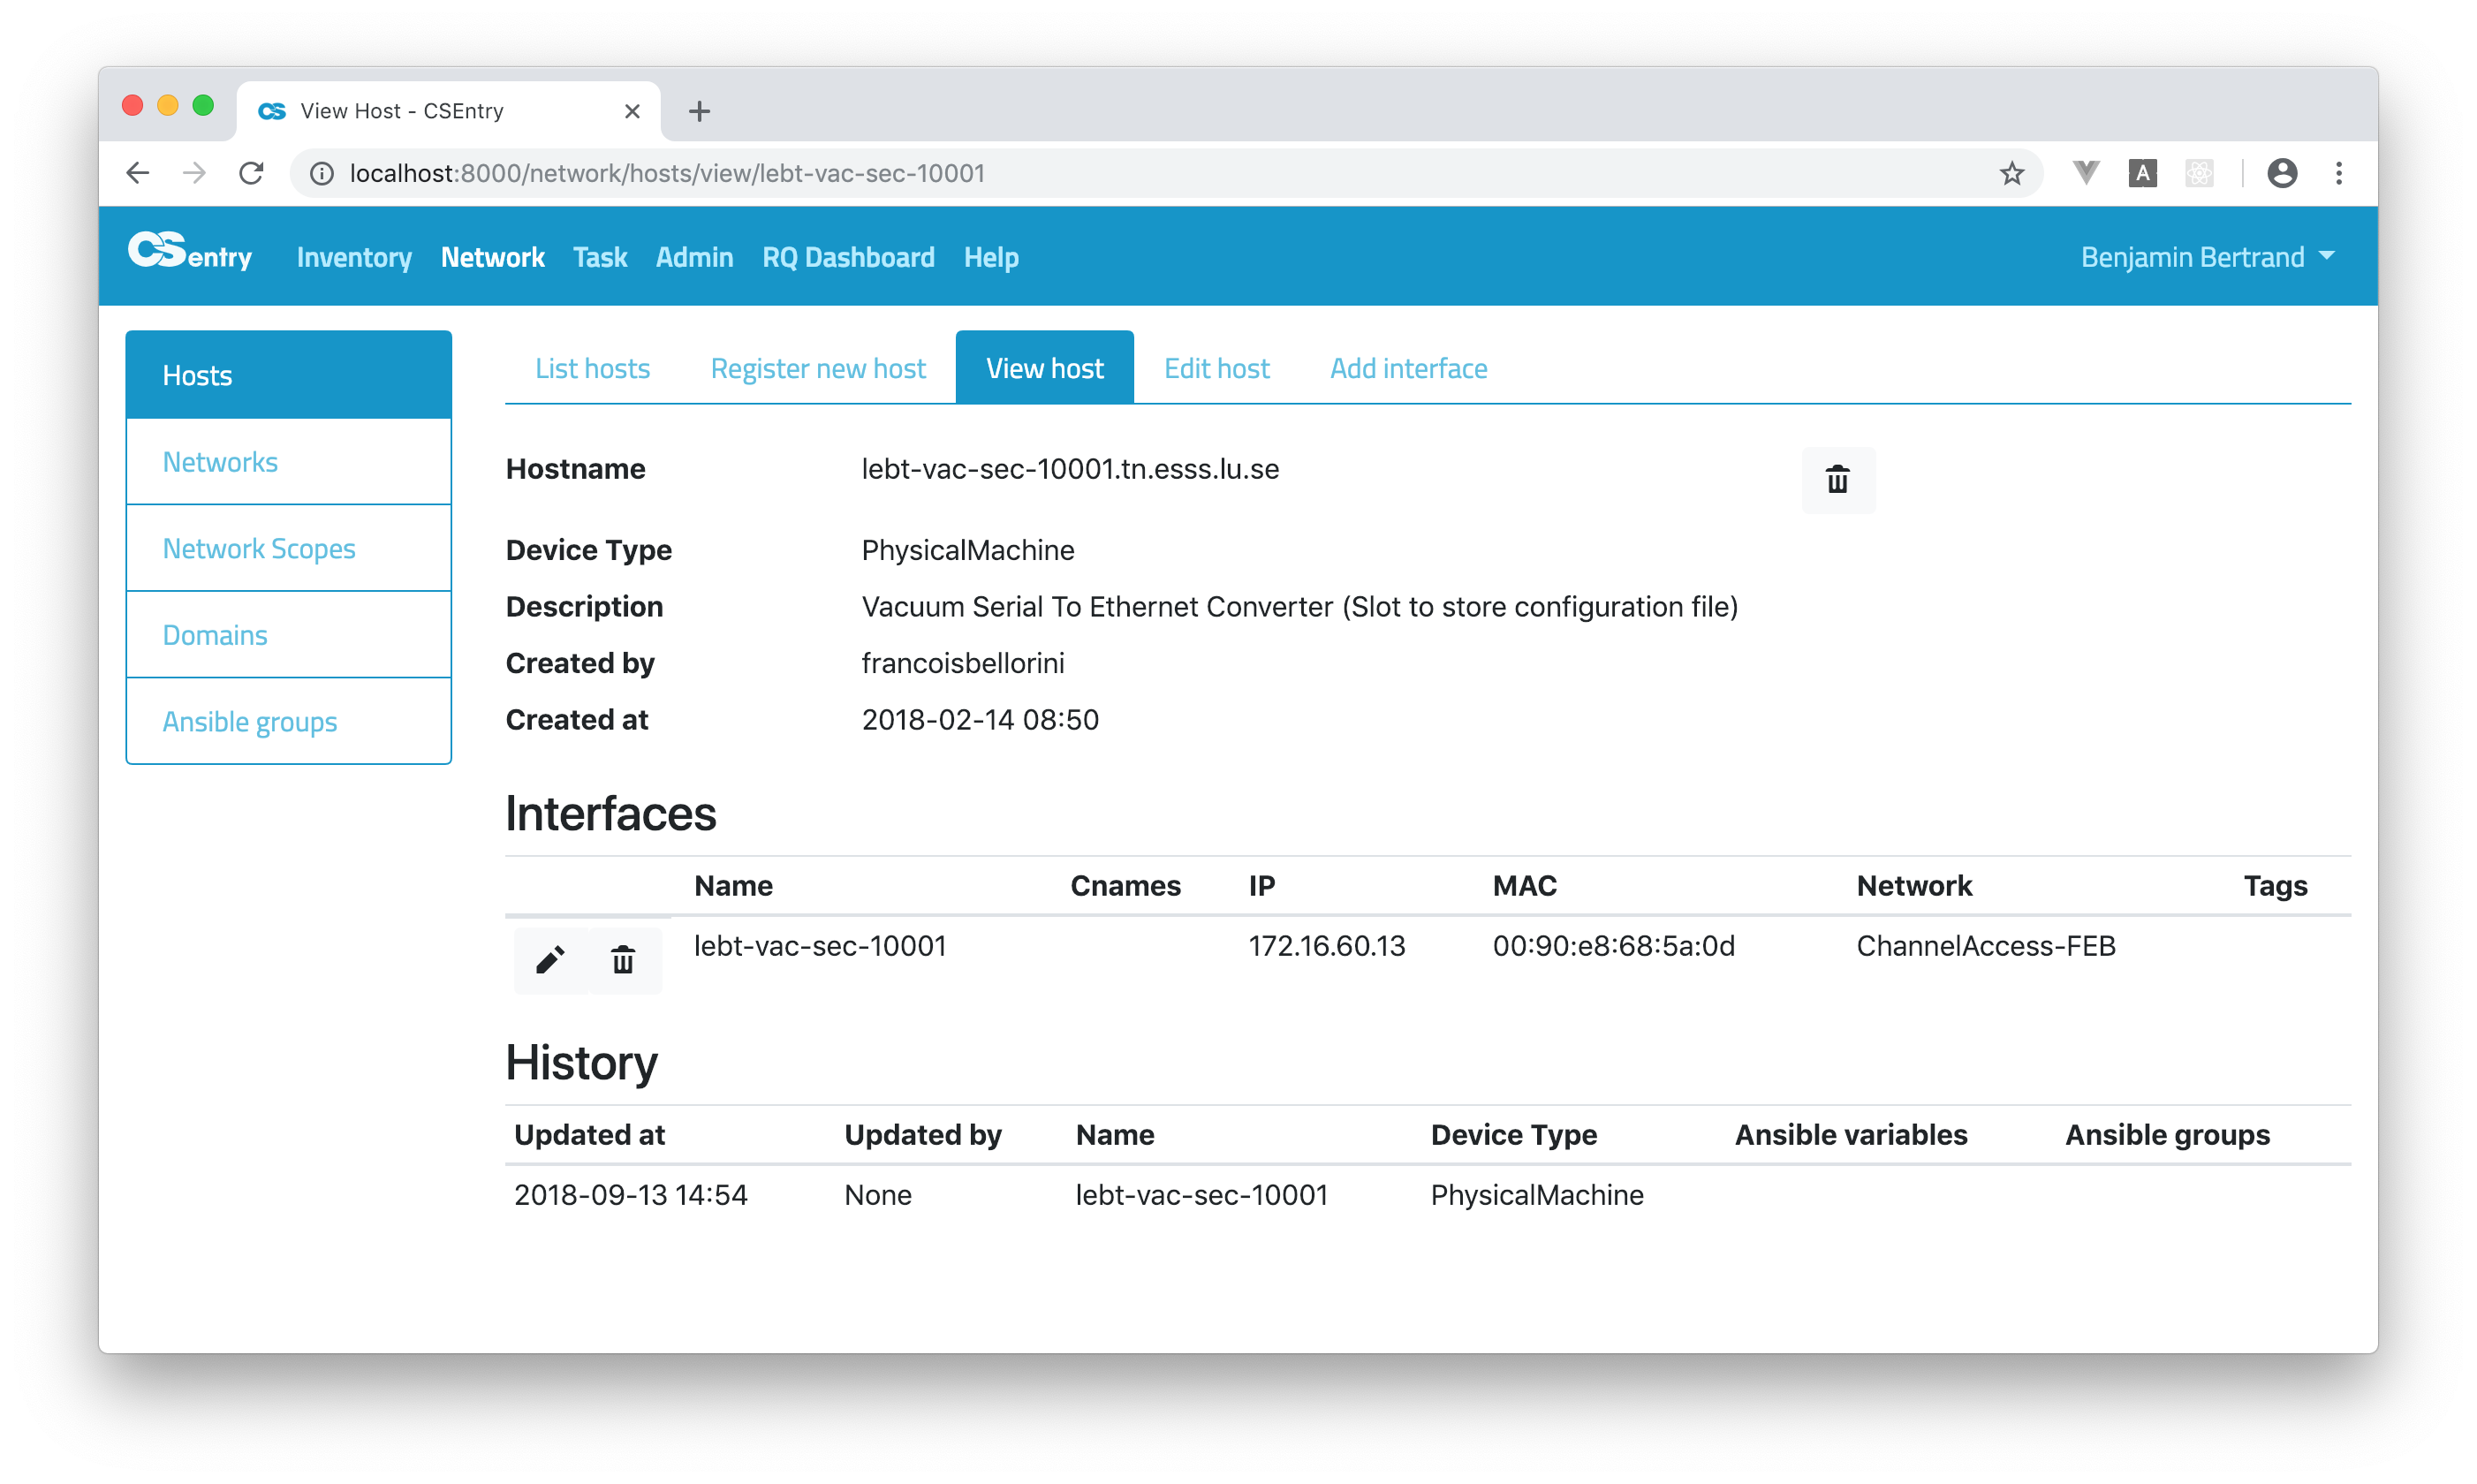
On that page you can see all the host’s details. You can add extra interfaces, edit the existing interfaces or edit the host information.
For network switches, you can see the list of stack members.
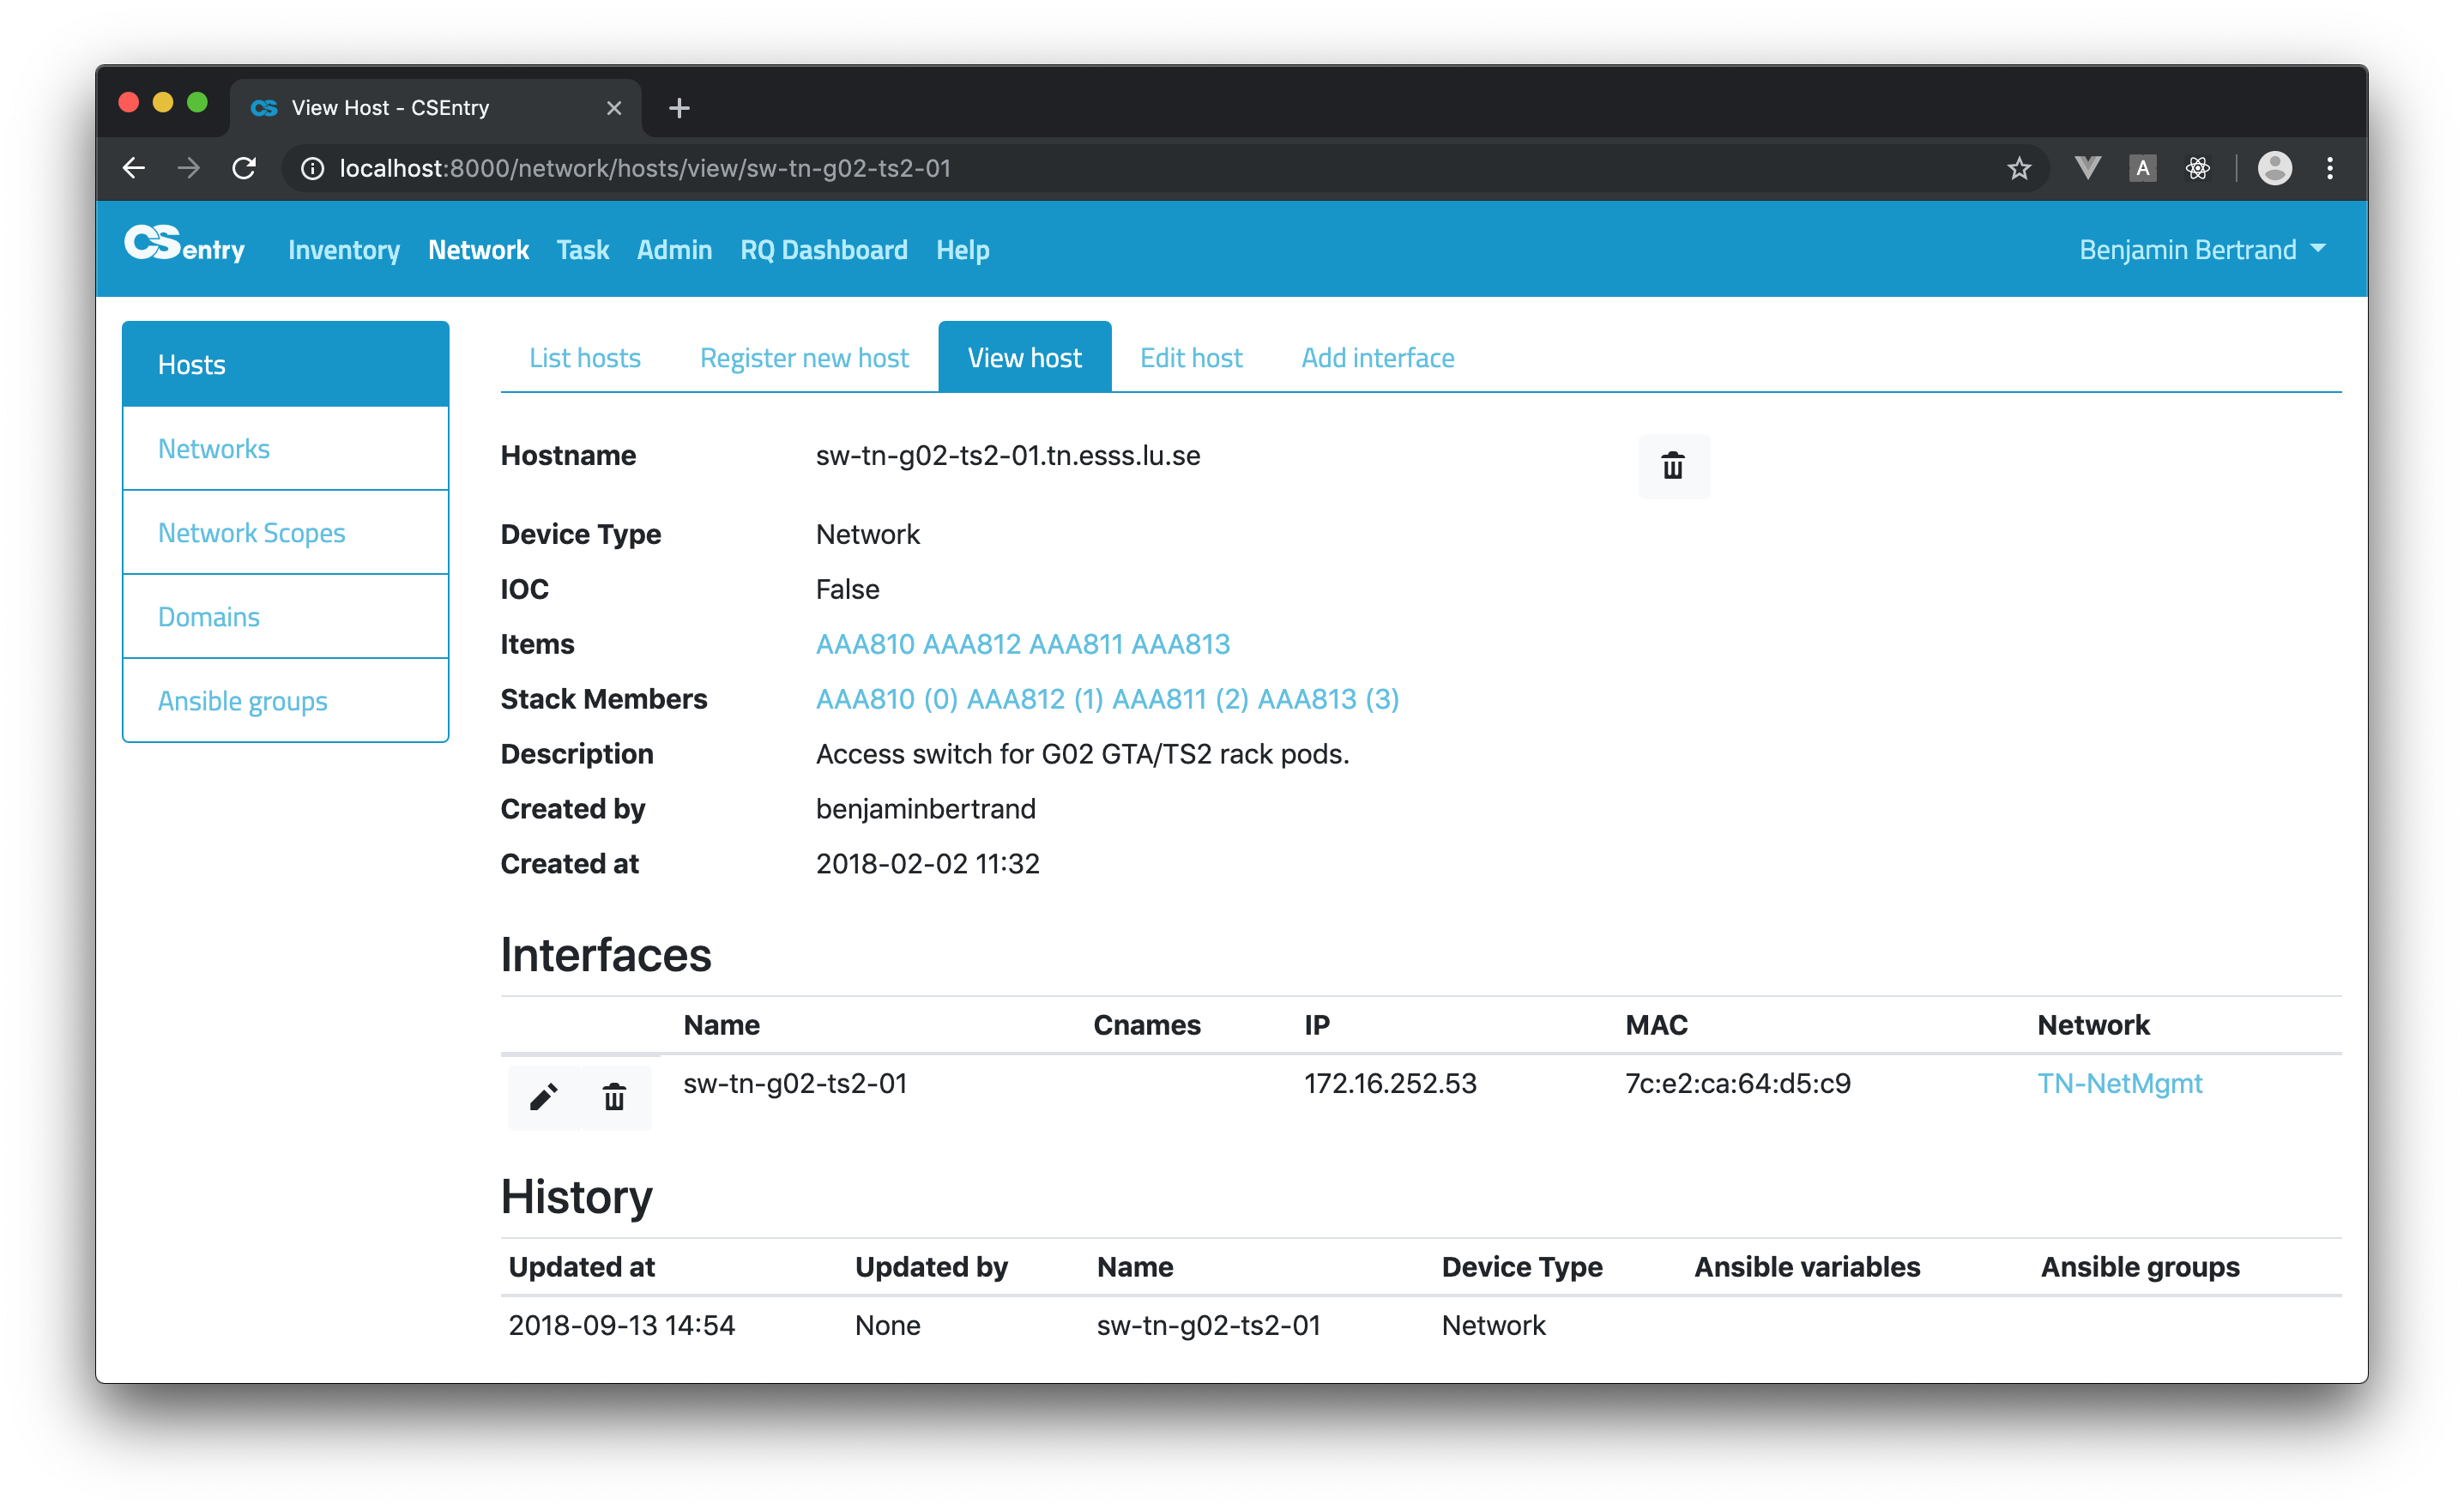
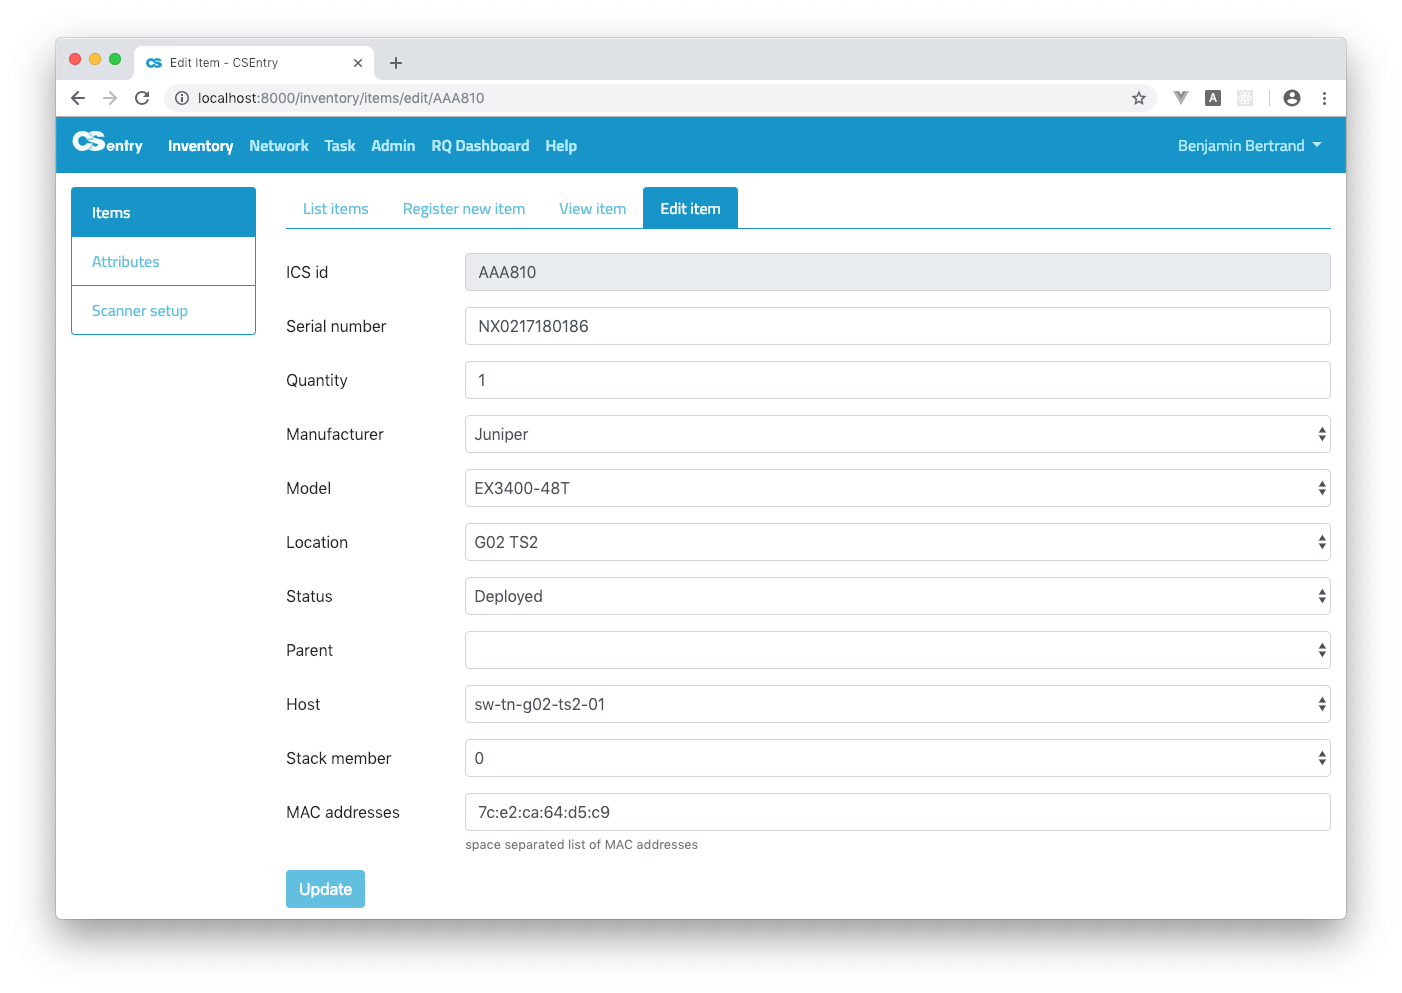
Stack members should be defined by linking an item to an host from the inventory Edit item page:
Search
You can find a specific host or group of hosts by using the search box. The search input (as well as column ordering and paging position) is saved locally in your browser and restored when you reload the page. To clear the state of the table, click on the Reset button.
As for the inventory Search, Elasticsearch is used as the full-text search engine and allows to use a query string “mini-language”.
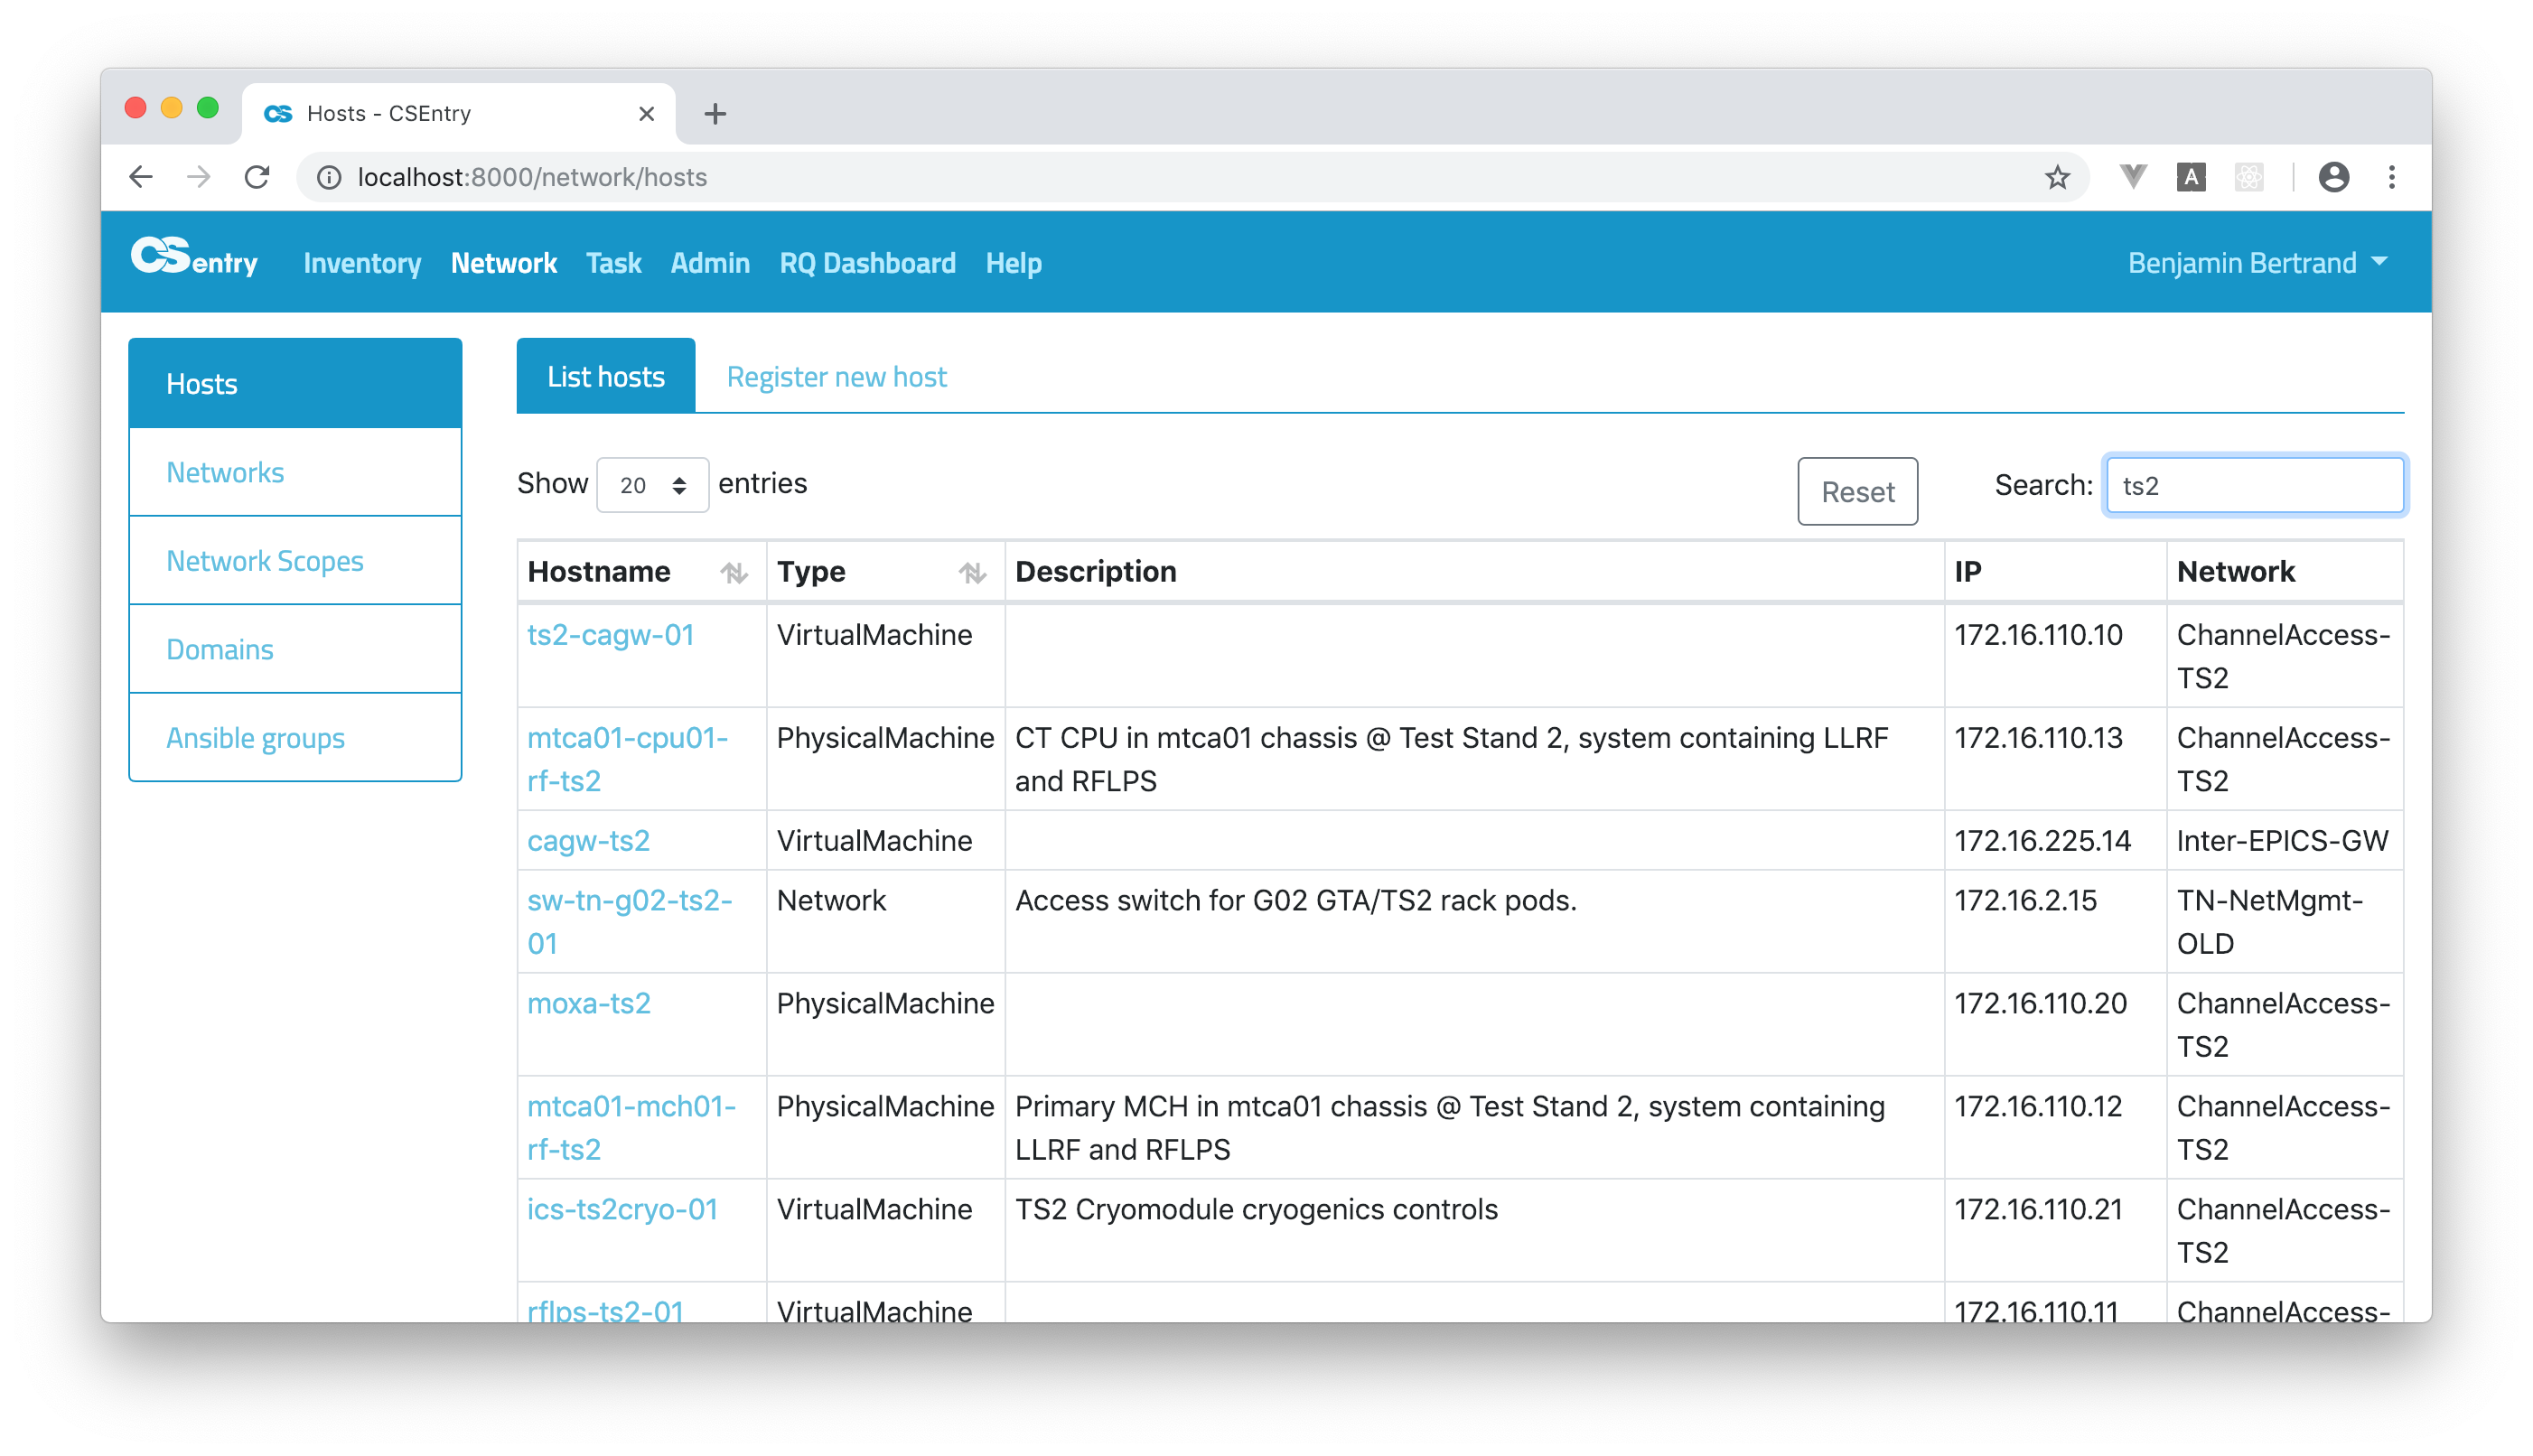
To perform a free text search, simply enter a text string. For example, if you’re looking for things related to TS2 (Test Stand 2), just enter
ts2. Notice that the search is case insensitive.
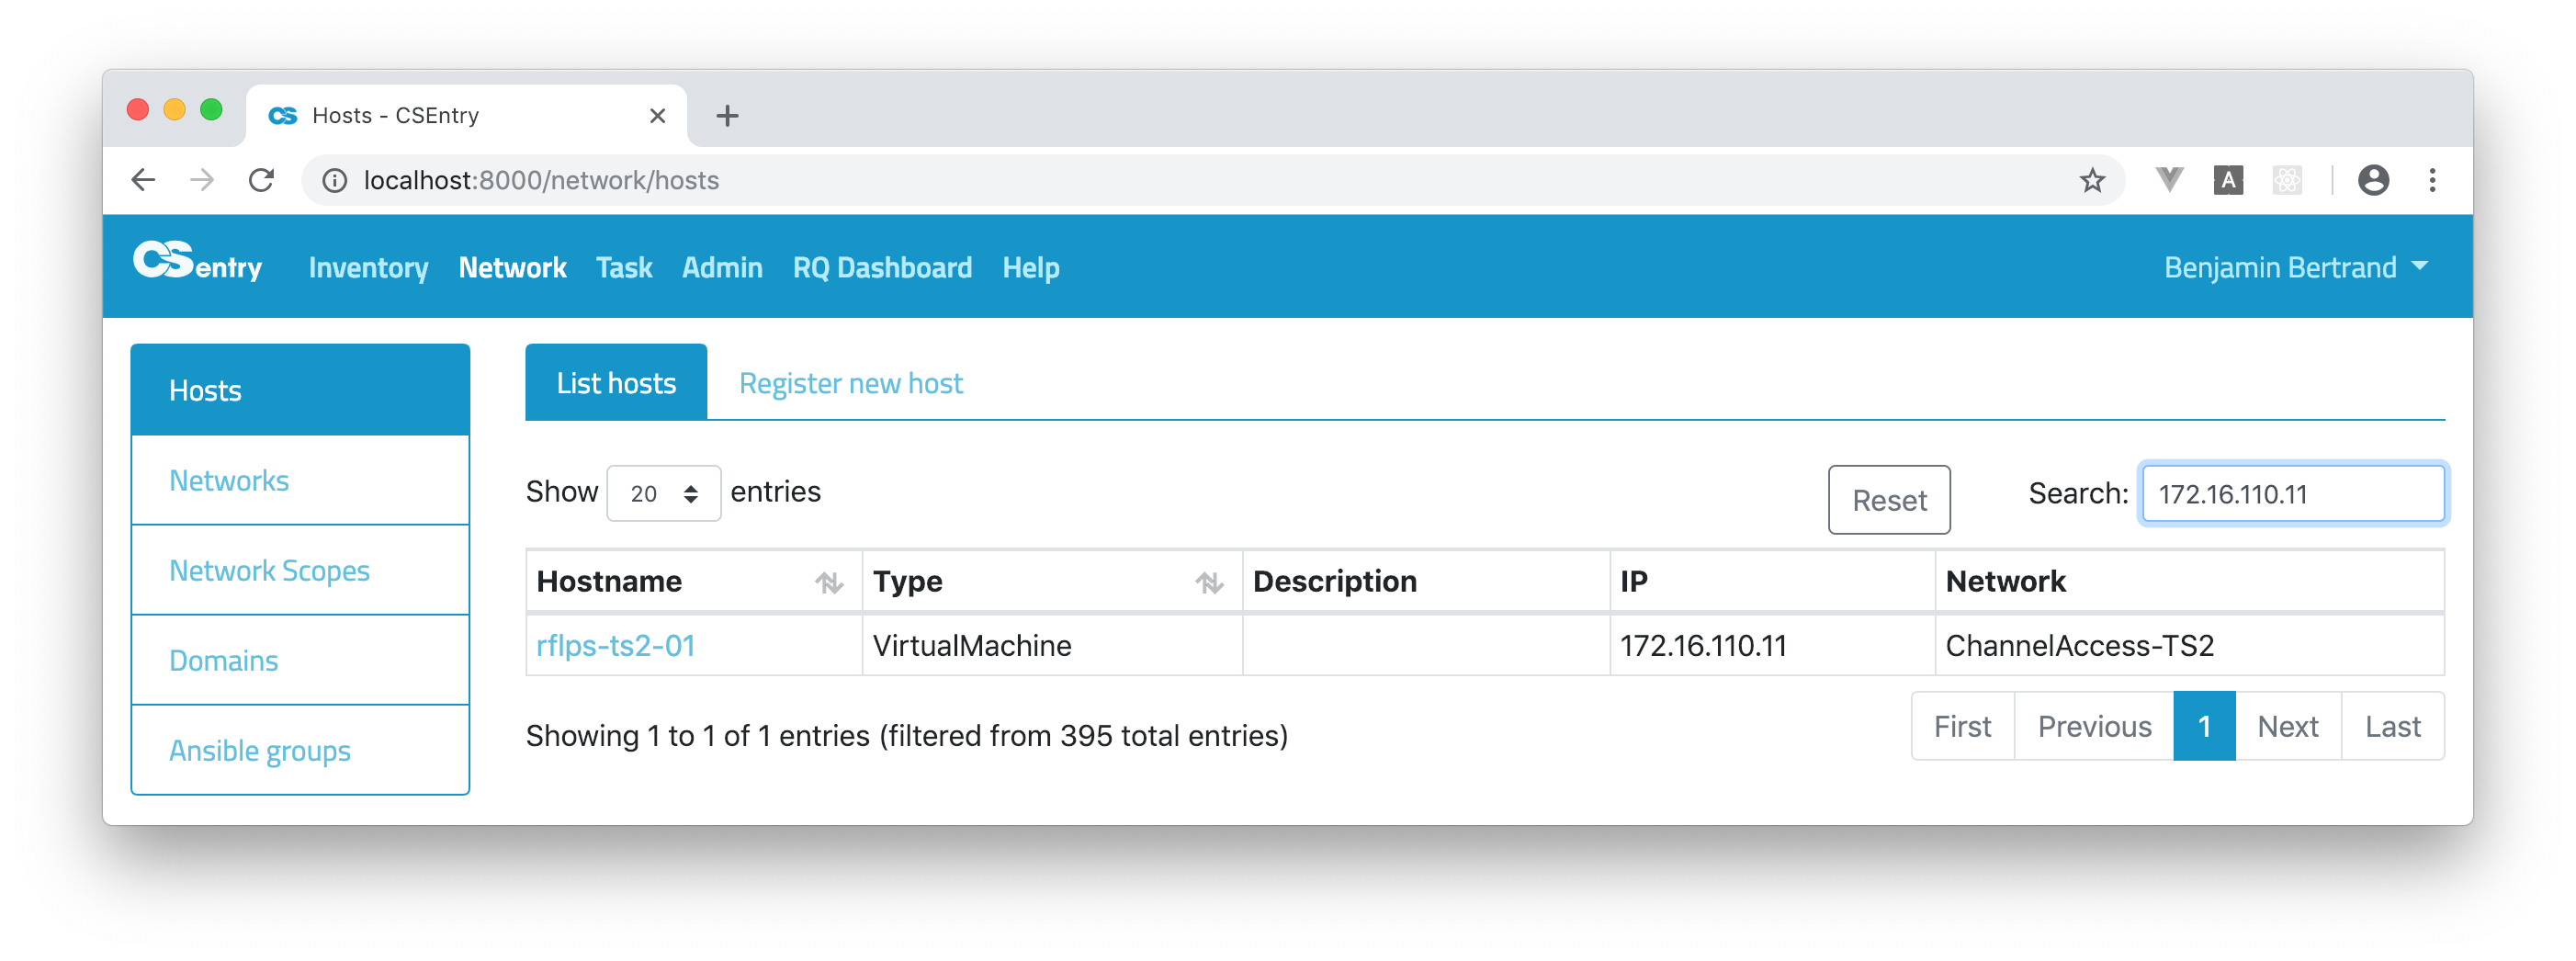
You can search an IP address:
Wildcard searches can be run using
?to replace a single character and*to replace zero or more characters:archiver*Be aware that wildcard queries can use an enormous amount of memory and perform very badly — just think how many terms need to be queried to match the query string
"a* b* c*".

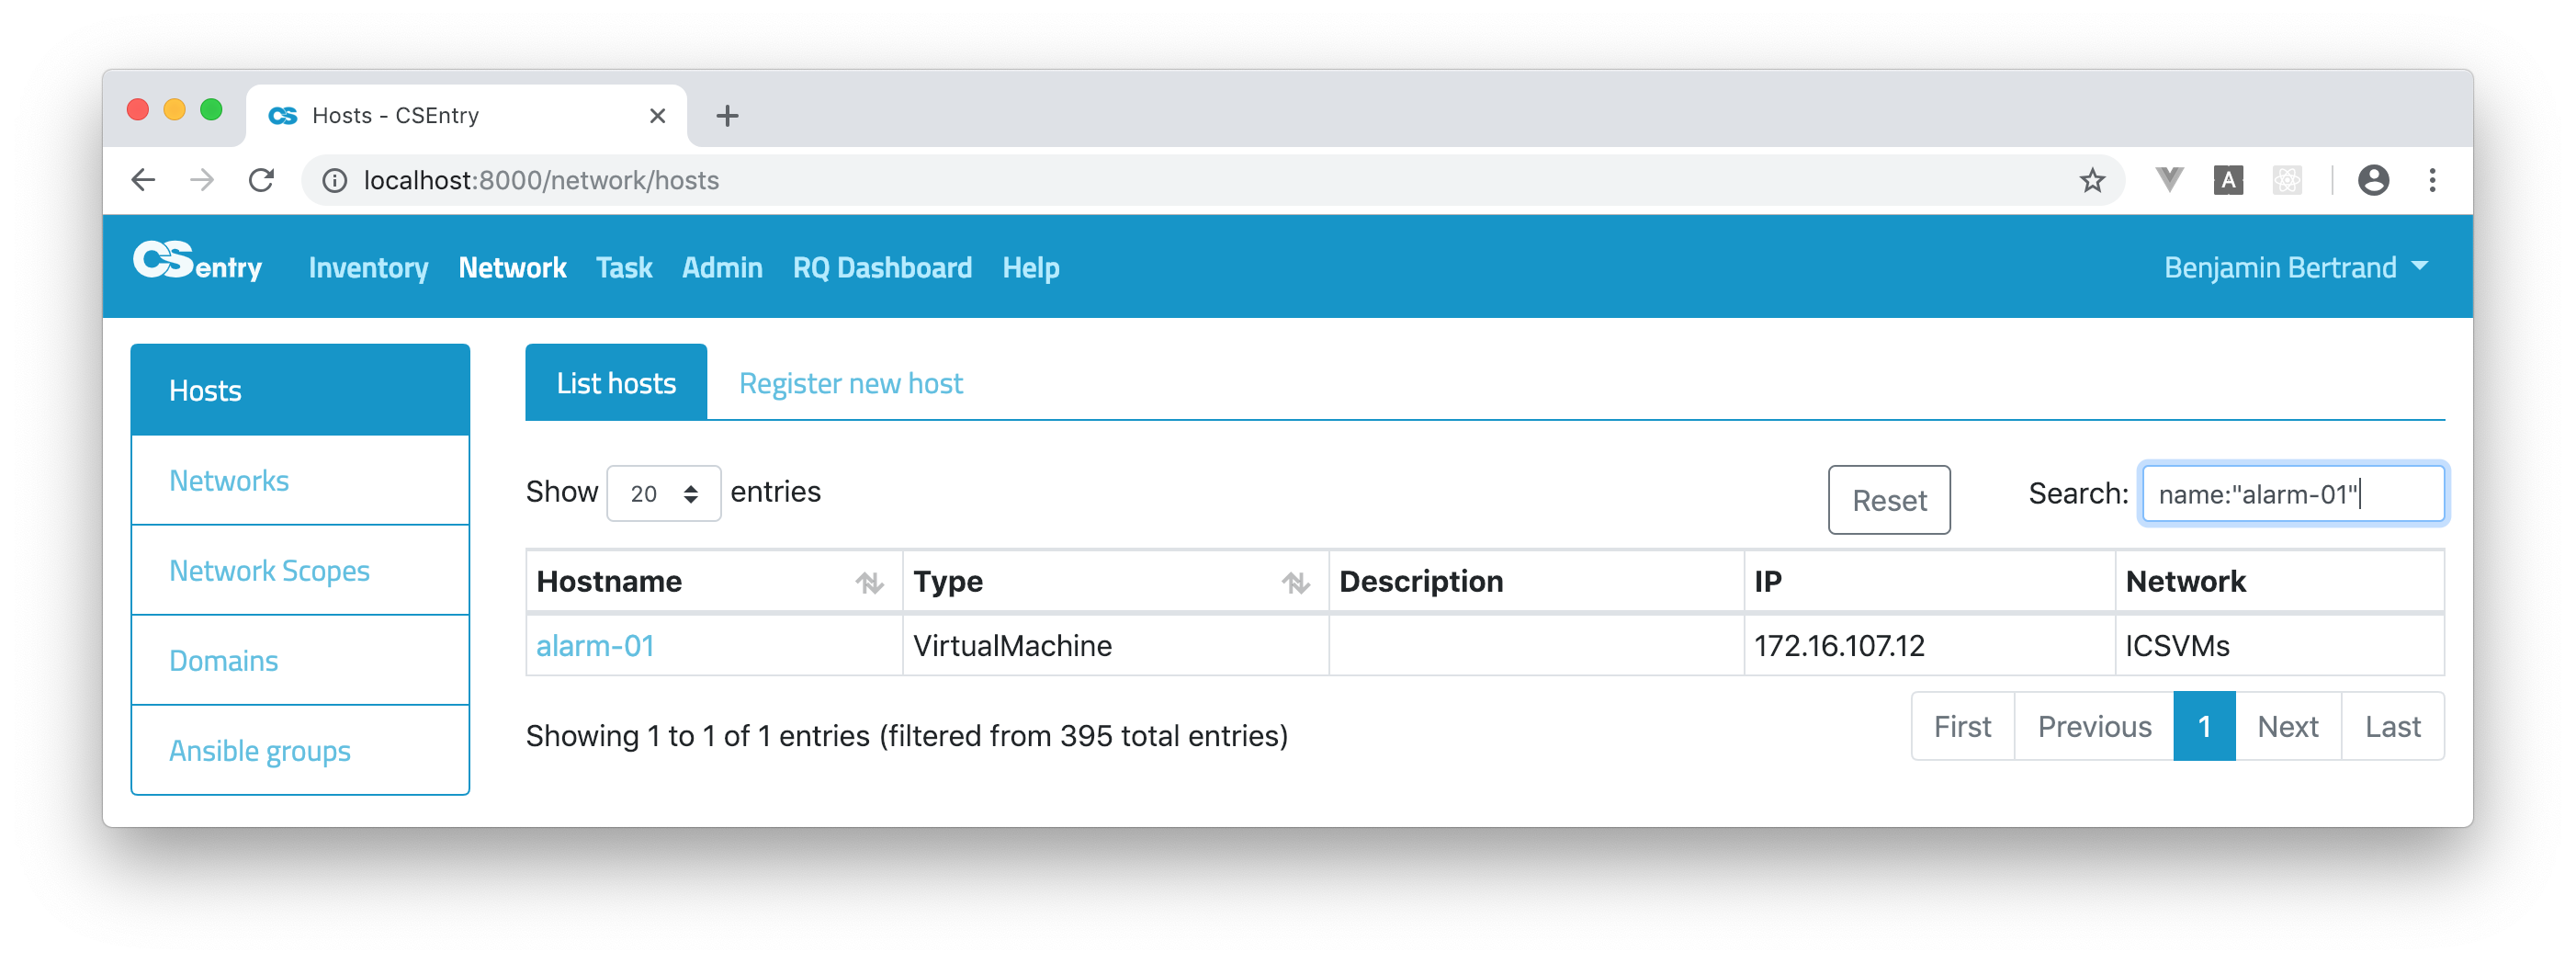
To search a string that includes reserved characters
+ - = && || > < ! ( ) { } [ ] ^ " ~ * ? : \ /, you have to use double quotes. Here is how to search the hostname"alarm-01".
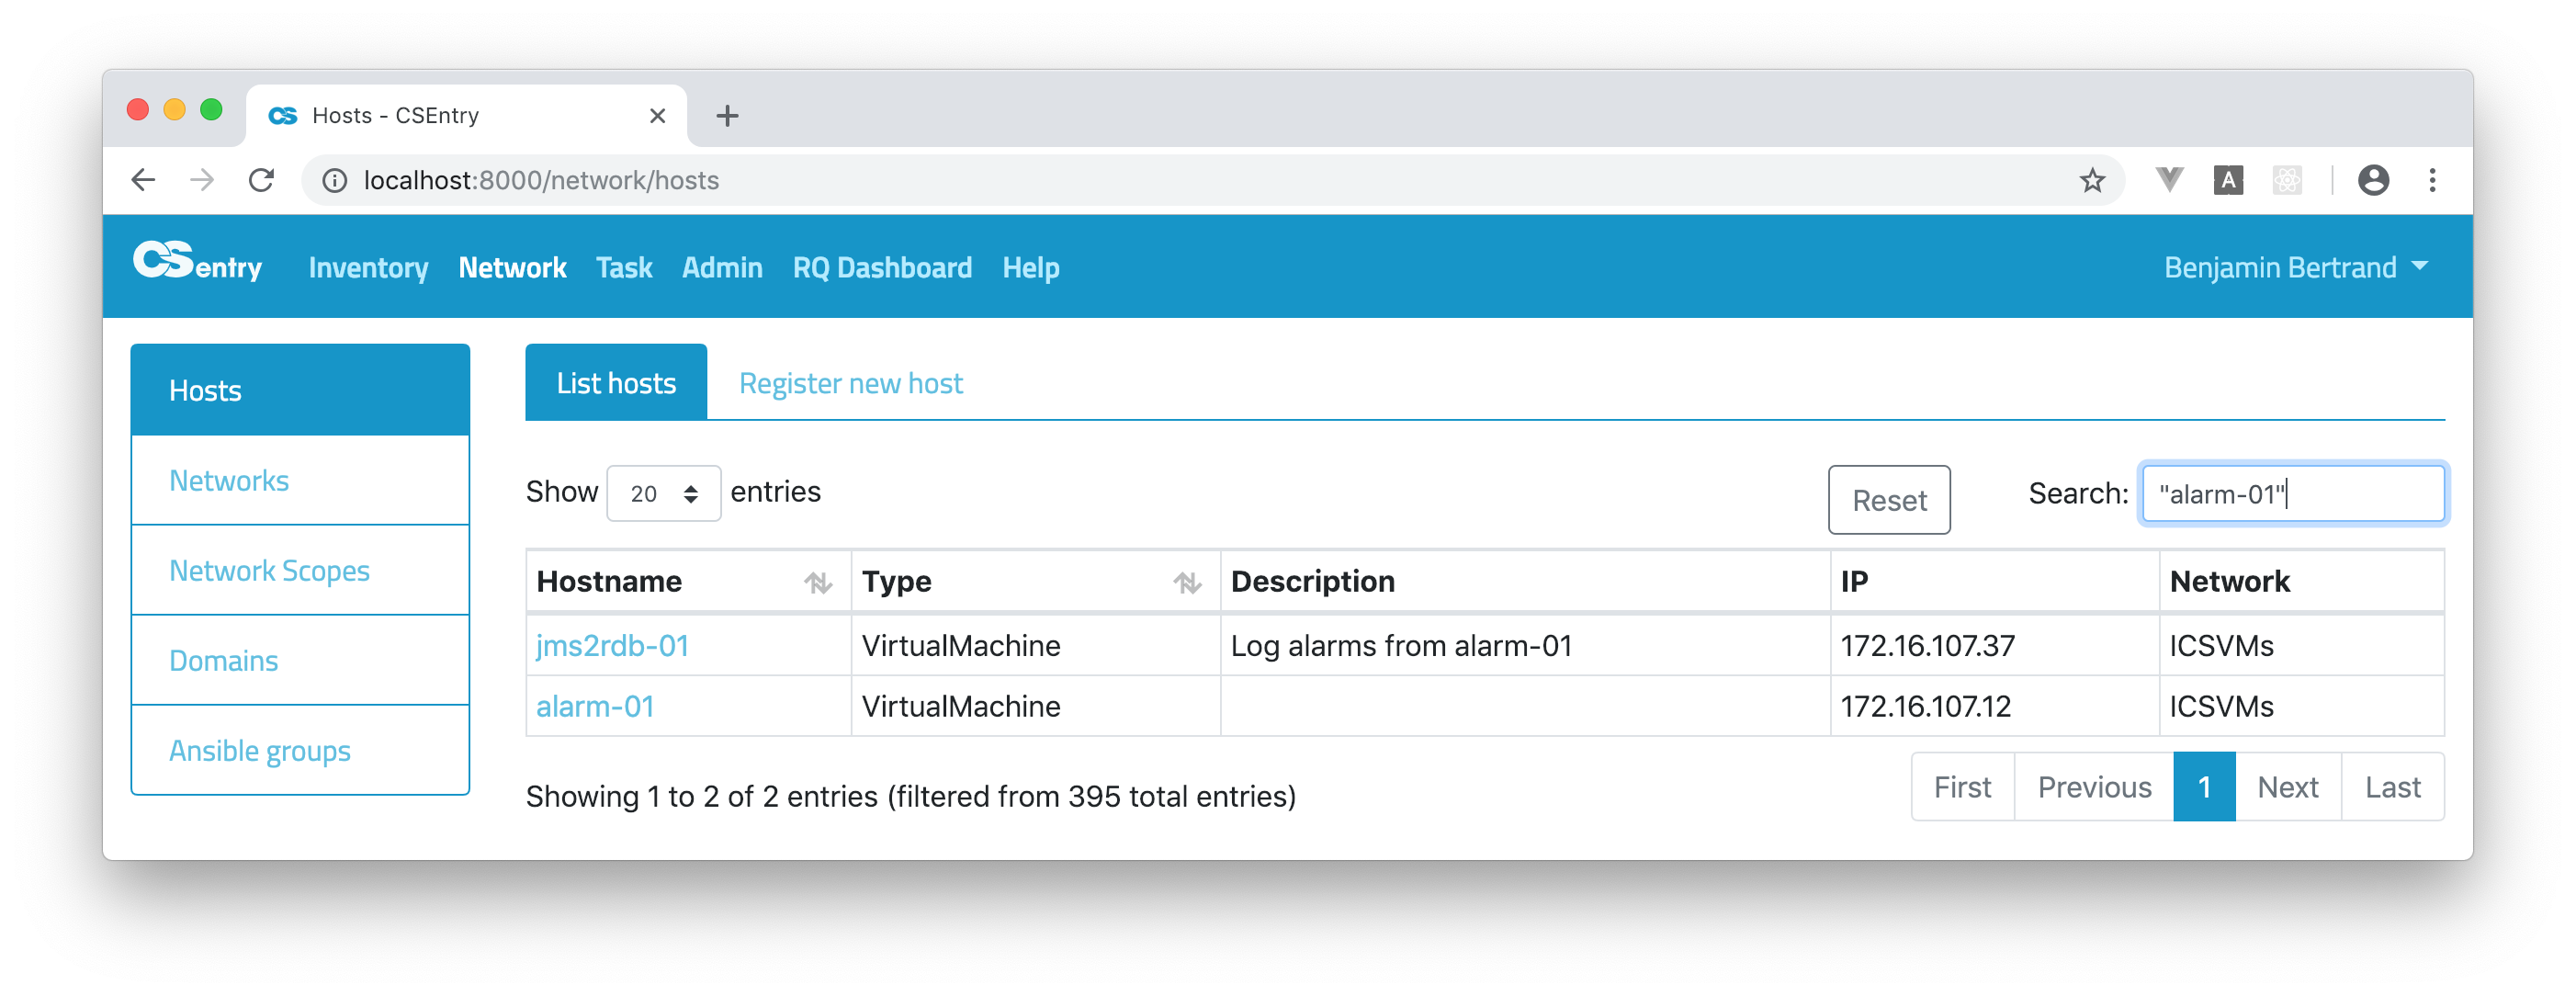
As you can see on the above screenshot, by default the search is performed on all fields. The text
alarm-01was found both in the hostname and description fields. You can restrict the search to a specific field:name:"alarm-01"
Subfields (for items and interfaces) can be accessed using dot notation:
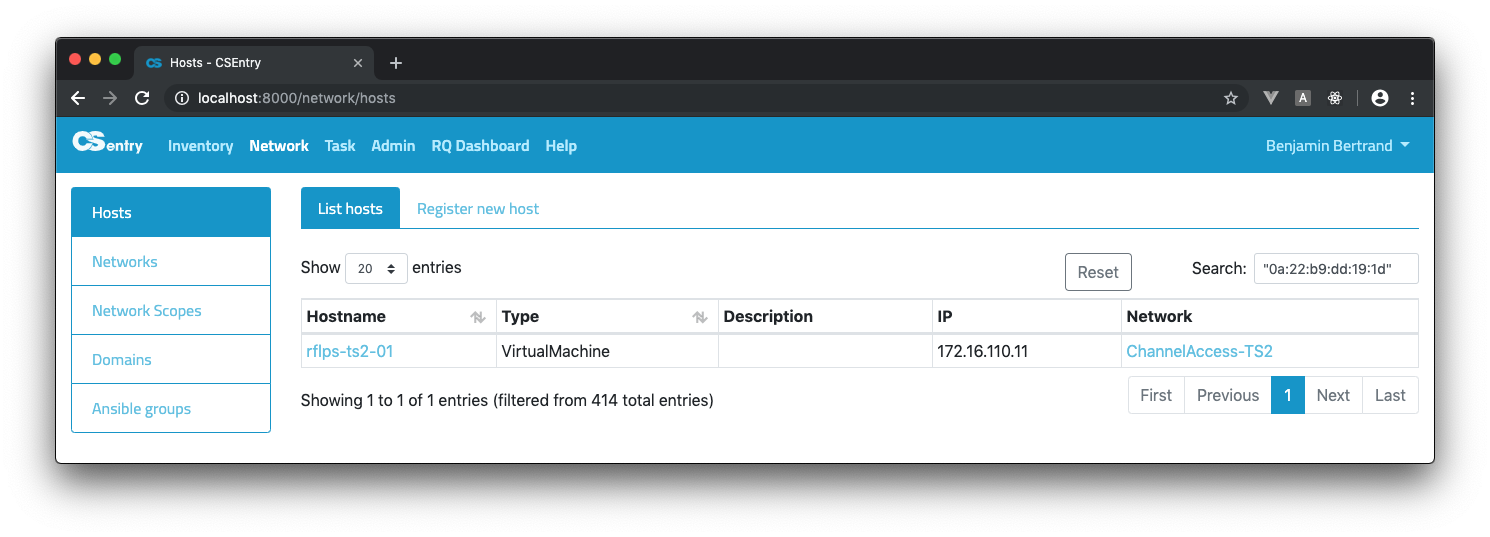
interfaces.cnames:artifactory.To search for a MAC address, you need to use double quotes due to the
:reserved character:"0a:22:b9:dd:19:1d".
Ansible variables are indexed using the flattened datatype. This allows to search on the value of any variable like for any other field. To query on a specific key, object dot notation shall be used:
ansible_vars.local_control_room_dev_workstation:true. Searching if an Ansible variable is defined can be done using_exists_:_exists_:ansible_vars.vm_owner.
The complete list of fields that can be searched is the following:
created_at
updated_at
user
name
fqdn
is_ioc
device_type
model
description
items
ics_id
serial_number
stack_member
interfaces
created_at
updated_at
user
is_main
network
ip
netmask
name
mac
host
cnames
domain
device_type
model
ansible_vars
ansible_groups
Check the elasticsearch query string syntax for more details.
Register a new host
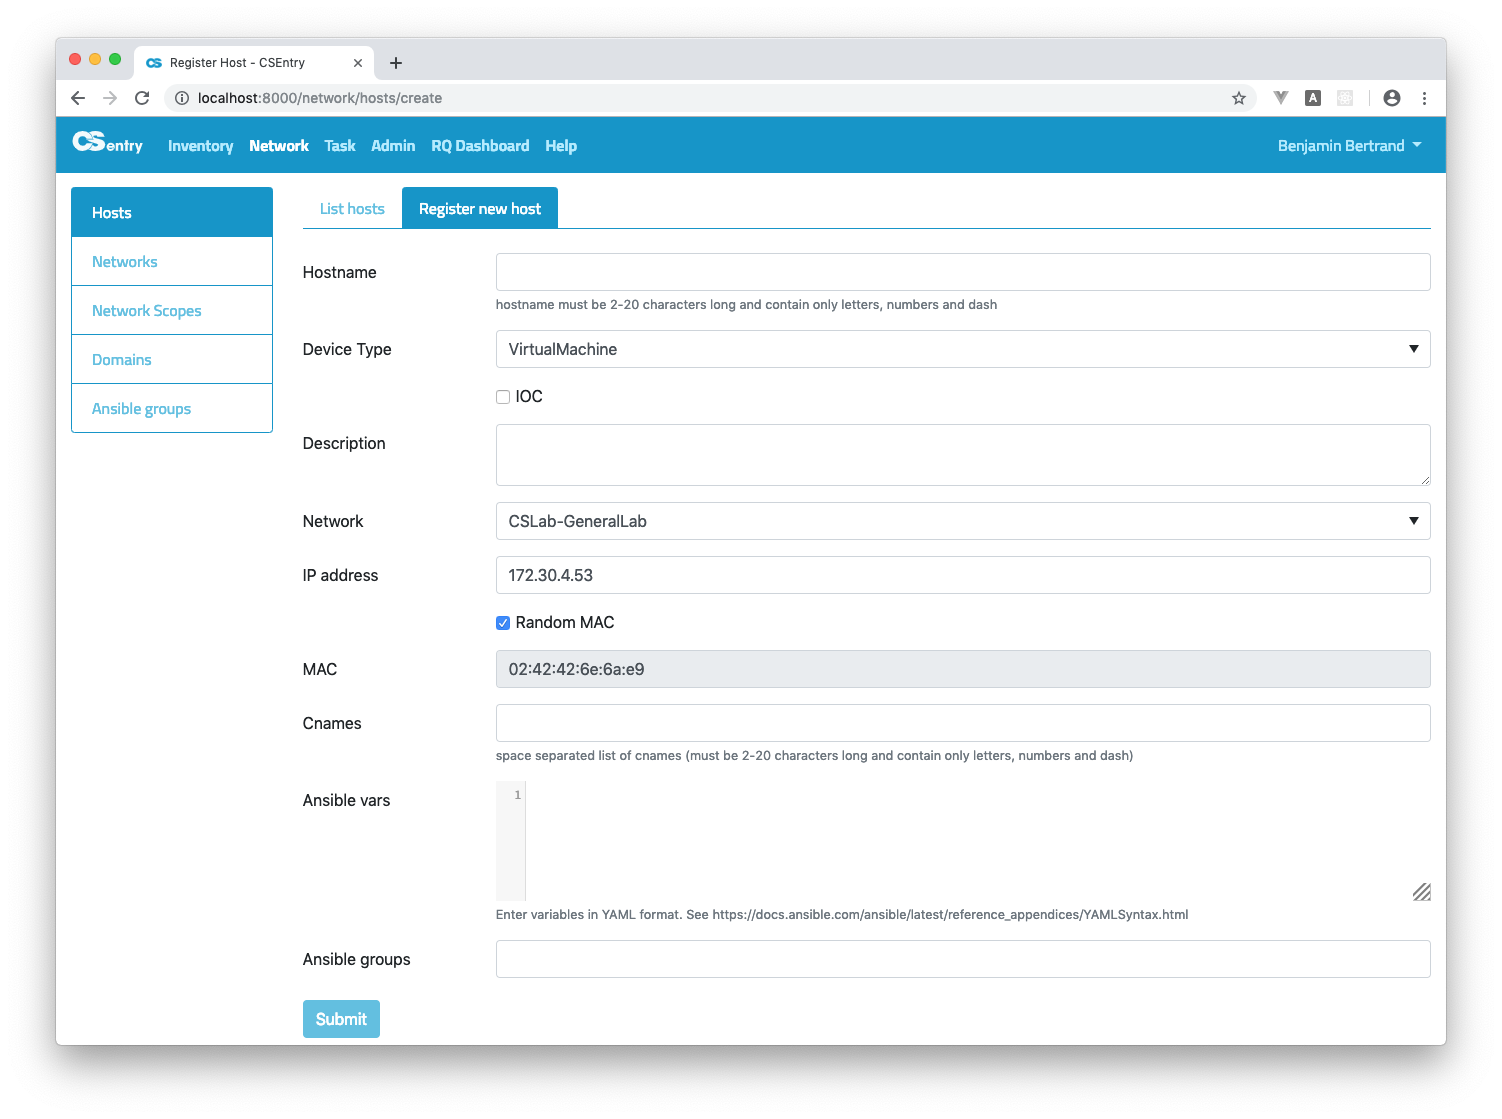
To register a new host, you should:
Enter a hostname.
Choose a Type. For physical machines, you can associate an item from the inventory (optional).
If the host is an IOC, select the IOC checkbox.
Enter a description.
Choose the network for the primary interface. The first available IP address on that network is automatically filled. You should not modify it except if you have a specific reason.
For physical machines, you have to enter the MAC address. A random one is automatically generated for virtual machines.
Click Submit.
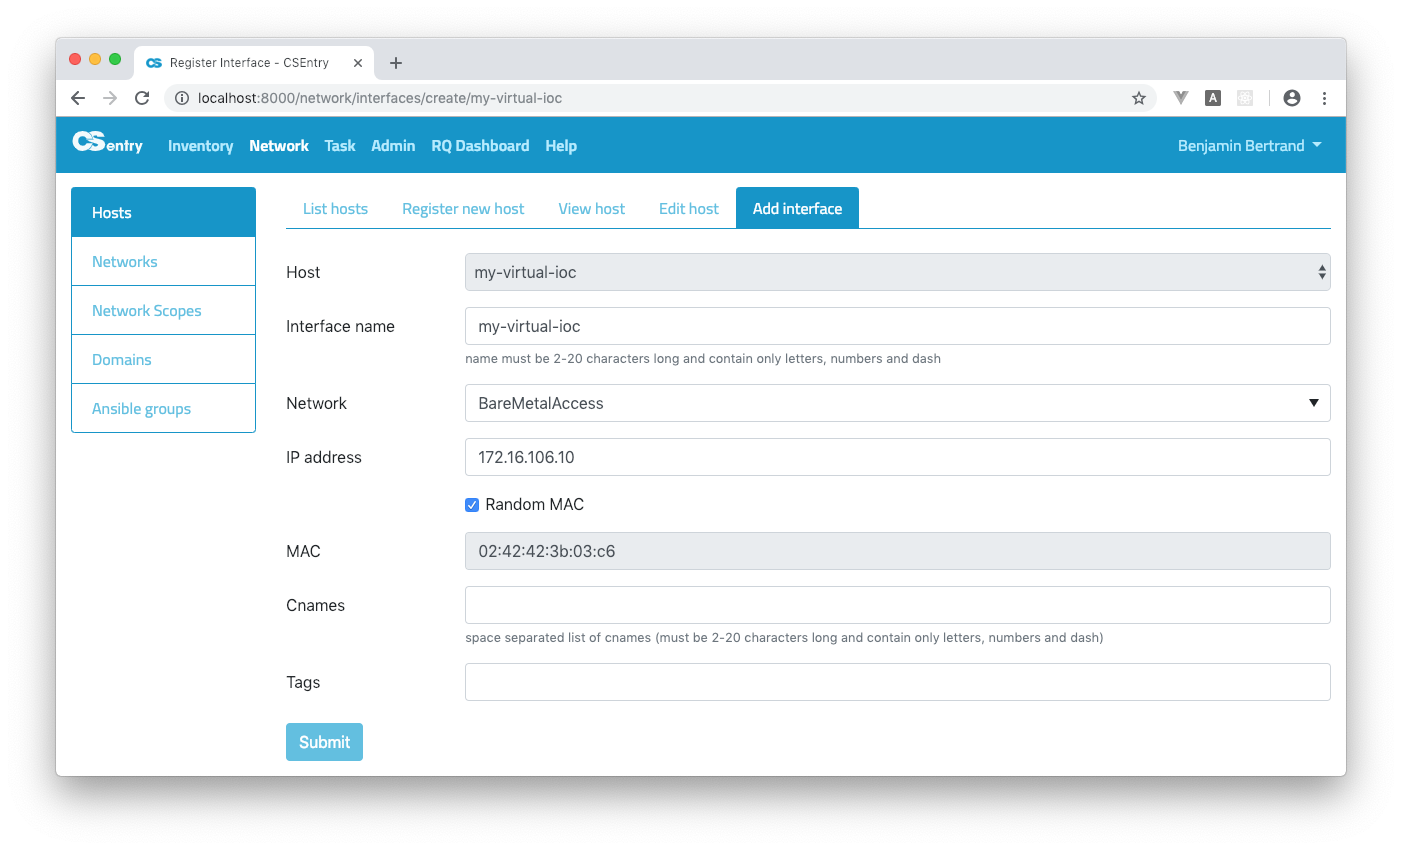
If you need more than one interface, you should go to the Add interface pane from the View host page. Note that the main interface shall have the same name as the host.
Delete a host
Normal users can only delete hosts they created (admin can delete any hosts). To delete a host, just click on the trash icon next to the hostname on the View host page.
A confirmation window will be opened. You can confirm or cancel the action.
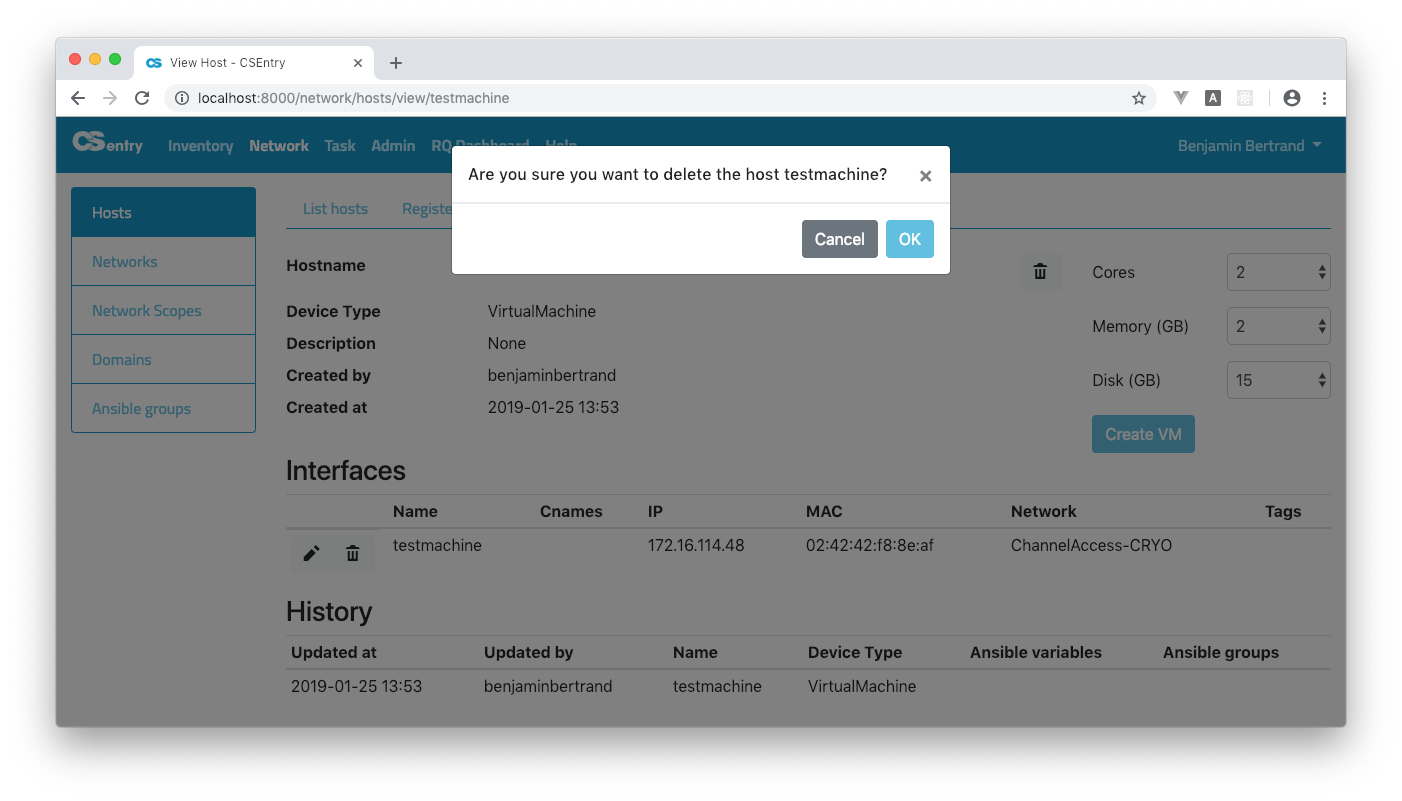
When deleting a host, all its interfaces are deleted as well. The host is only deleted from CSEntry. Virtual machines are not automatically deleted.
DNS and DHCP update
Any creation or update of an host will automatically trigger an update of the core services on the Technical Network (DNS and DHCP). See Task.
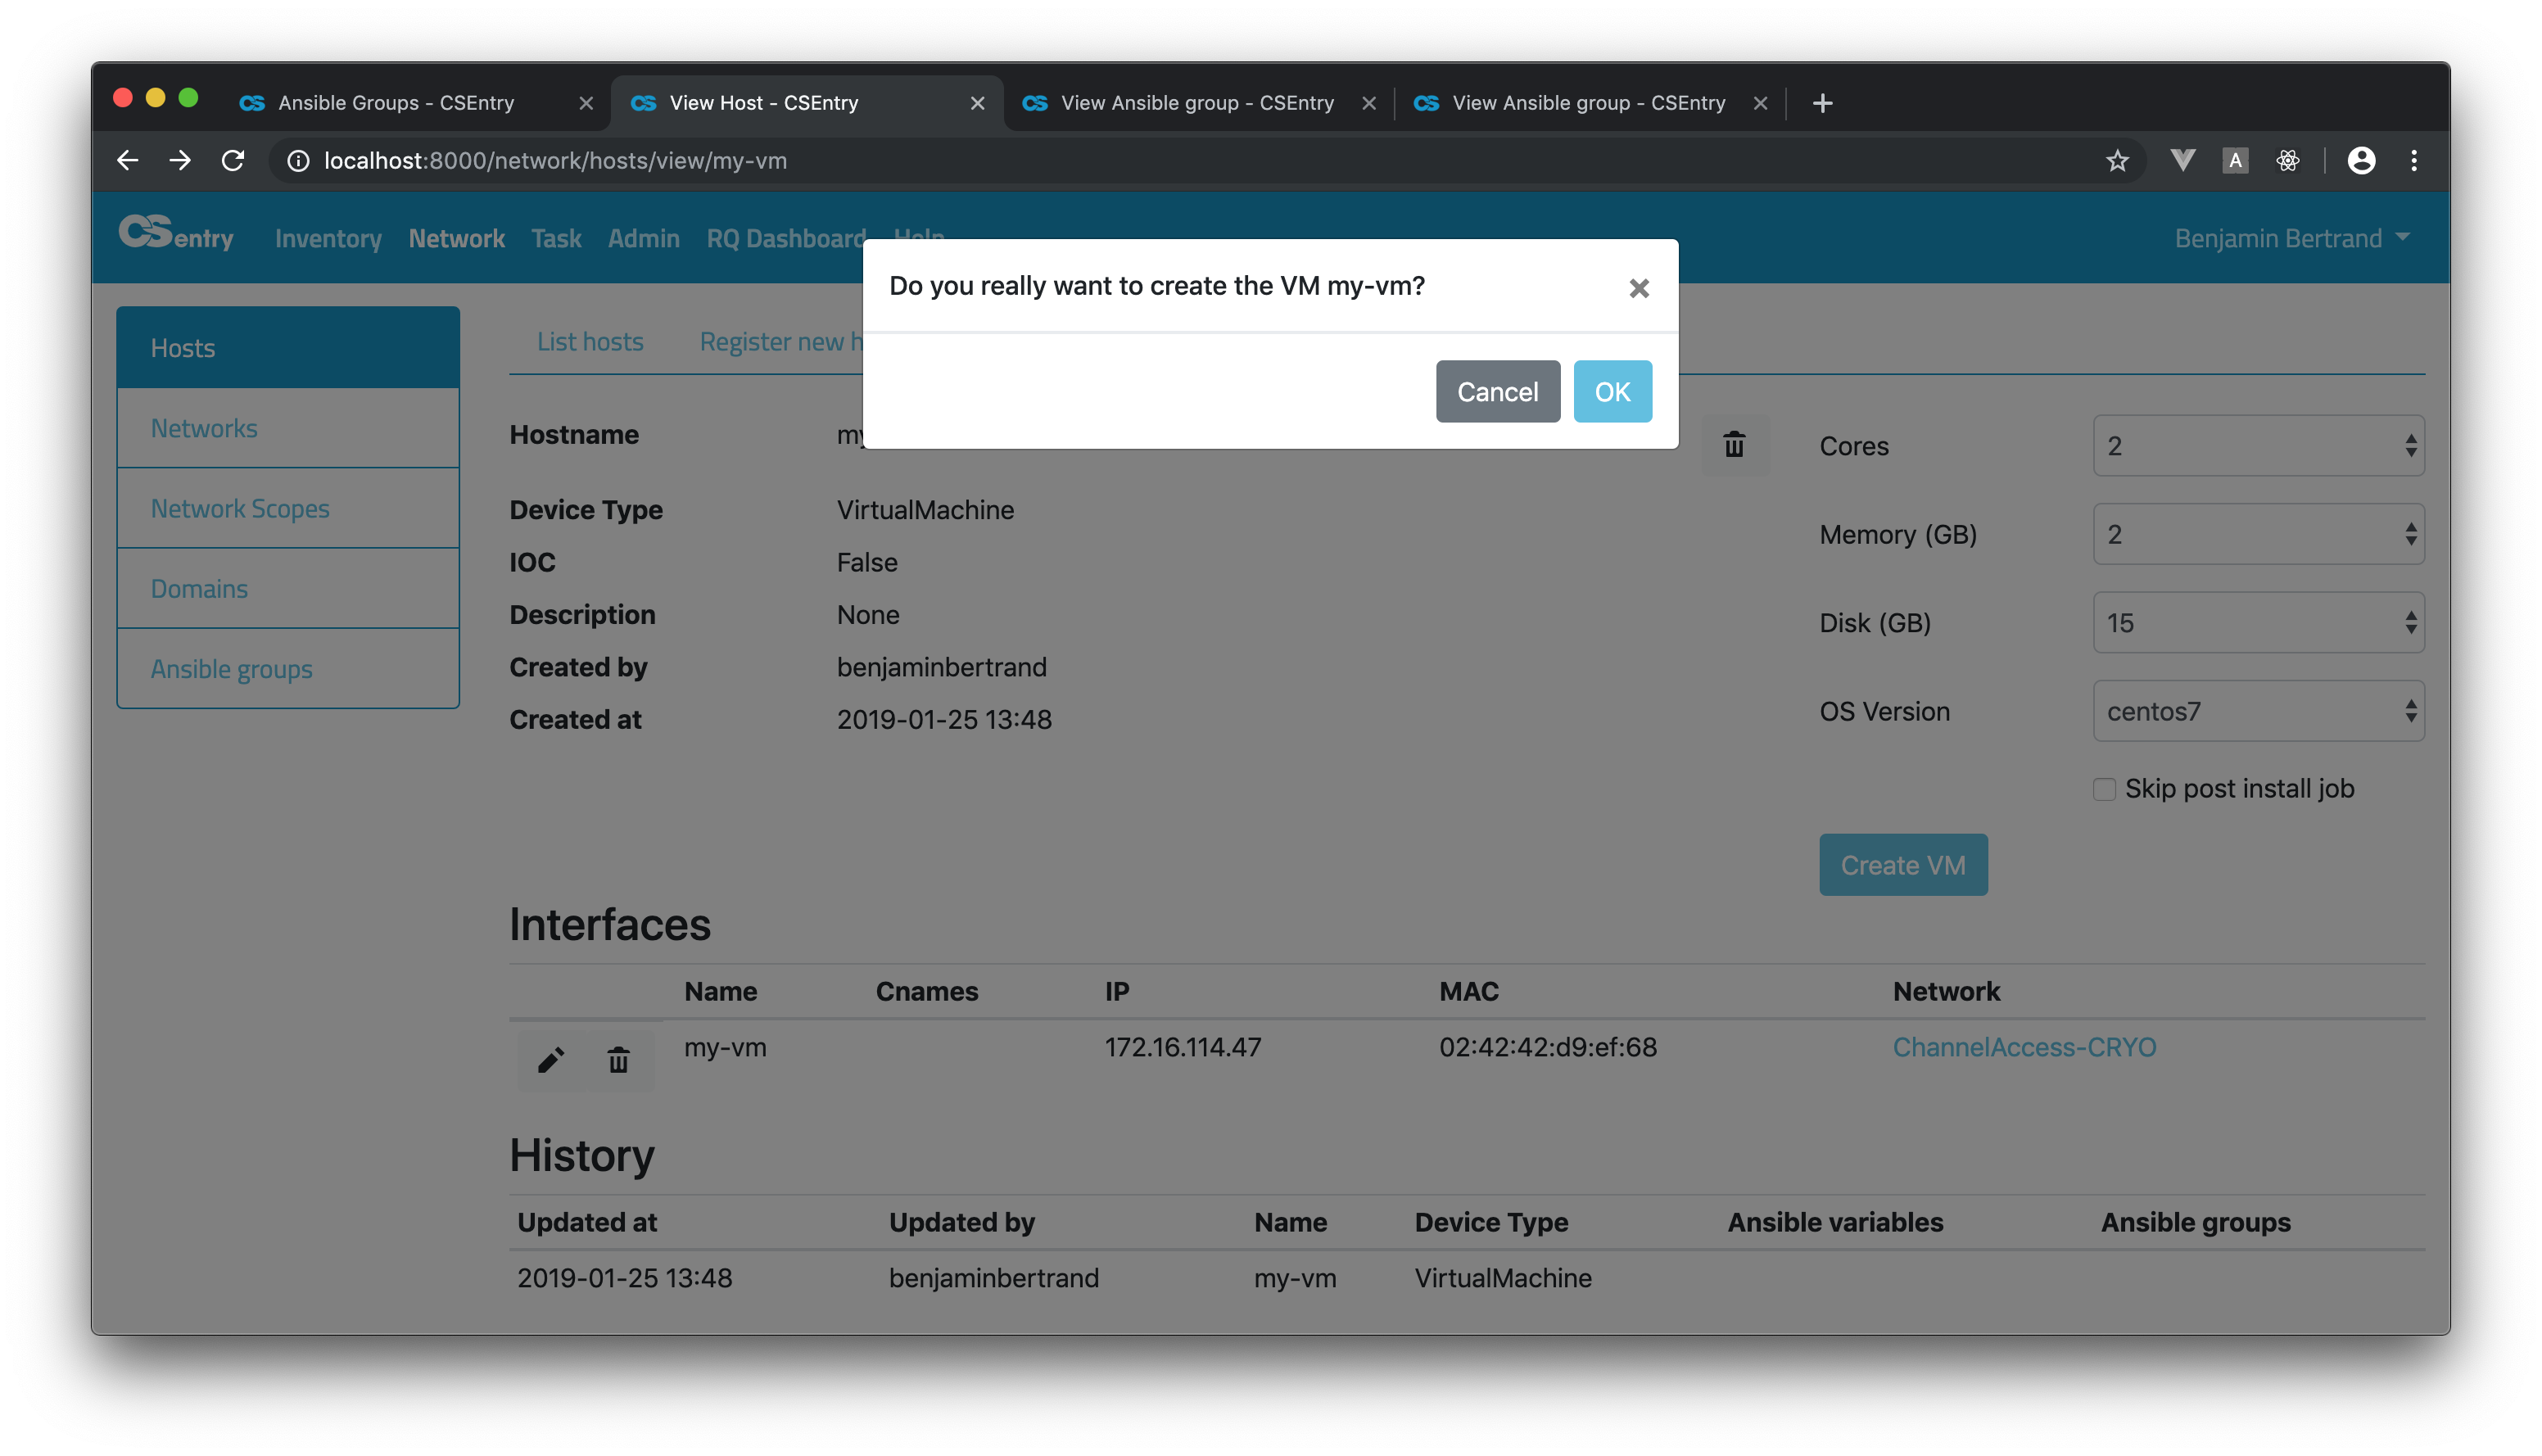
VM creation
From the View host page, you can trigger the creation of a Virtual machine:
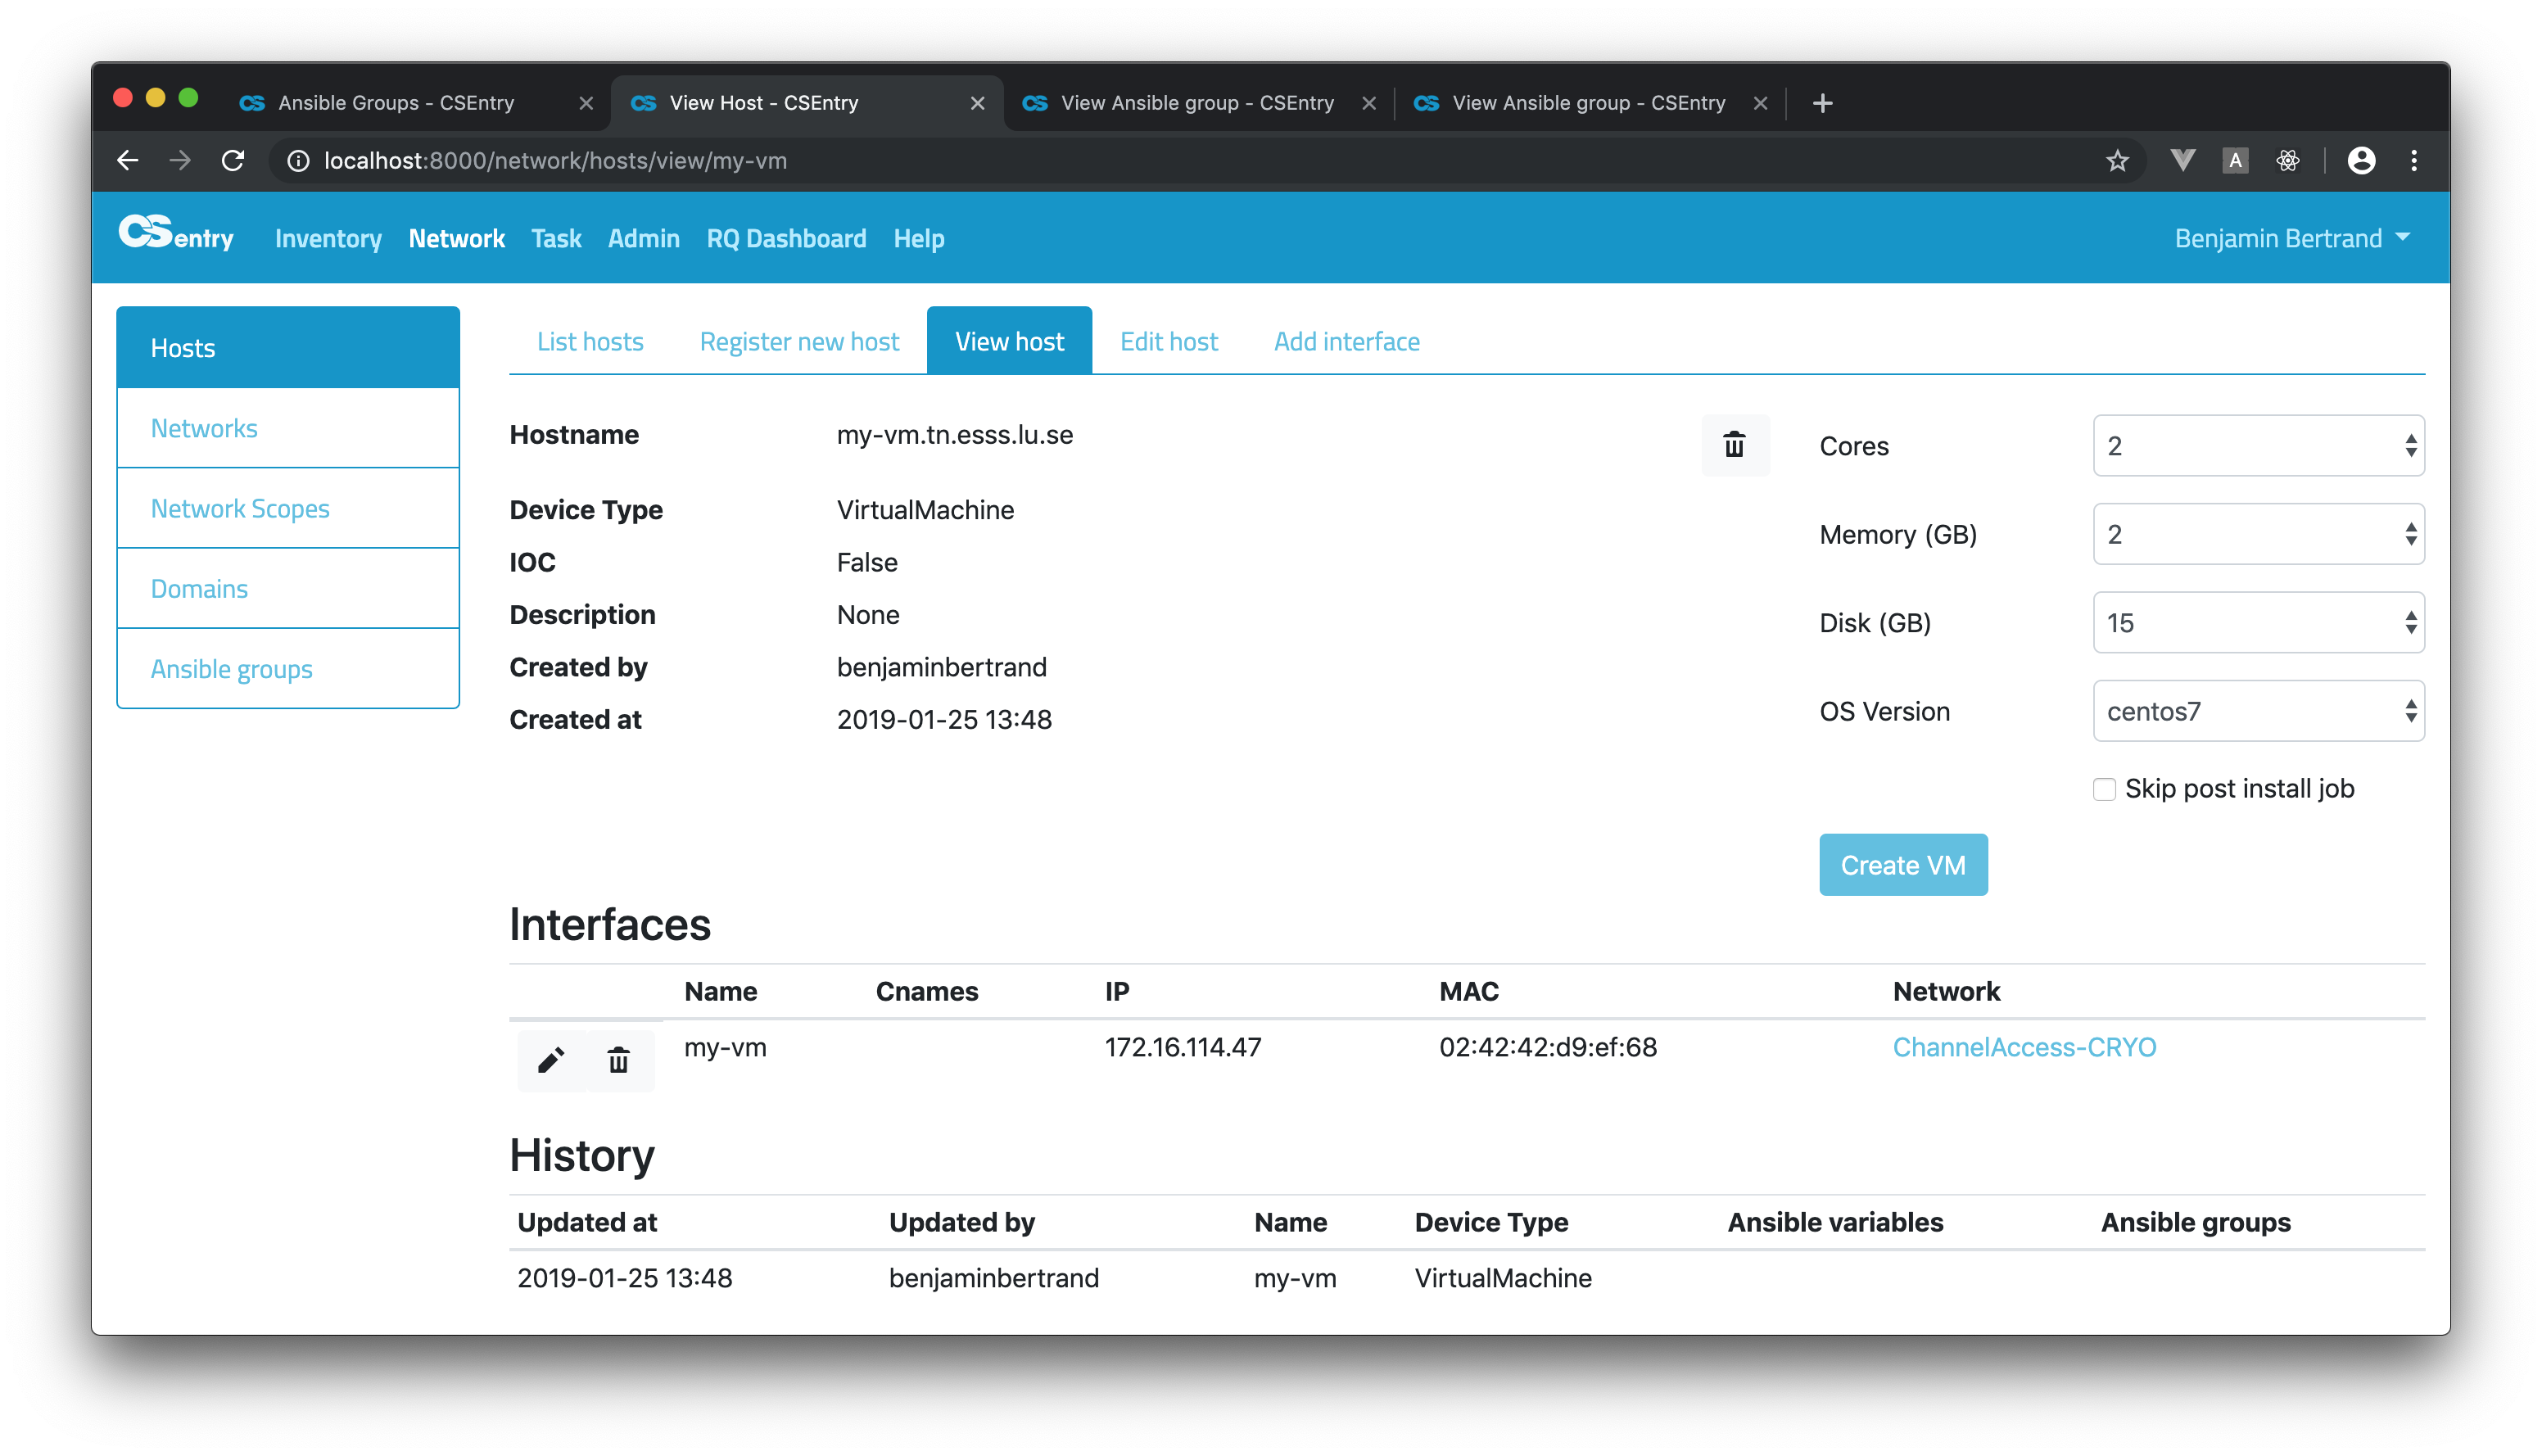
If the host is an IOC, the form will be slightly different:
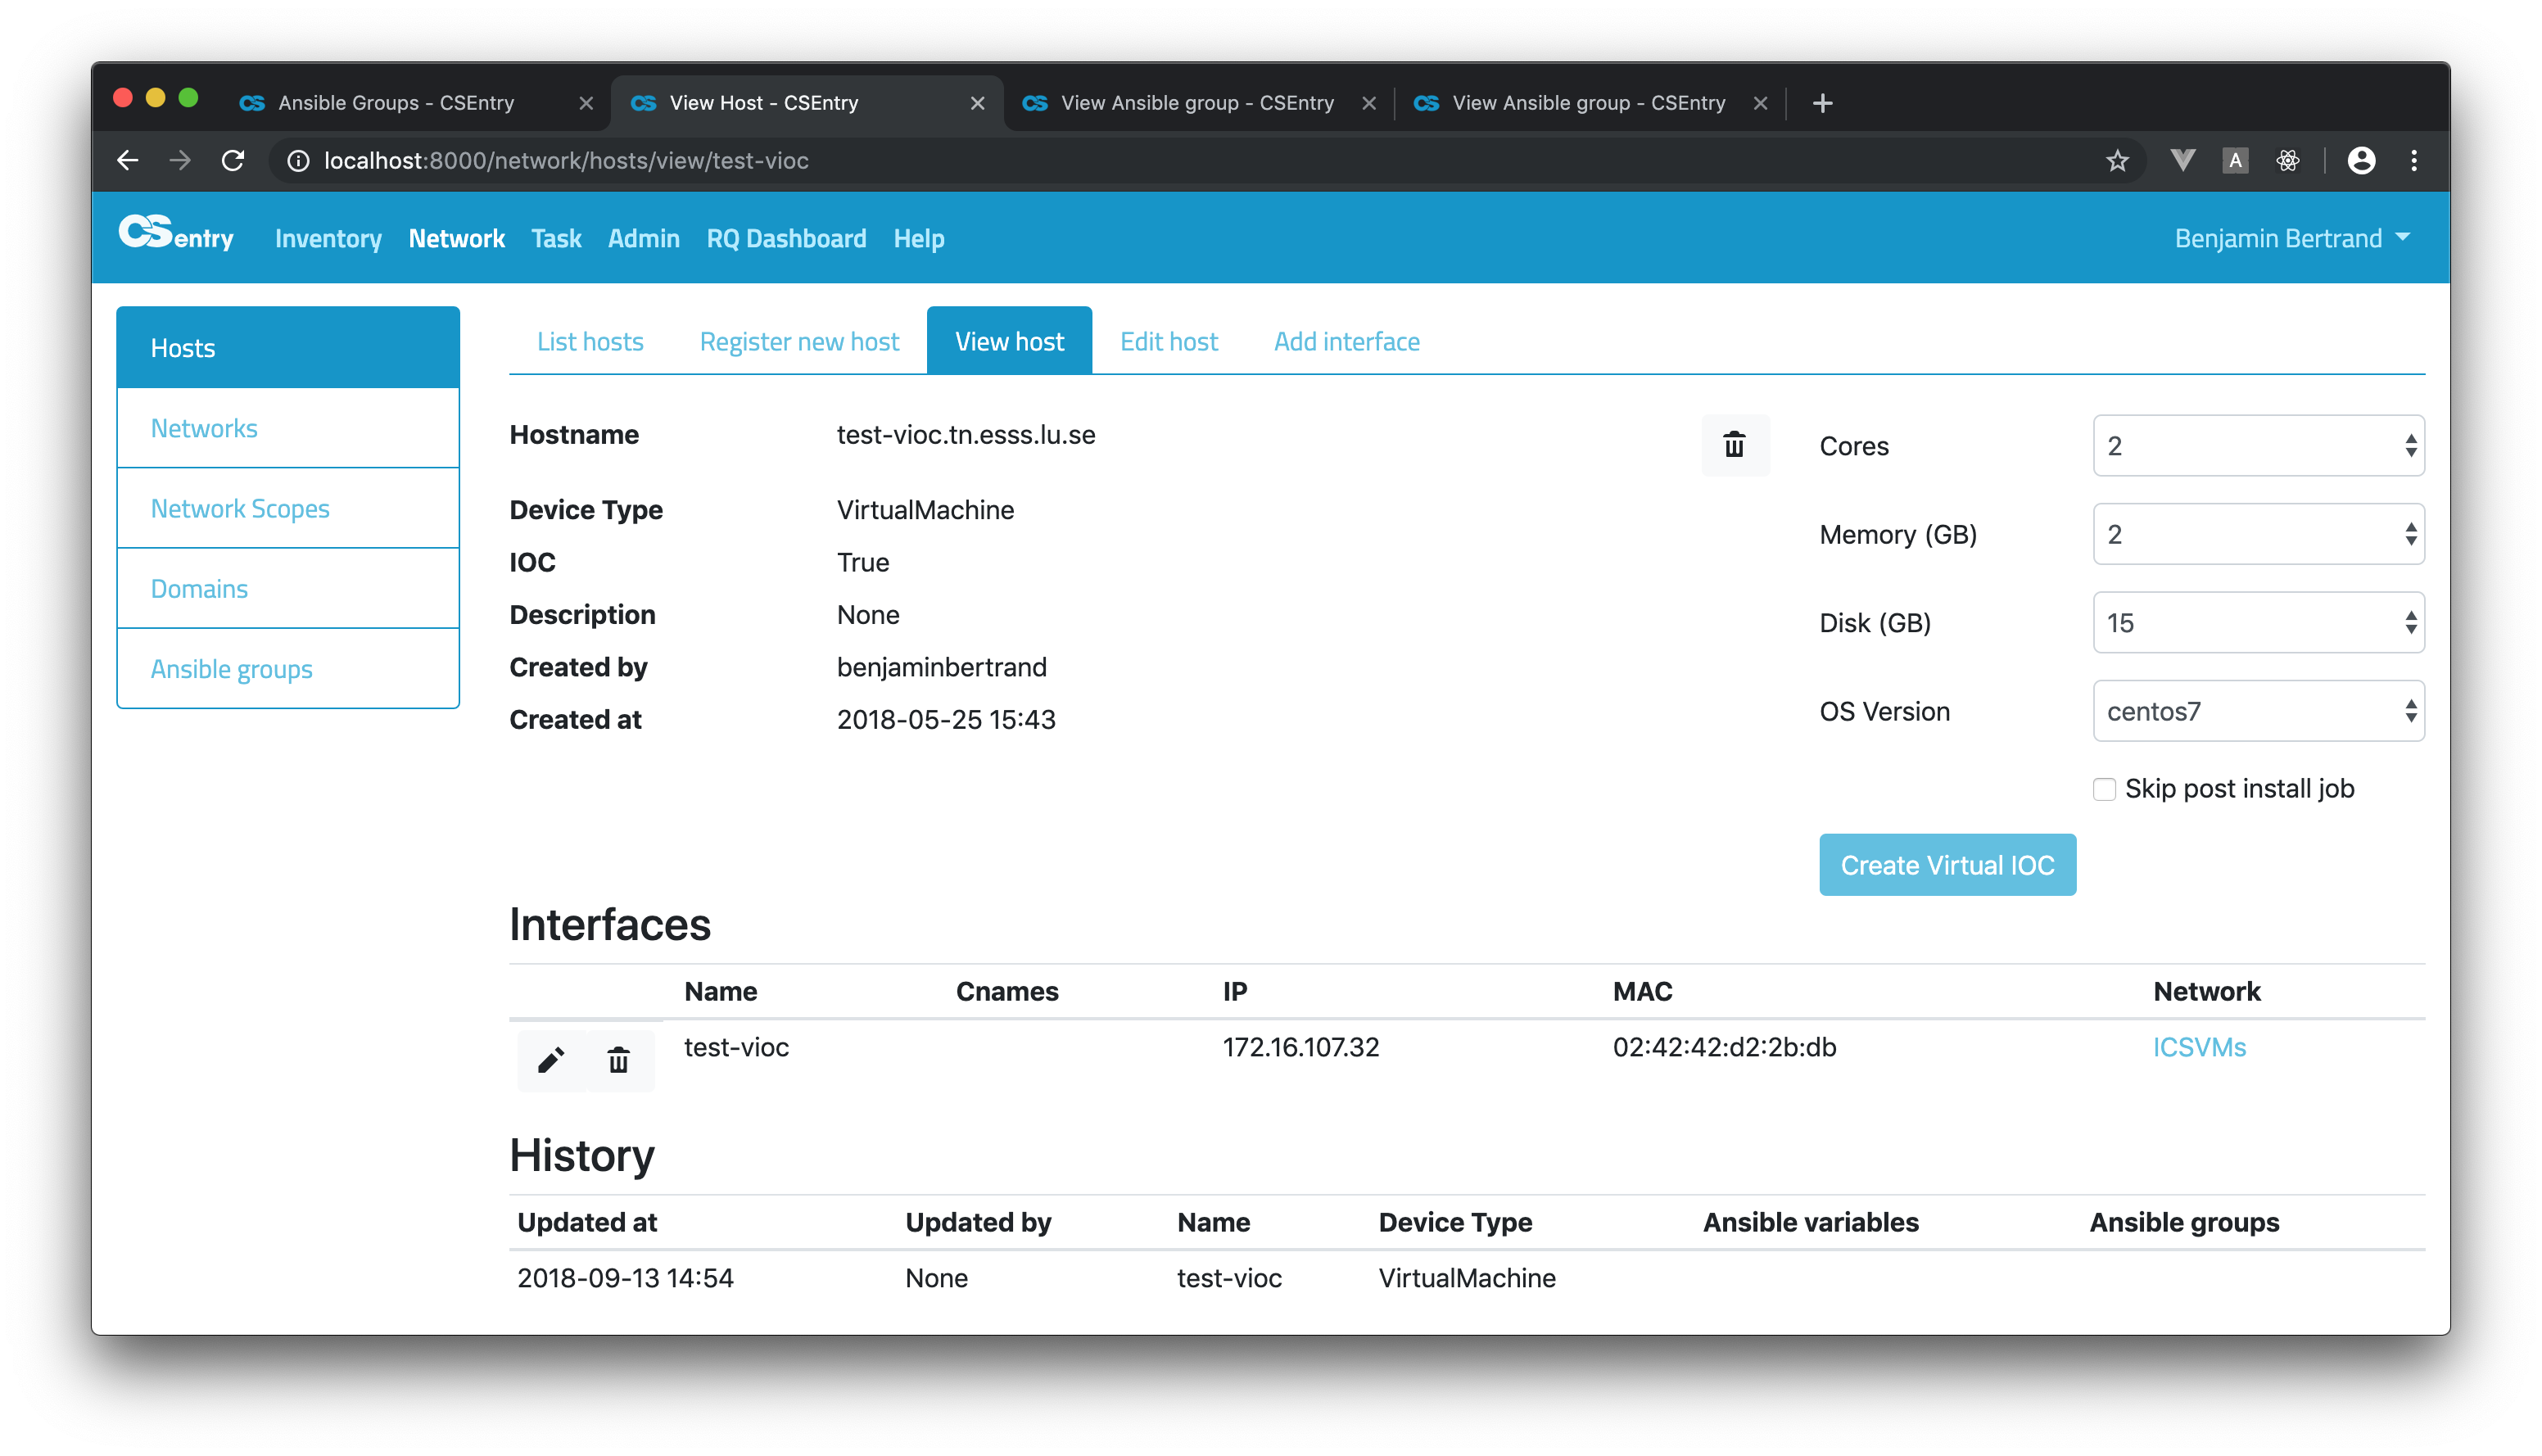
In both case, a confirmation dialog will be displayed when you submit the form.
To create a VM or VIOC, a job template is triggered on AWX (AWX_CREATE_VM or AWX_CREATE_VIOC). If a post install job template is defined, a task is enqueued to run after the successful completion of the first one. The post install job name can be defined per domain in the AWX_POST_INSTALL dictionary.
Admin users can disable the post install job run by selecting the Skip post install job checkbox. This checkbox is only visible to admin users.
A VIOC can be created by any user who has access to the associated network/domain. The same restriction applies to VMs but the associated domain must also be part of the ALLOWED_VM_CREATION_DOMAINS list (currently cslab.tn.esss.lu.se). Please contact an admin user if you don’t have the proper permissions.
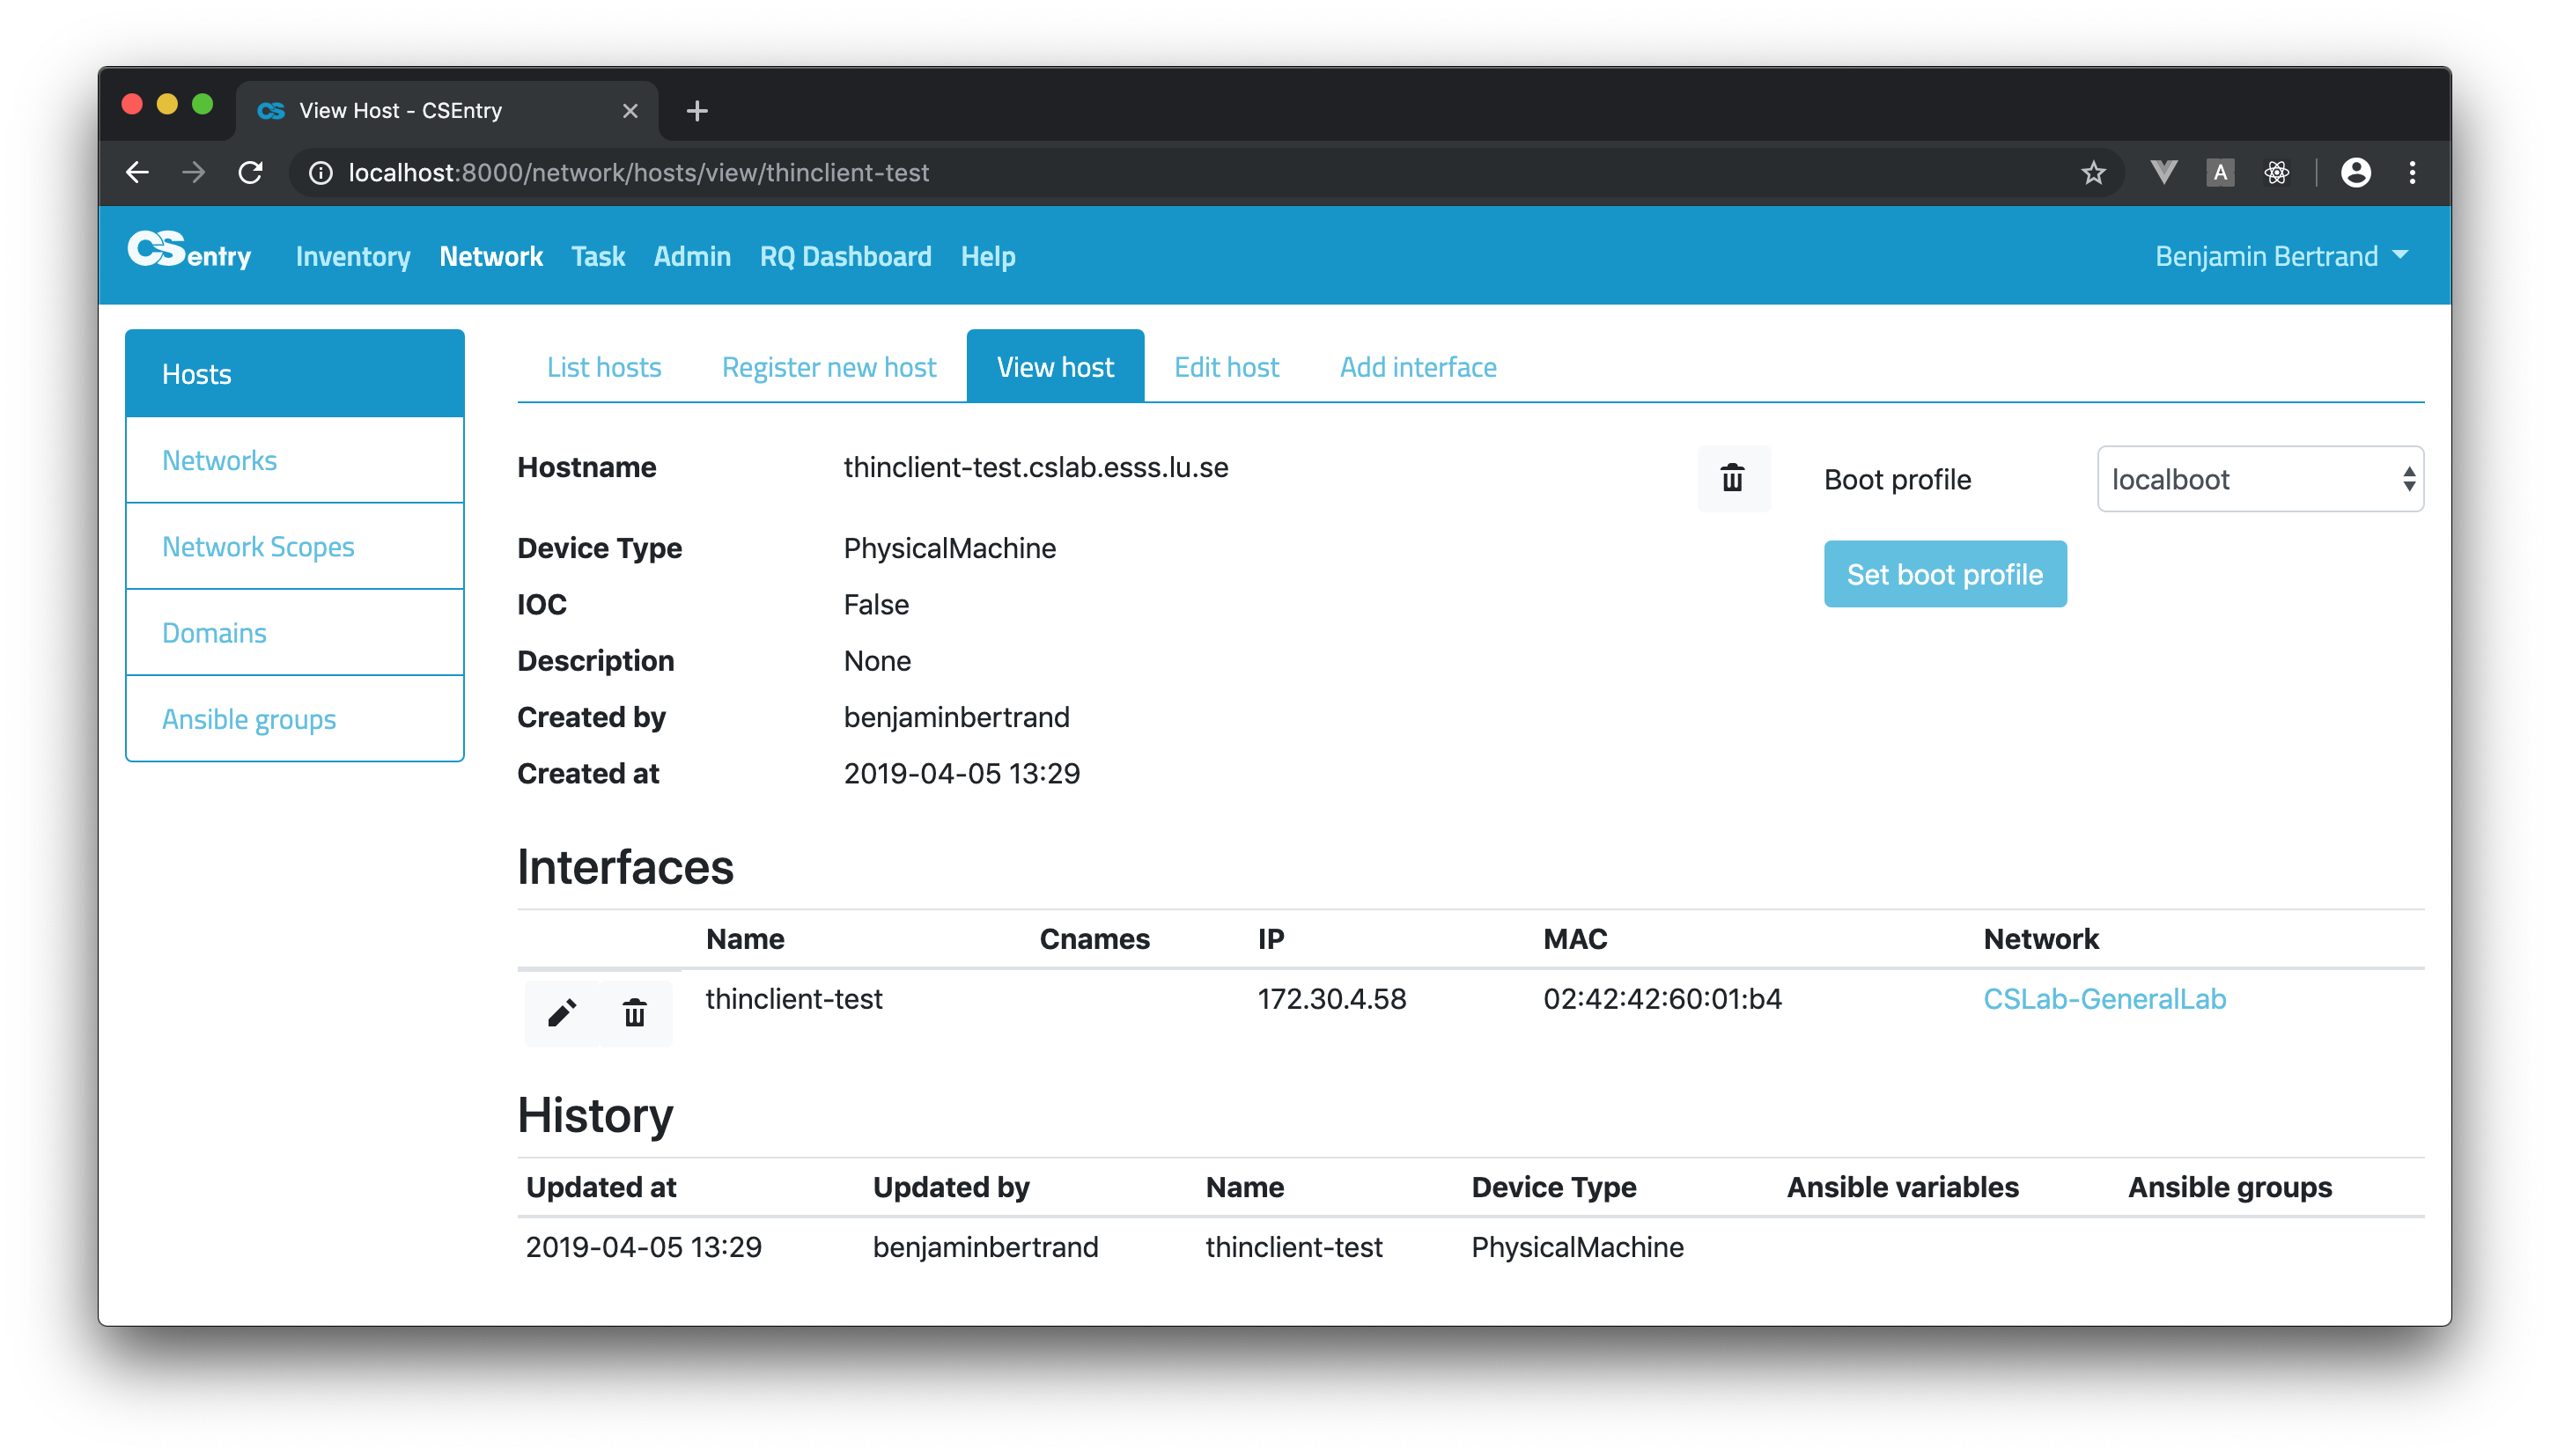
Physical Machine installation
From the View host page, you can set the boot profile of a Physical Machine or MTCA-AMC. This can be used to perform a network installation:
When submitting the form, a confirmation dialog will be displayed.
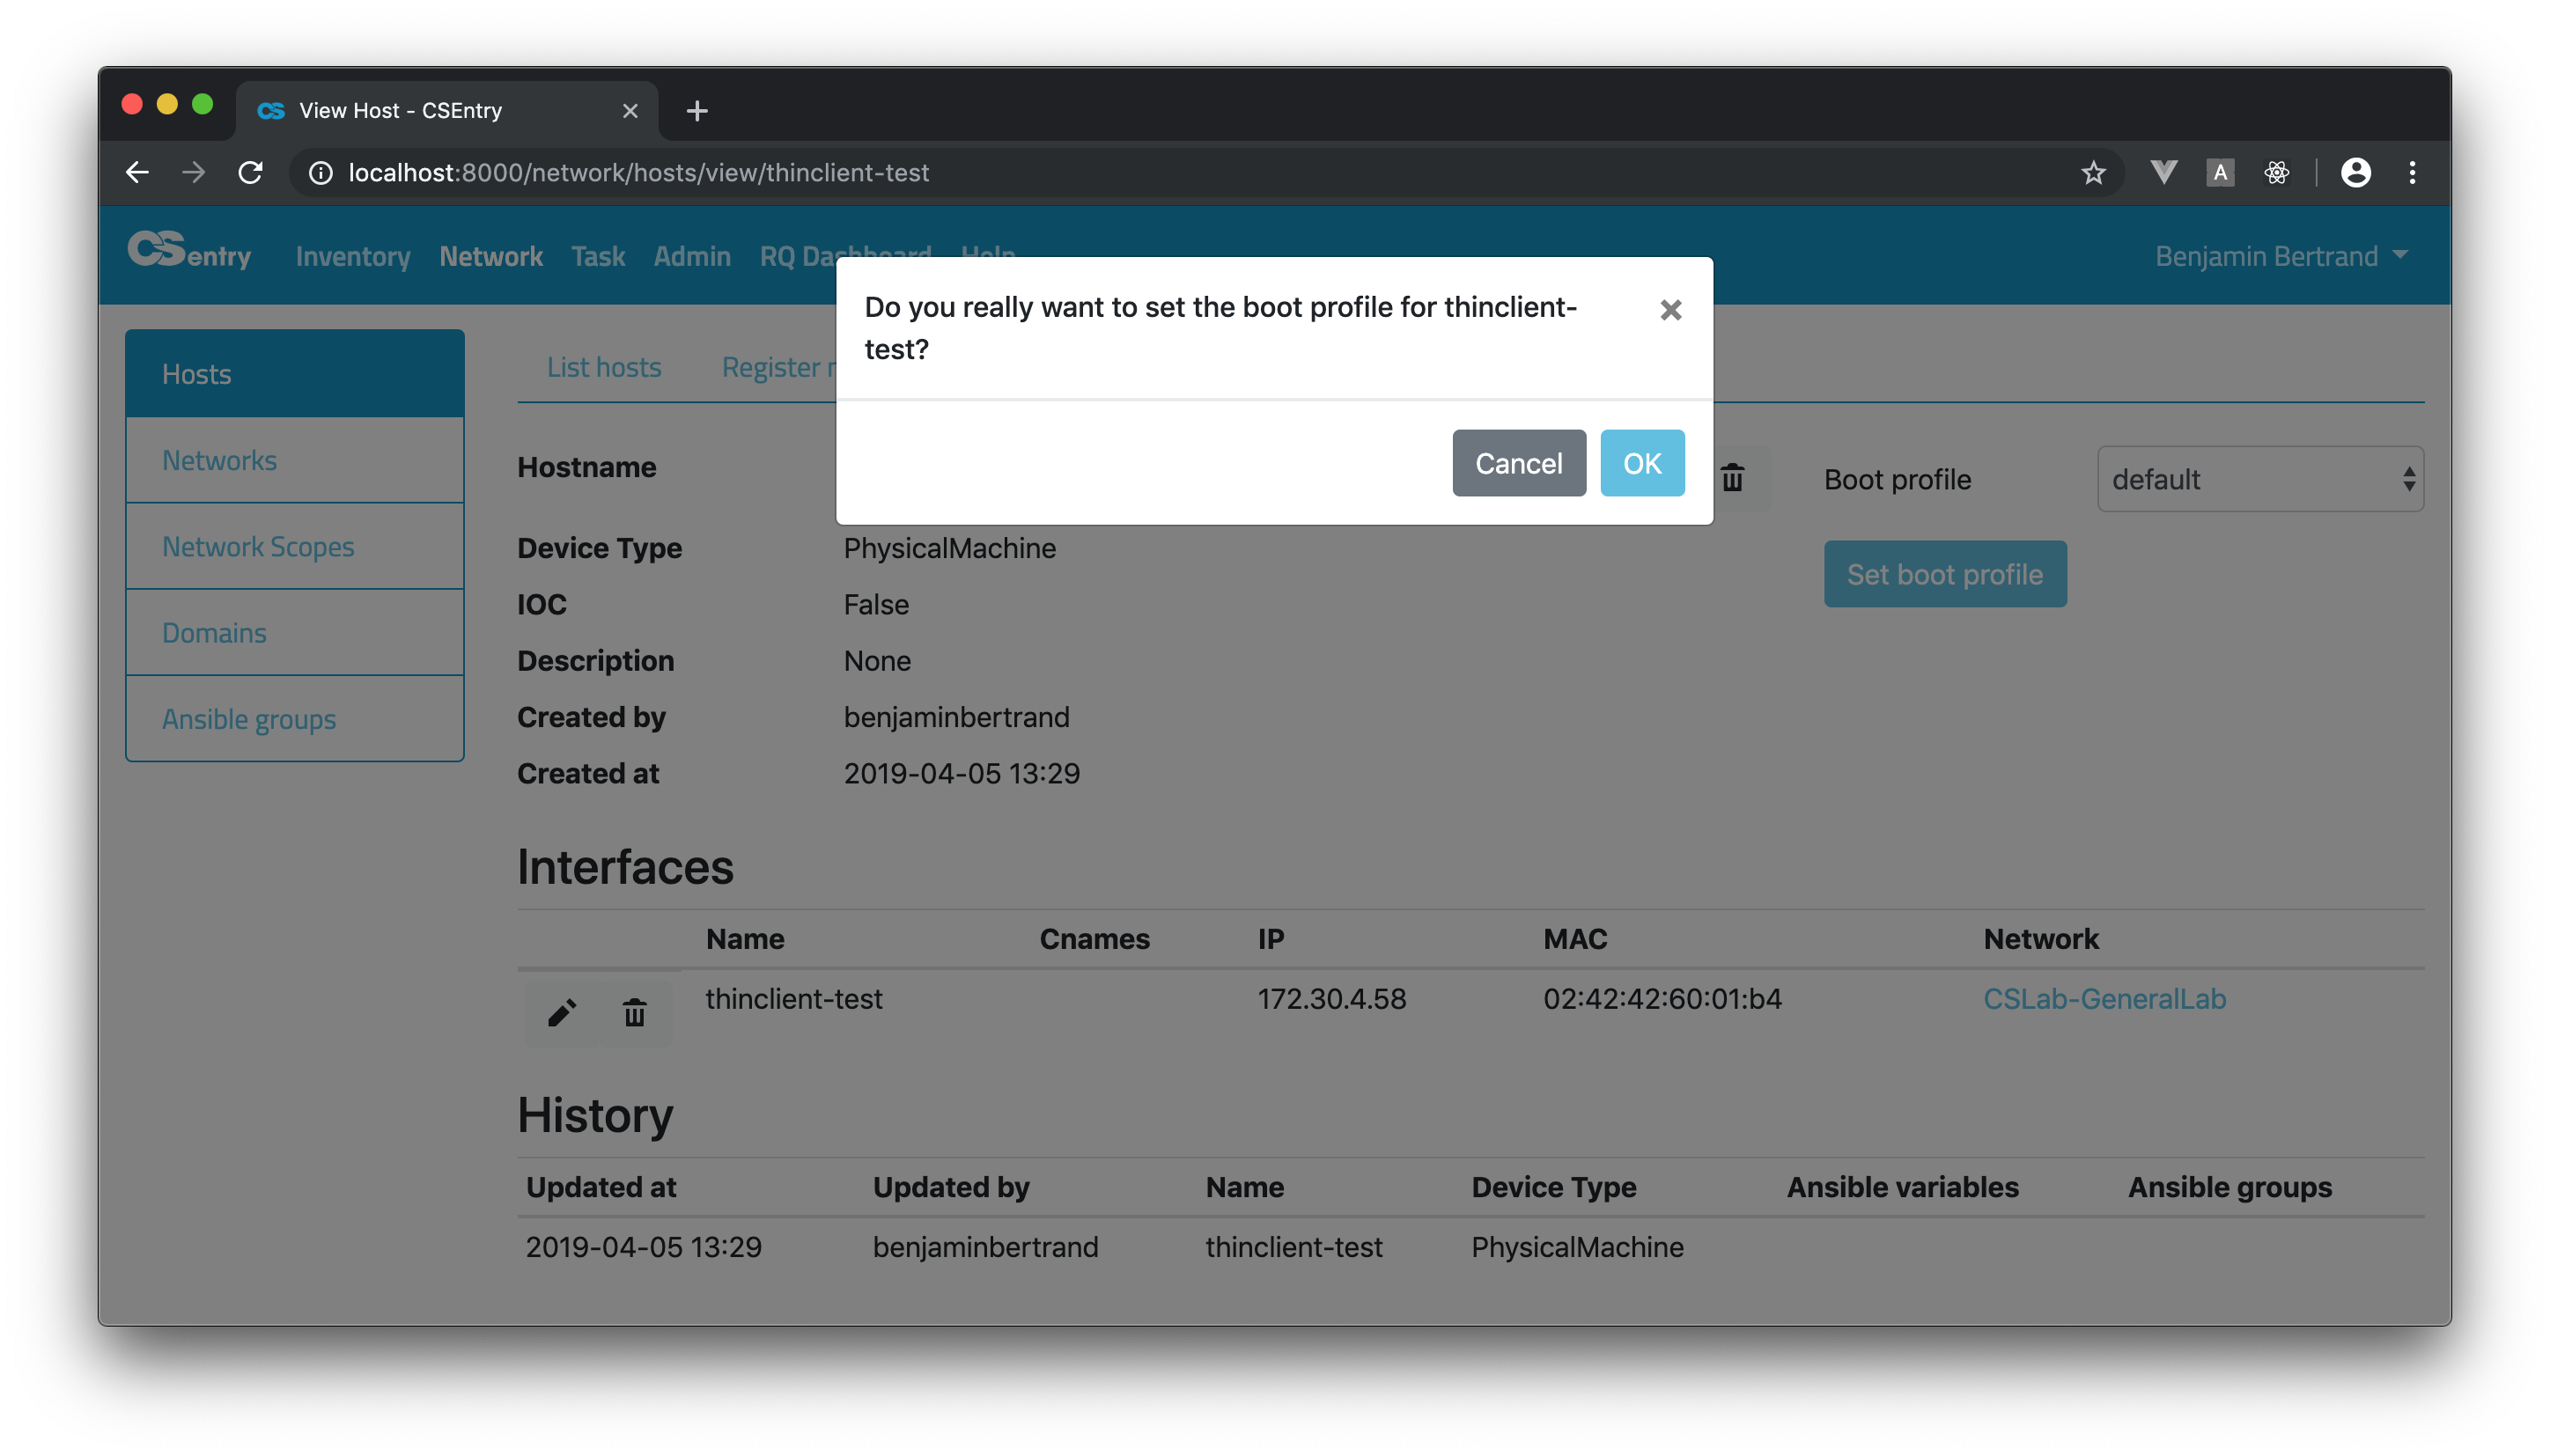
This will trigger a job template on AWX (AWX_SET_NETWORK_BOOT_PROFILE) that creates a link for the host MAC address to the proper profile. When the task is done, the machine can be rebooted. If it boots on the network, the chosen installation will be performed. After the installation the boot profile is automatically set back to localboot. So even if the machine is rebooted, it will boot locally.
The boot profile can be set by any user who has access to the associated network/domain. But the domain must also be part of the ALLOWED_SET_BOOT_PROFILE_DOMAINS list (currently cslab.tn.esss.lu.se) for non admin users. Please contact an admin user if you don’t have the proper permissions.
Ansible inventory
CSEntry is used as an Ansible dynamic inventory.
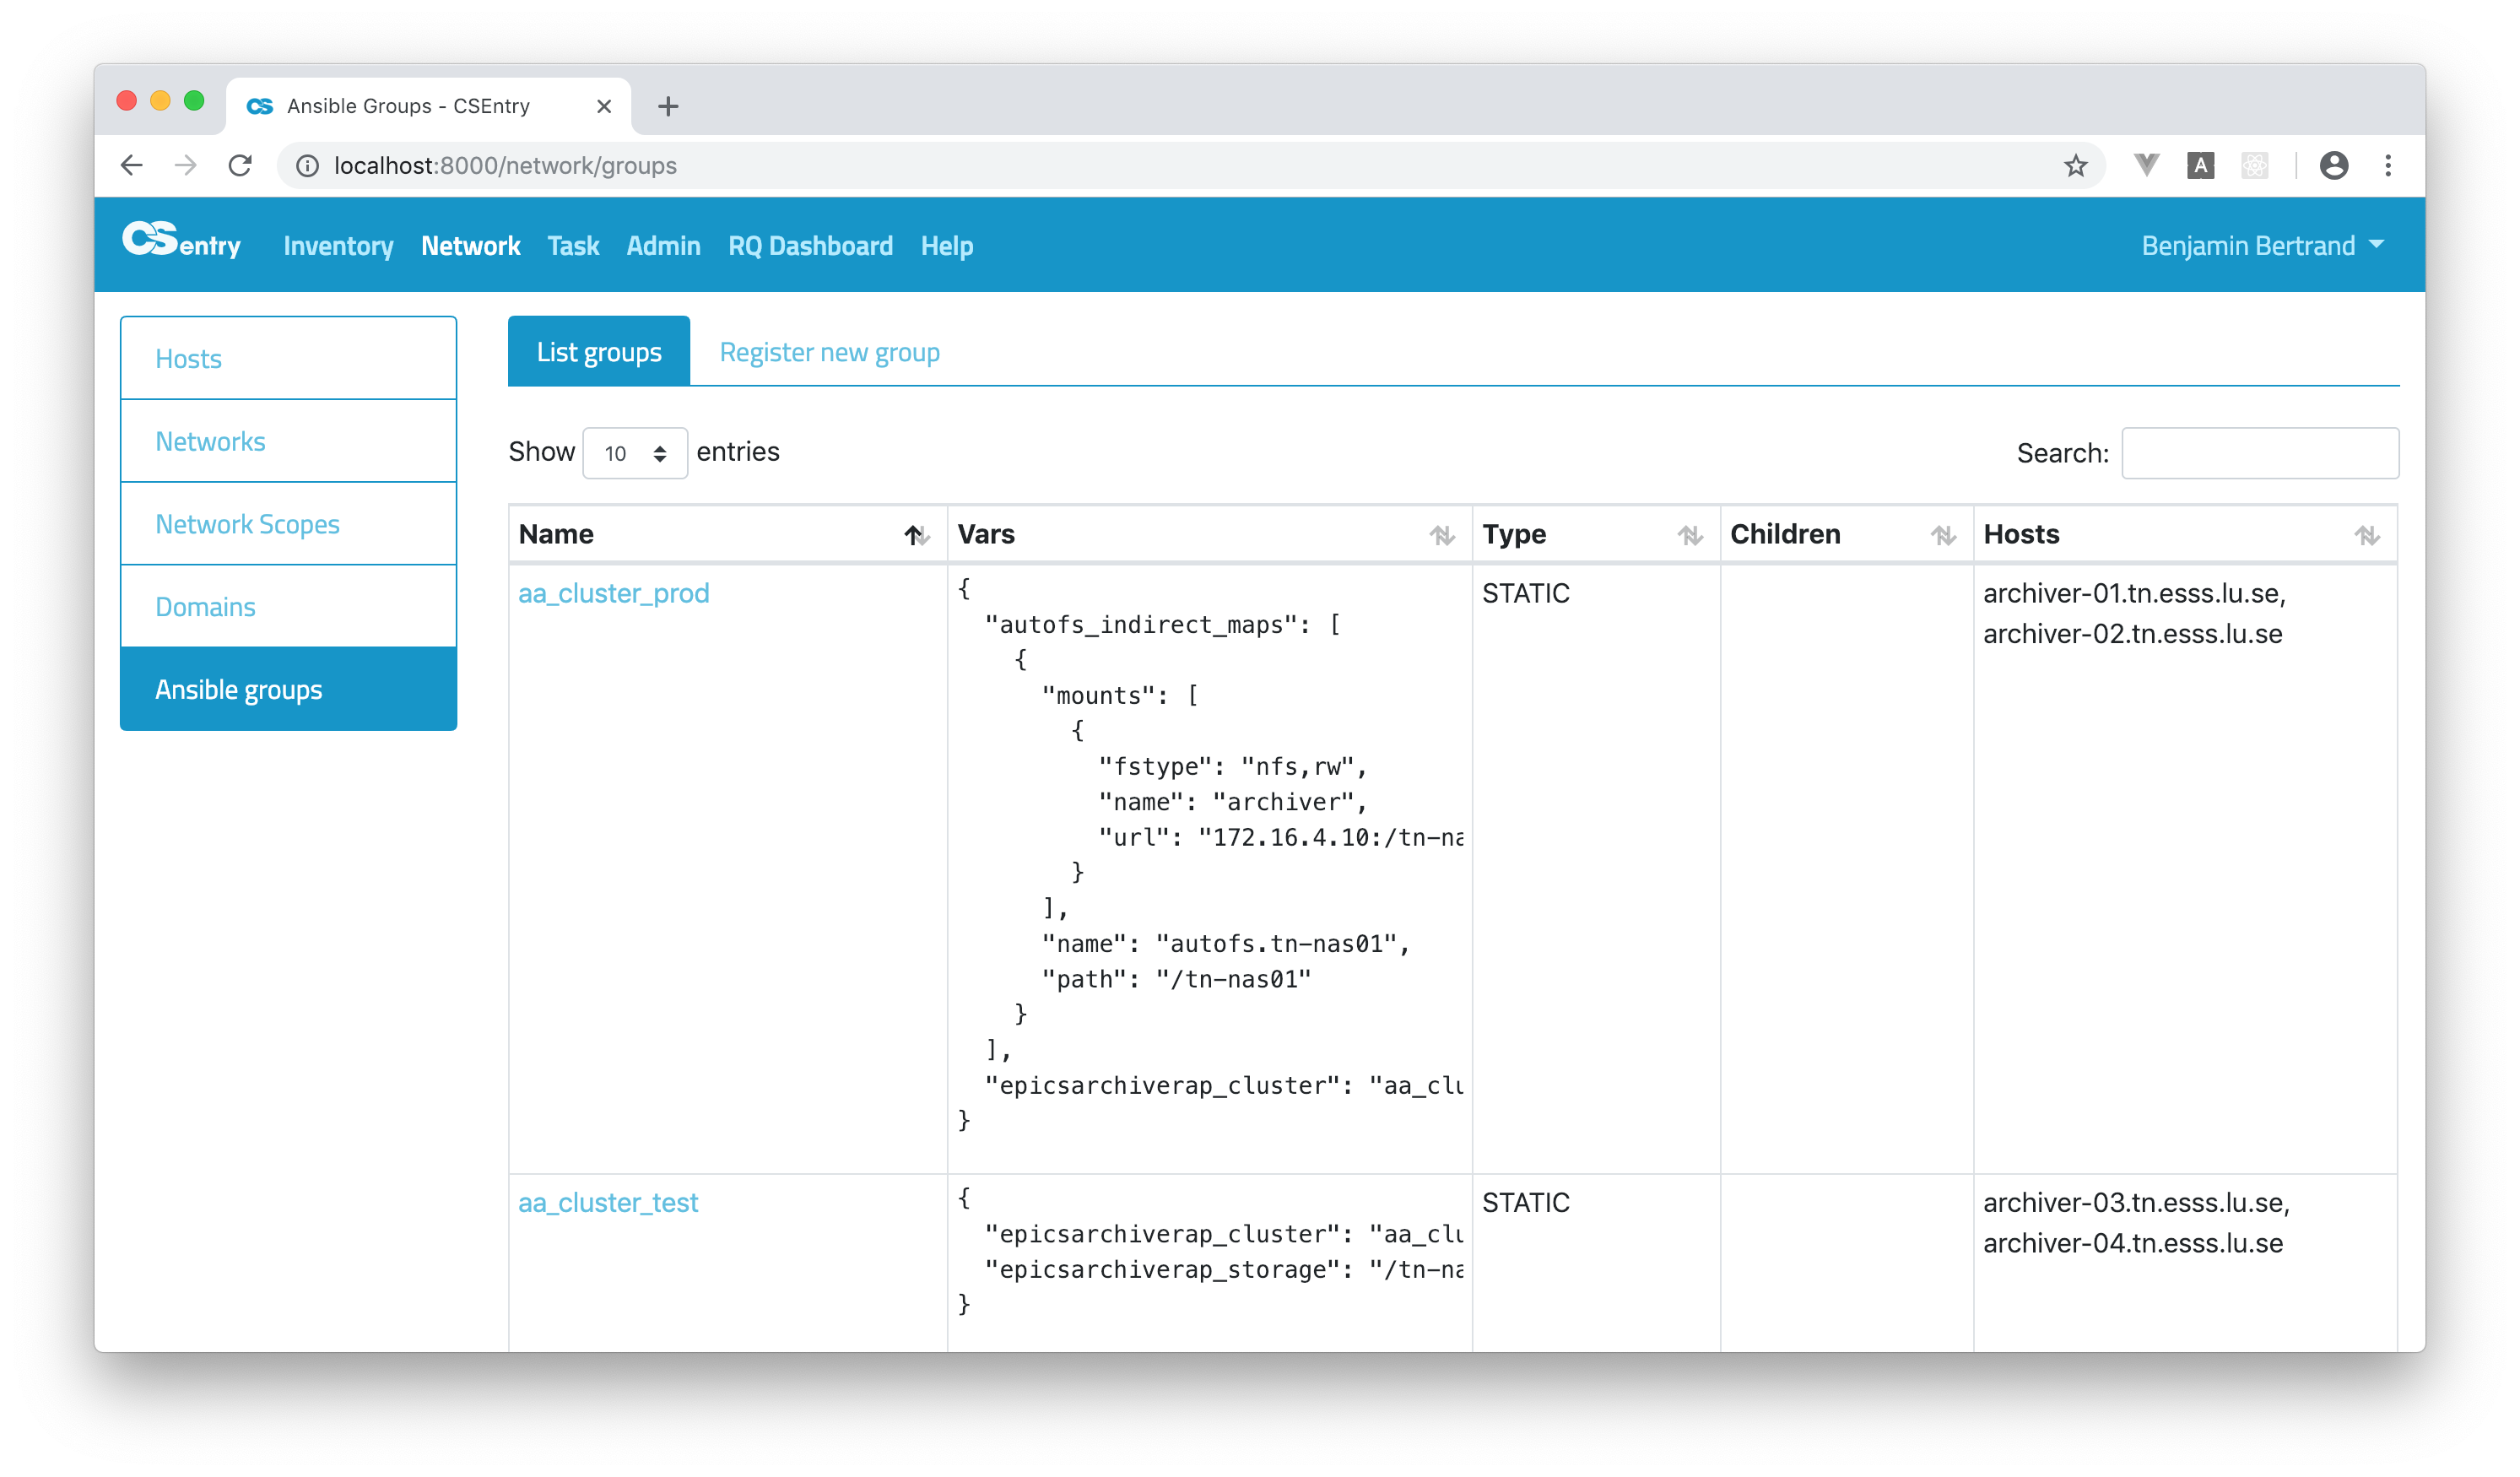
Ansible groups can be created via the web interface and variables can be defined at the group or host level. Note that group creation/edition is restricted to admin users.
The main Ansible groups page lists all the groups with their variables and associated hosts.
As for the hosts, Elasticsearch is used as the full-text search engine and allows to use a query string “mini-language”.
The complete list of fields that can be searched is the following:
created_at
updated_at
user
name
vars
type
hosts
children
Note that variables are indexed using the flattened datatype.
This allows to search on the value of any variable like for any other field.
But to query on a specific key, object dot notation shall be used: sssd_ldap_referrals:True.
Searching if a variable is defined can be done using _exists_: _exists_:vars.docker_log_driver.
Static groups
New group can be added from the Register Ansible group page:
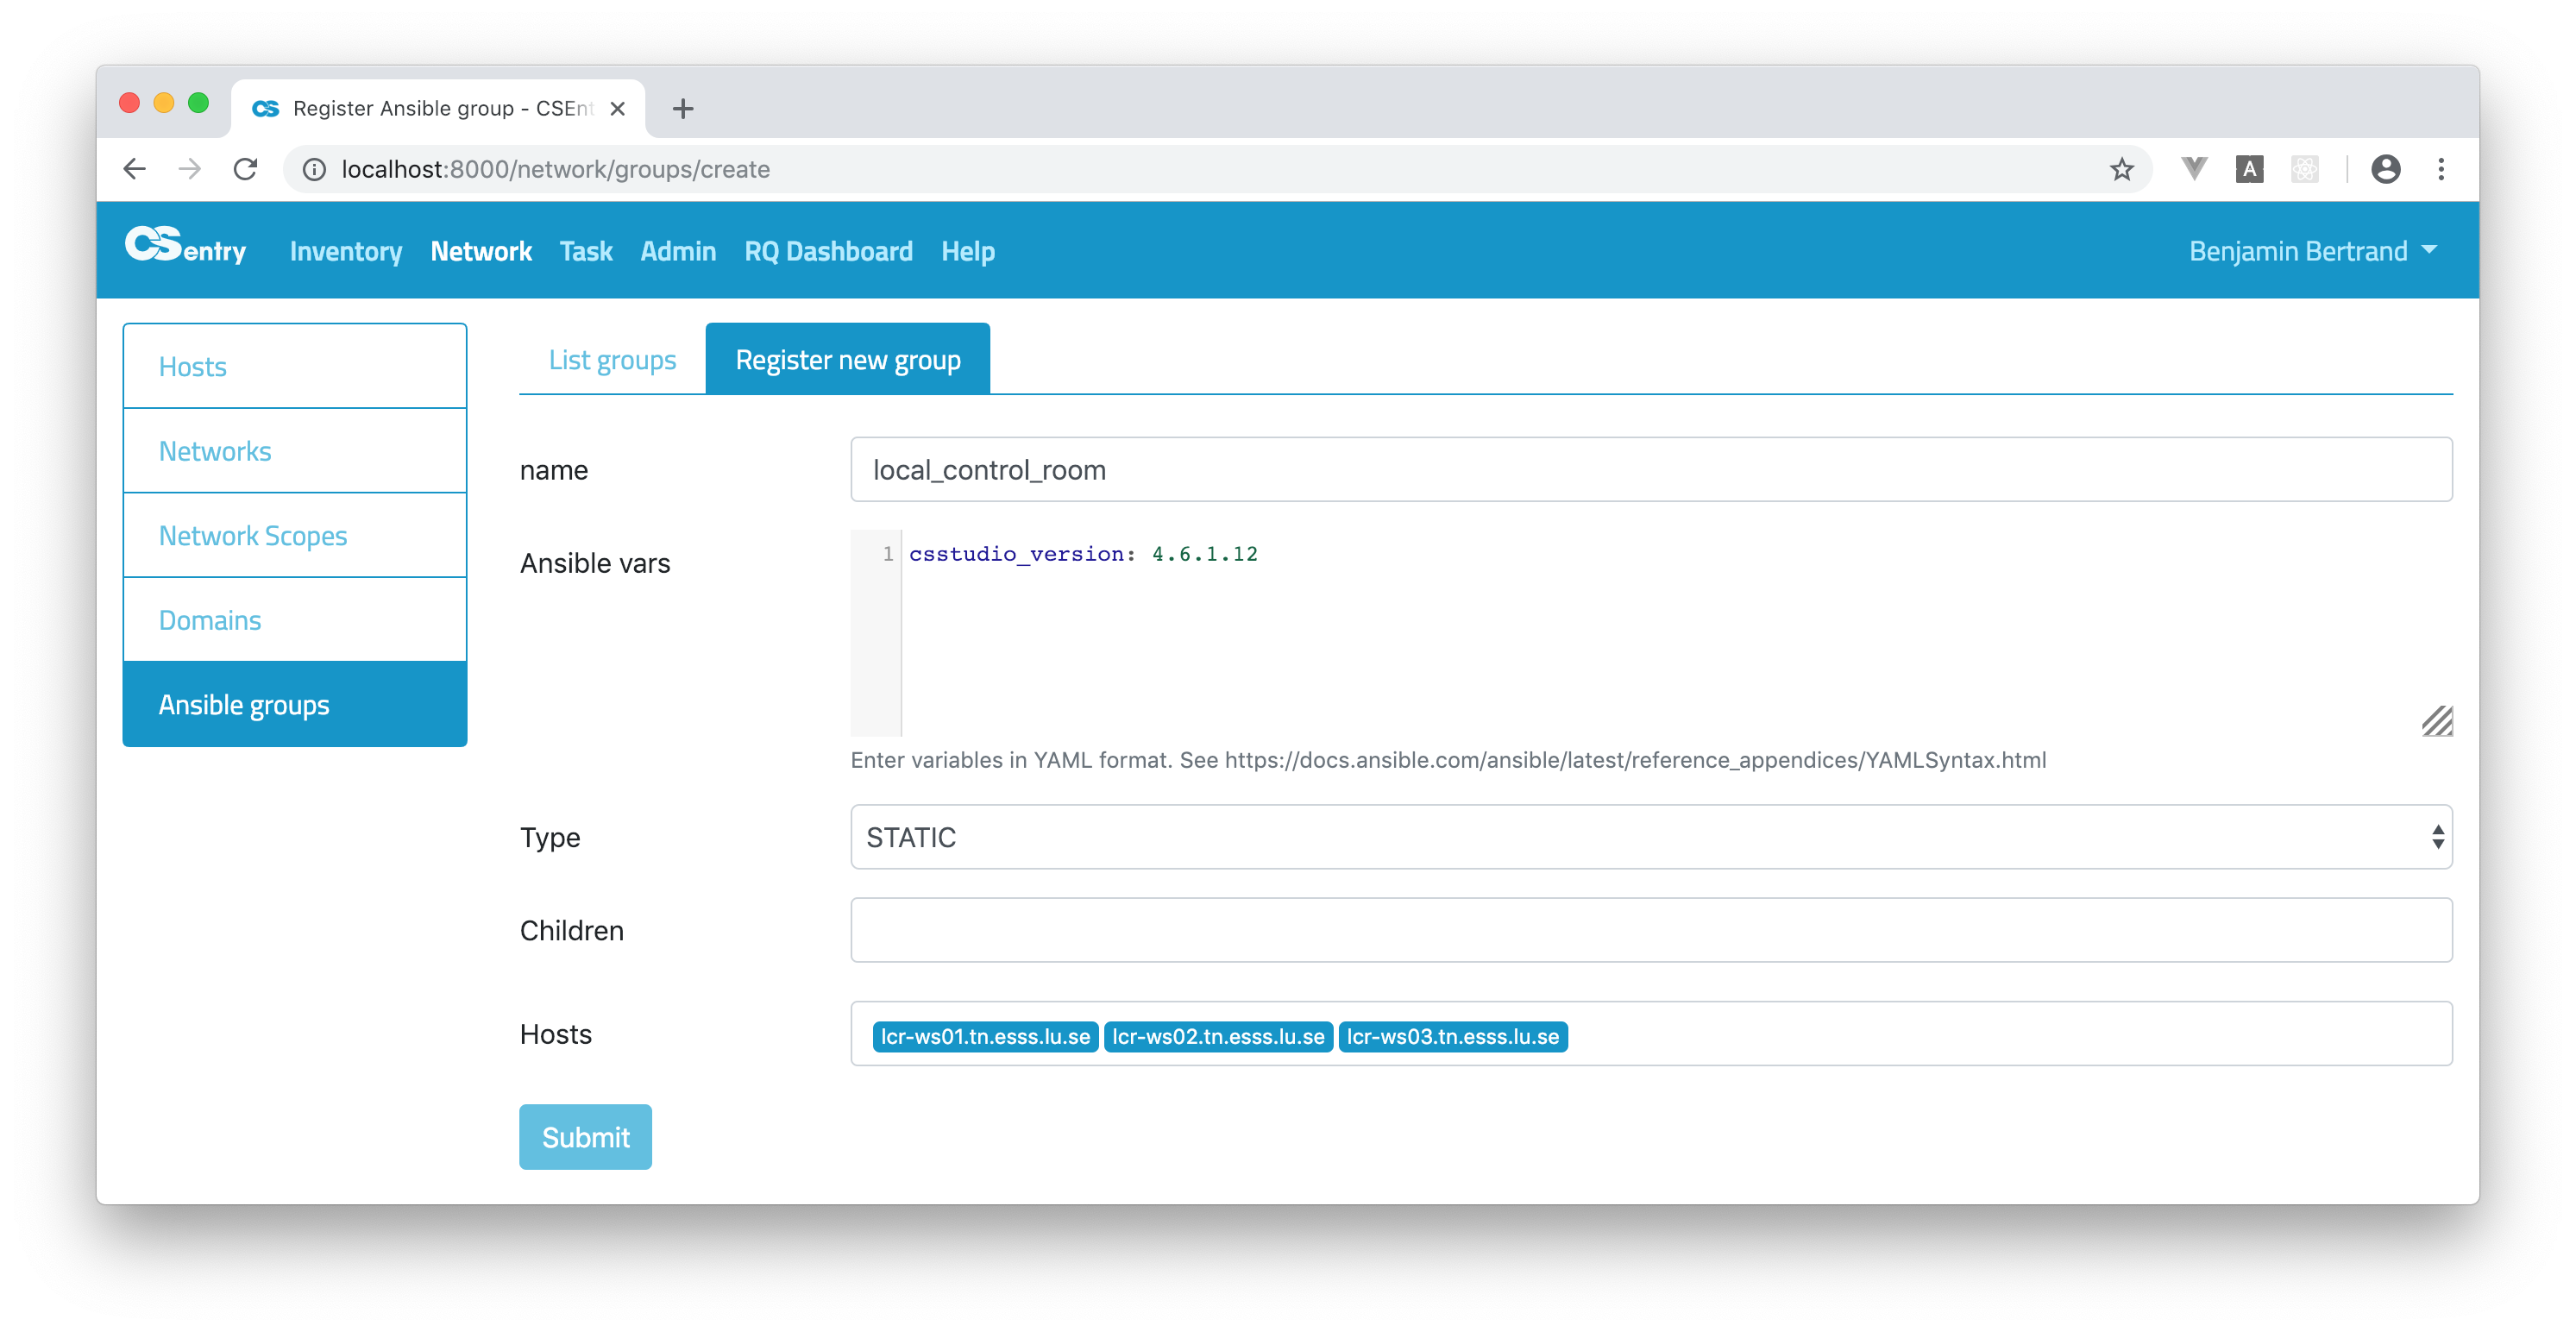
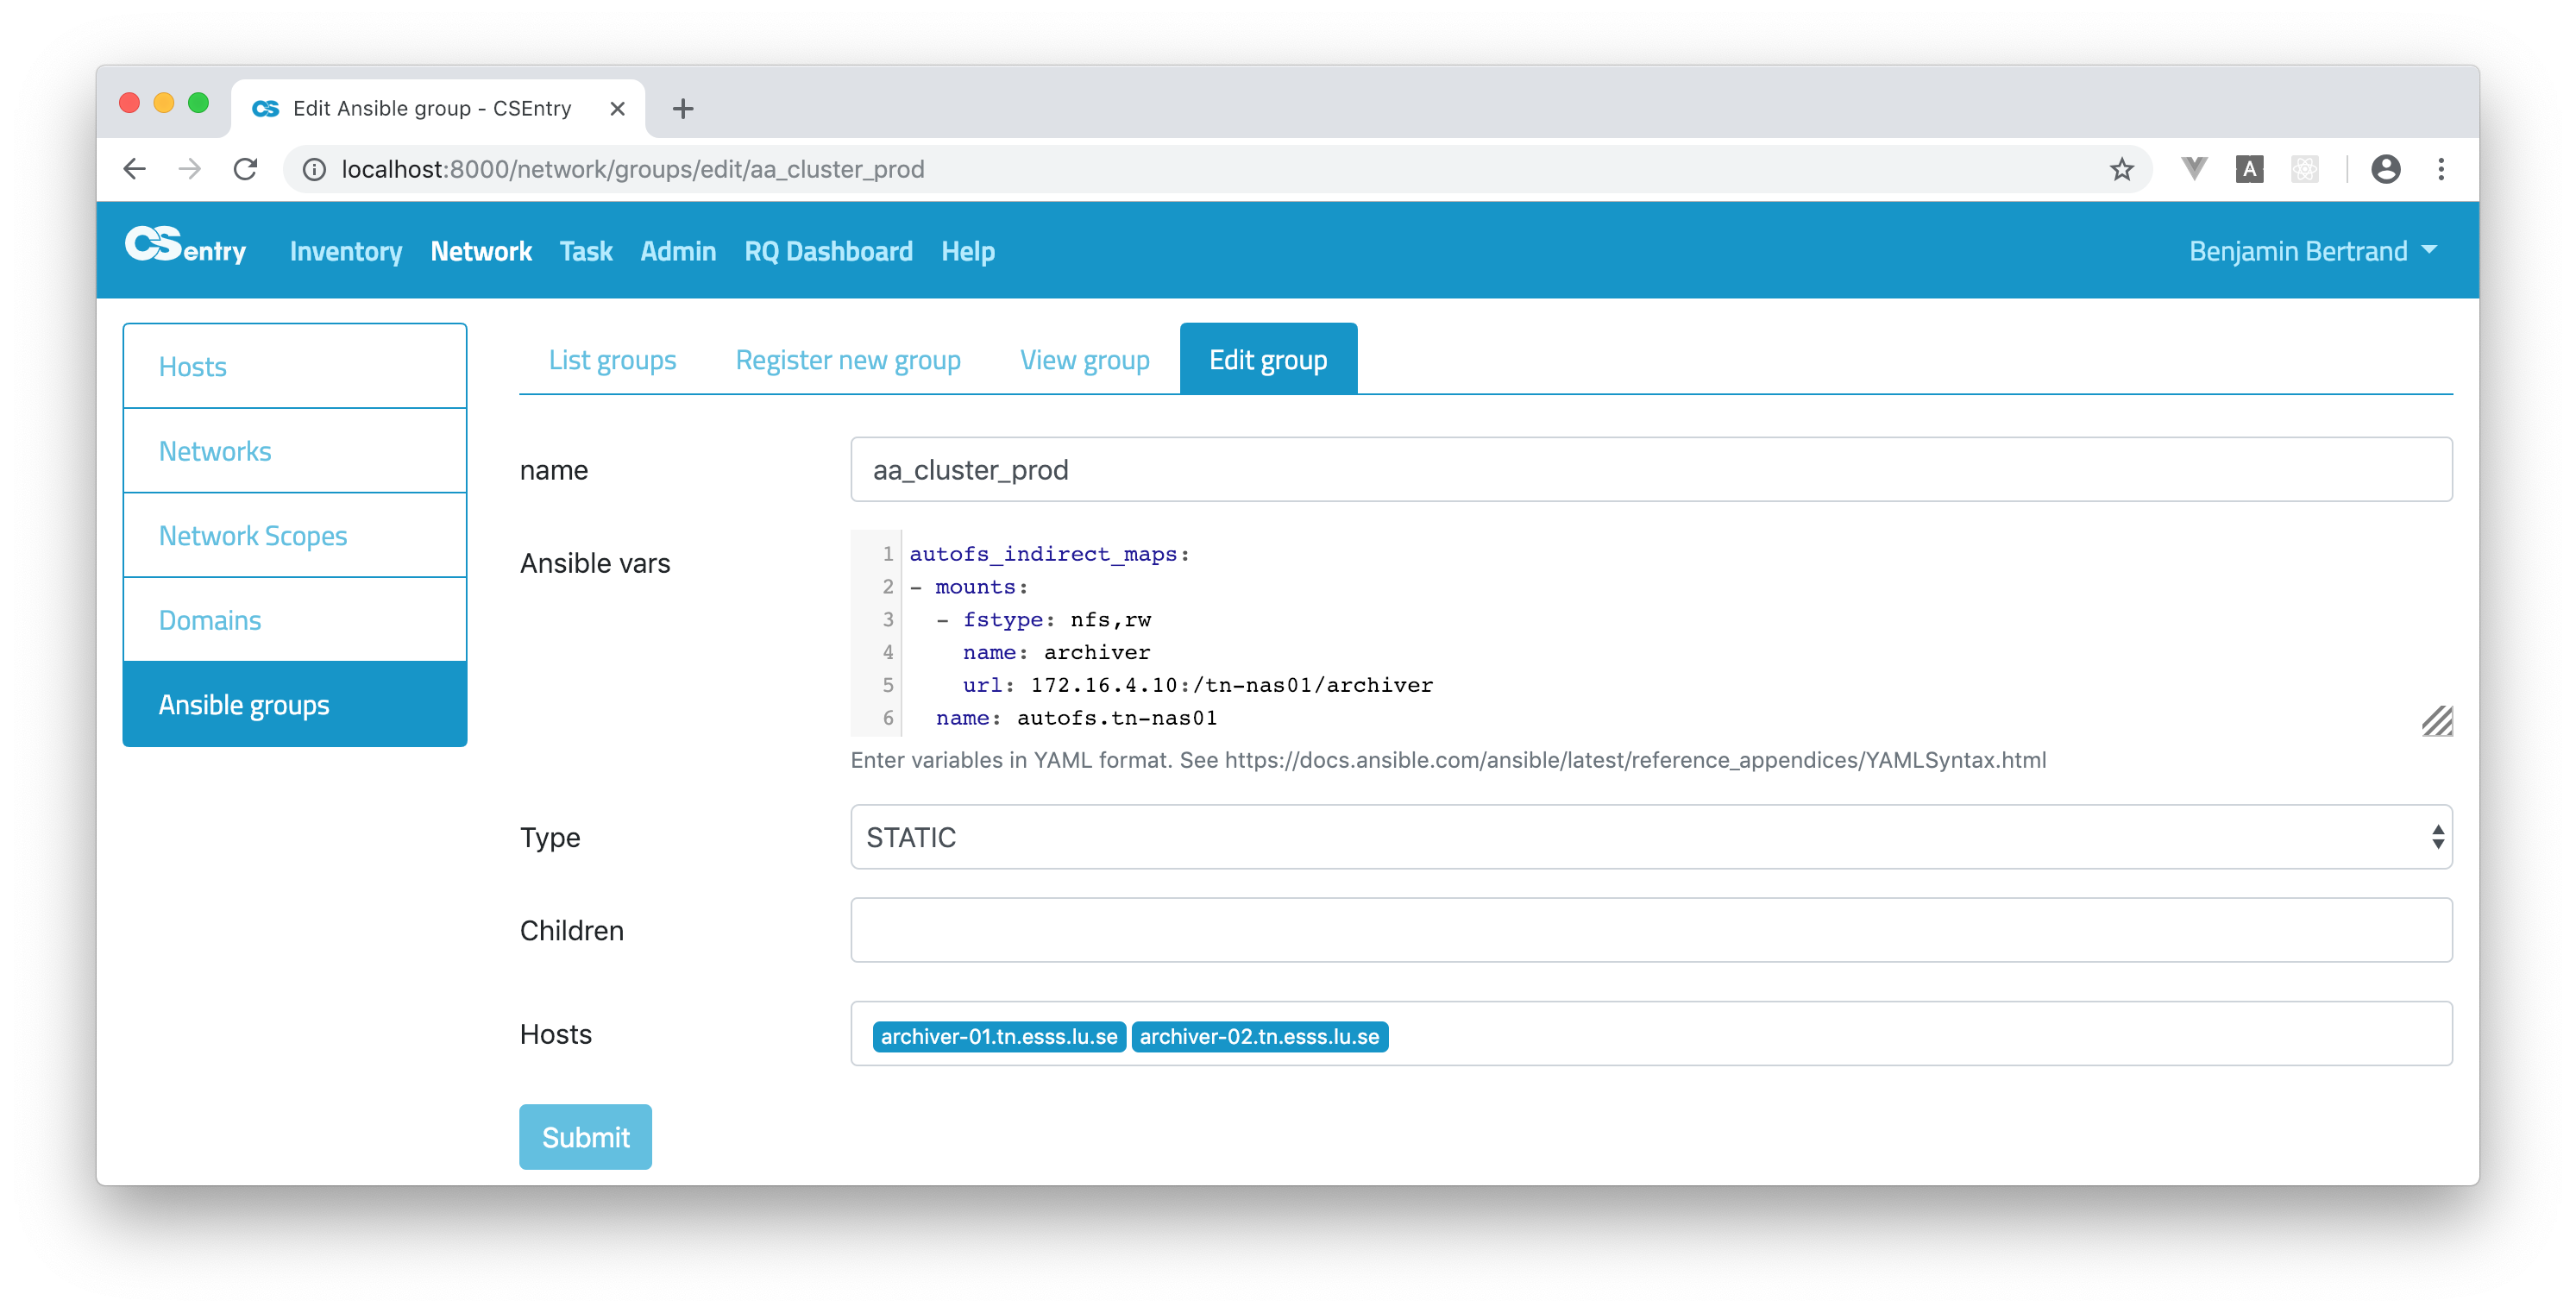
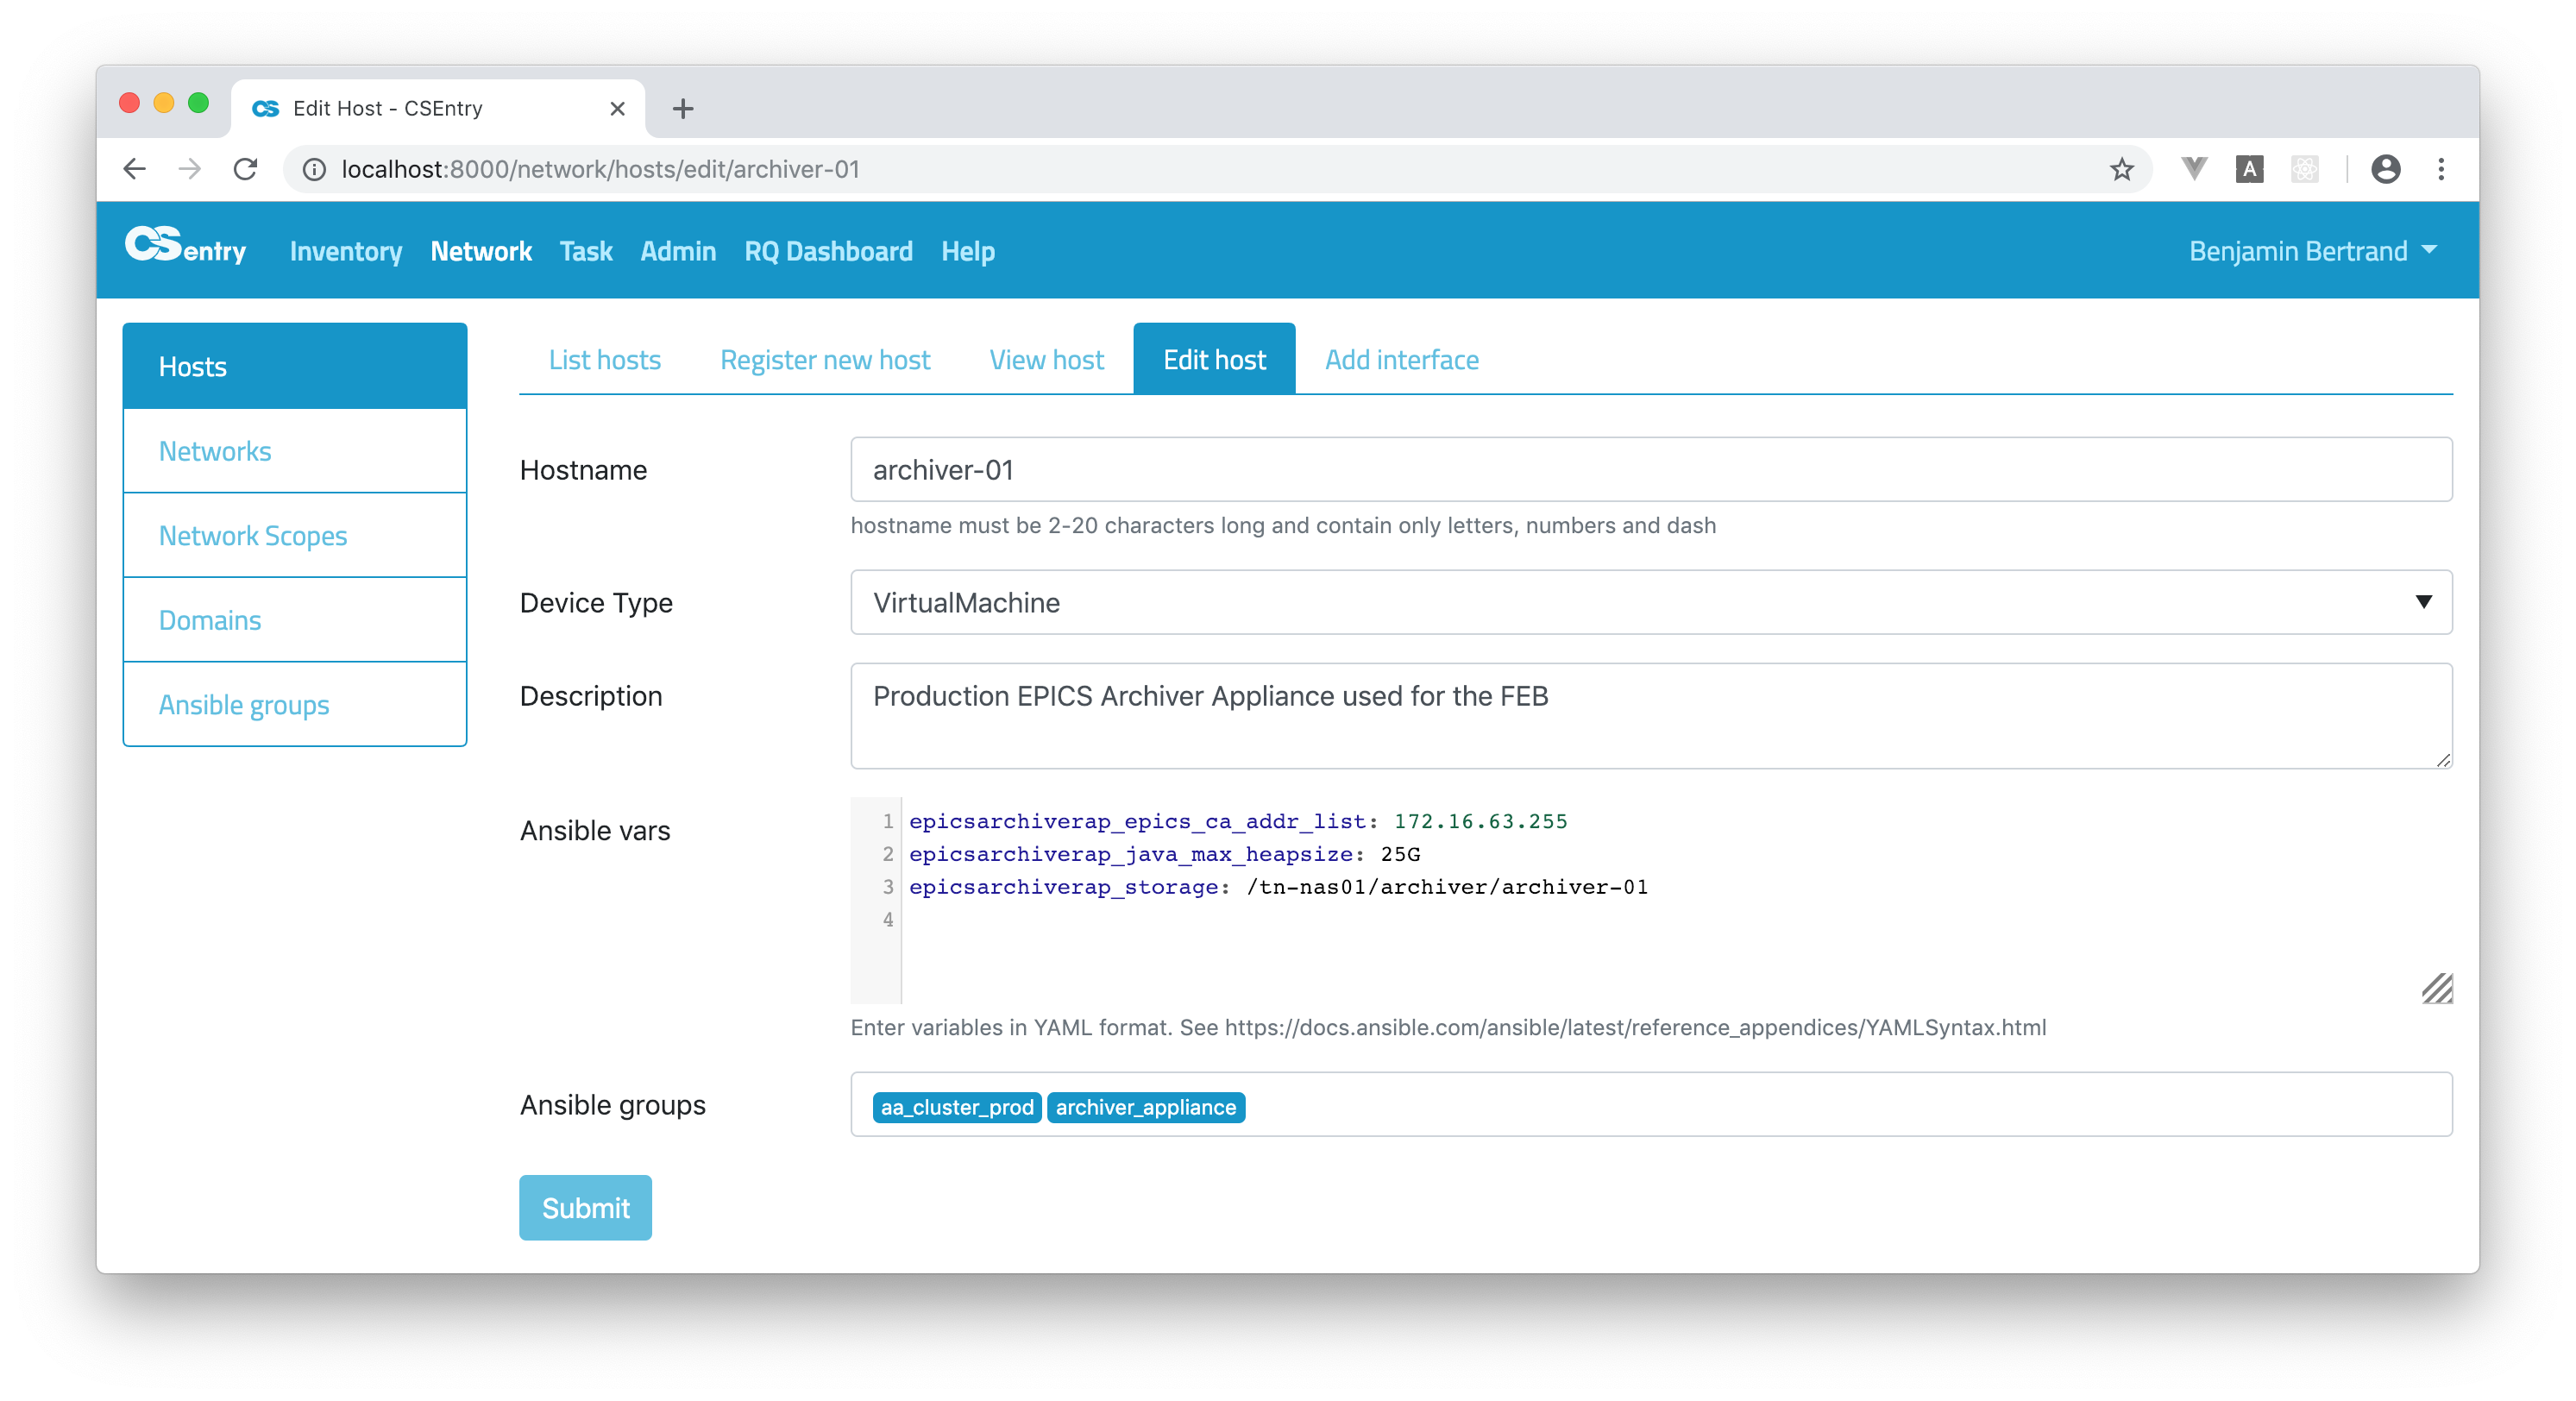
Hosts can be associated to a group from the Edit Ansible group page or from the Edit Host page.
Variables should be entered in YAML format. CodeMirror is used to provide a text editor with syntax higlighting in the register/edit pages. Refer to Ansible documentation for more information about YAML Syntax.
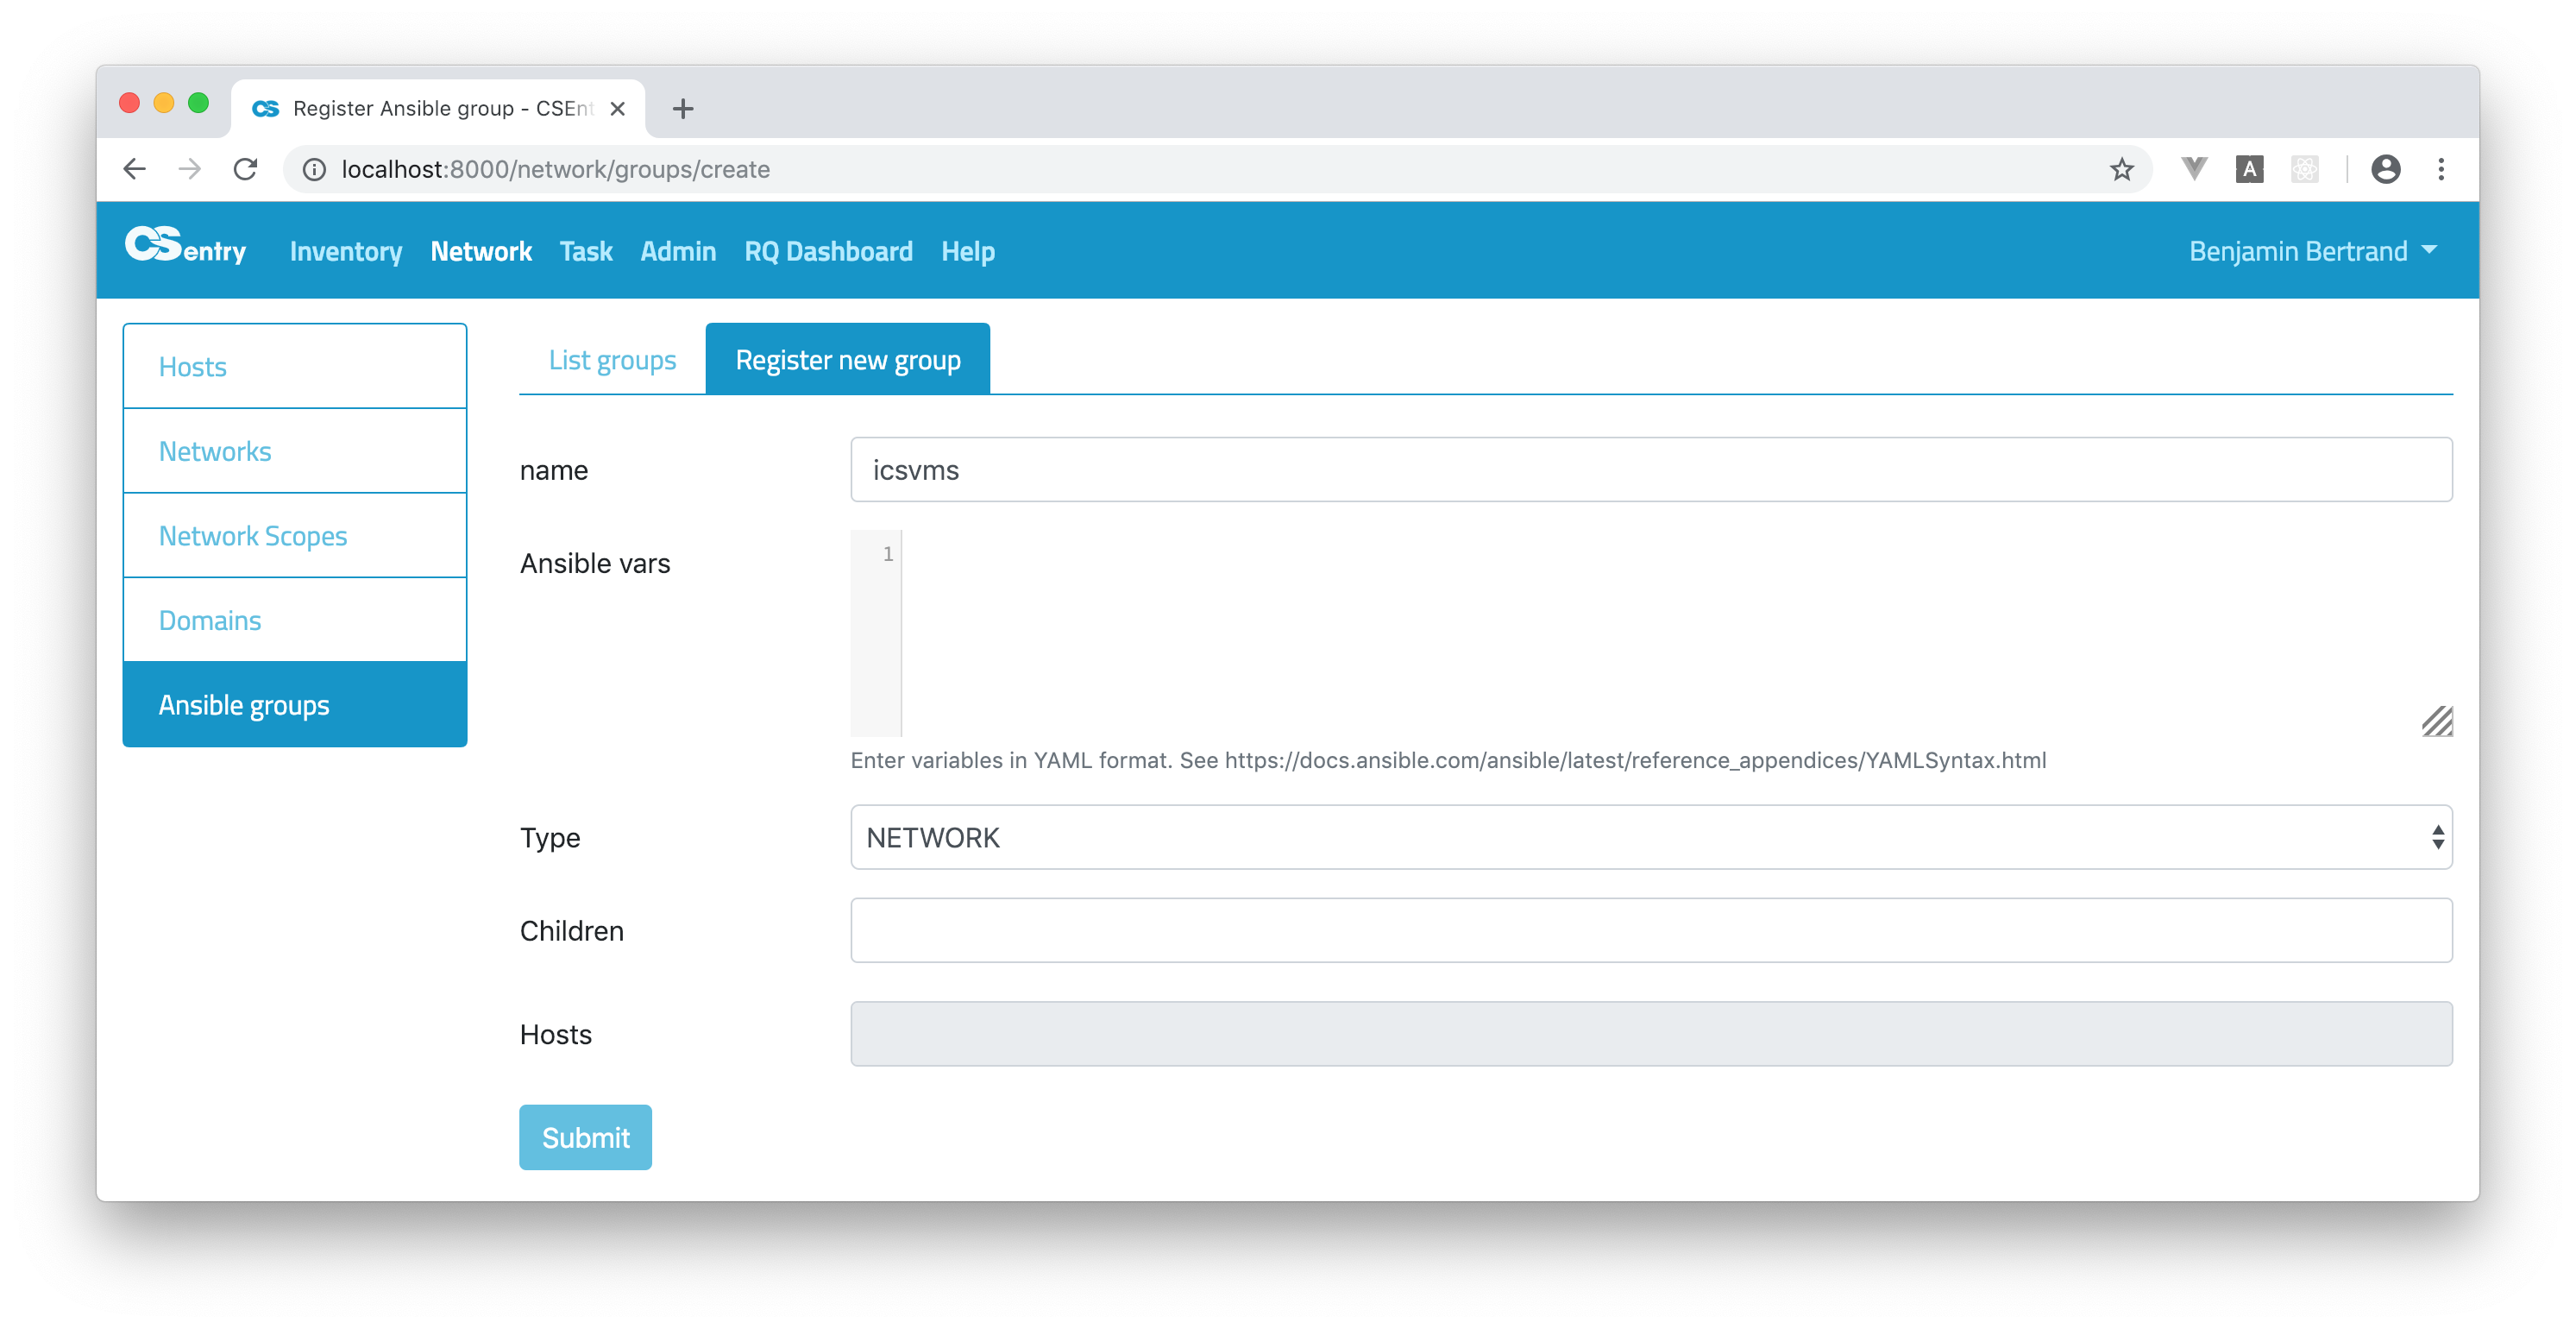
Dynamic groups
By default, groups are static. It is possible to create dynamic groups based on the Network scope, Network or device type. When creating a dynamic group, the name of the group should match the name of the type you target.
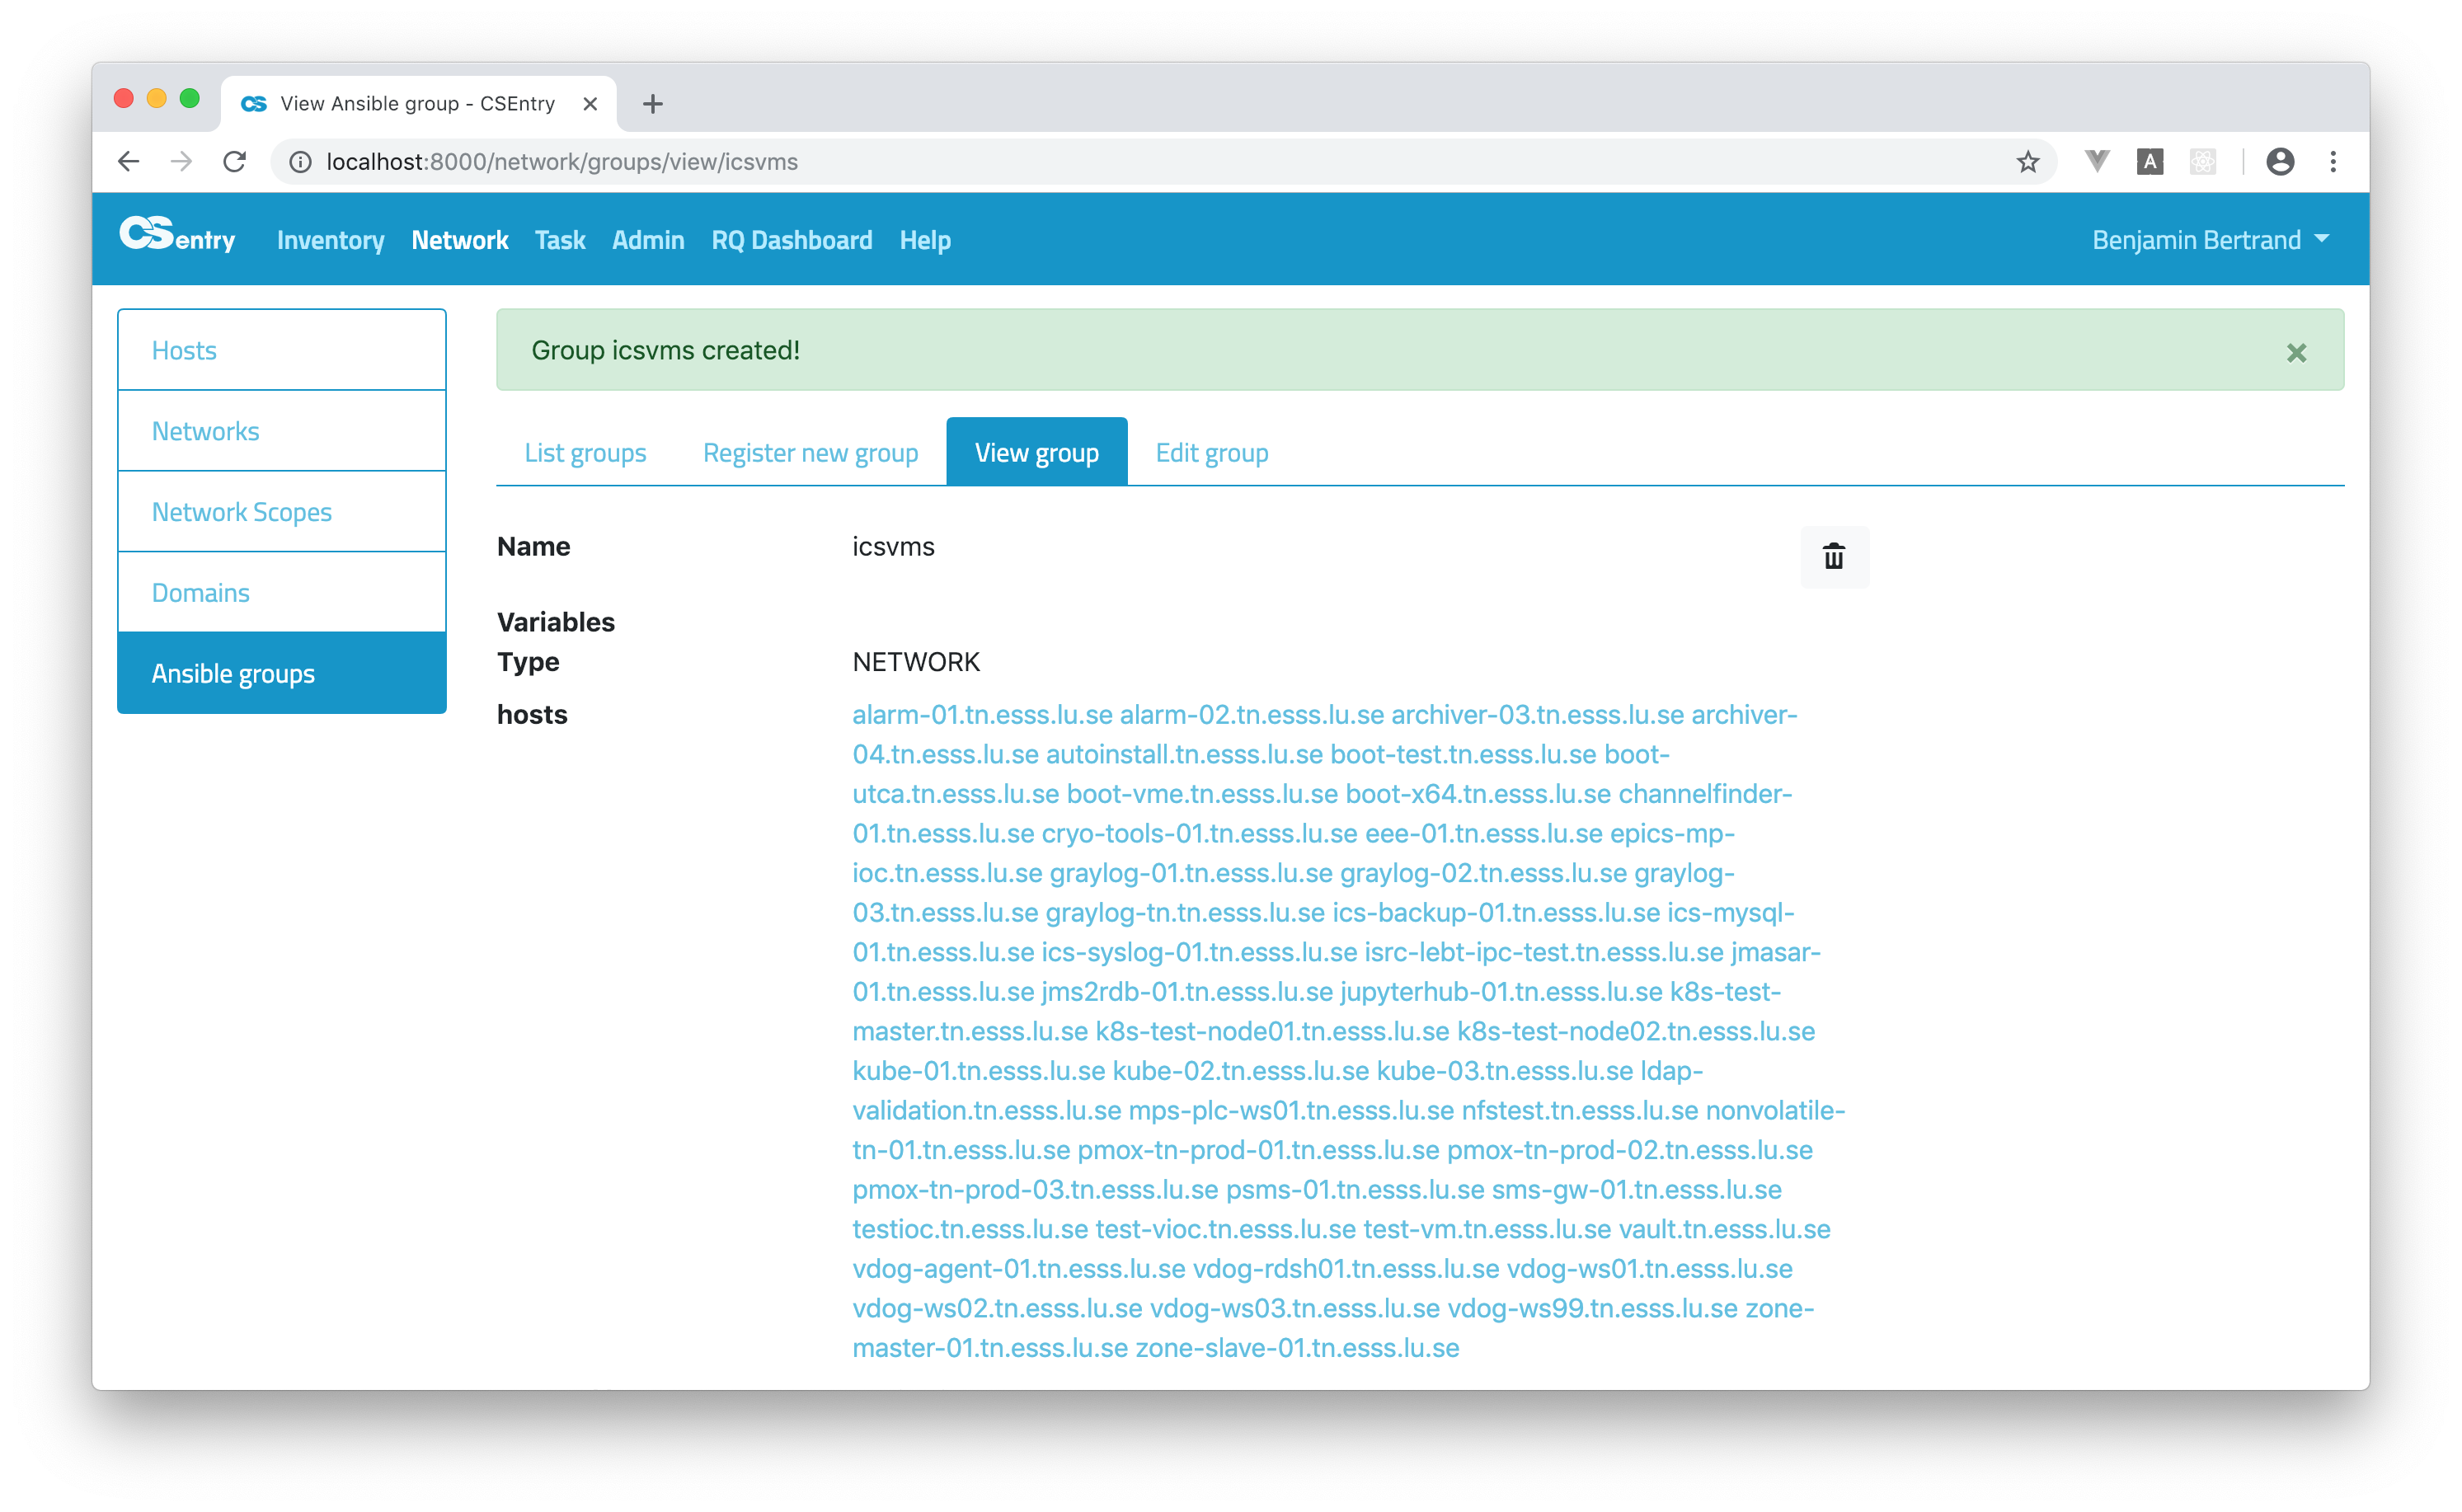
Let’s take an example. To create a group based on the ICSVMs Vlan name, create a group named icsvms (a group name is always in lower-case) and choose the type NETWORK. Note that you can’t select any hosts.
Click submit. You can see the list of hosts part of the ICSVMs network:
There are two additional dynamic groups: IOC and HOSTNAME. The IOC type is supposed to be used to create a unique iocs group. It gathers all the hosts which have the IOC checkbox selected.
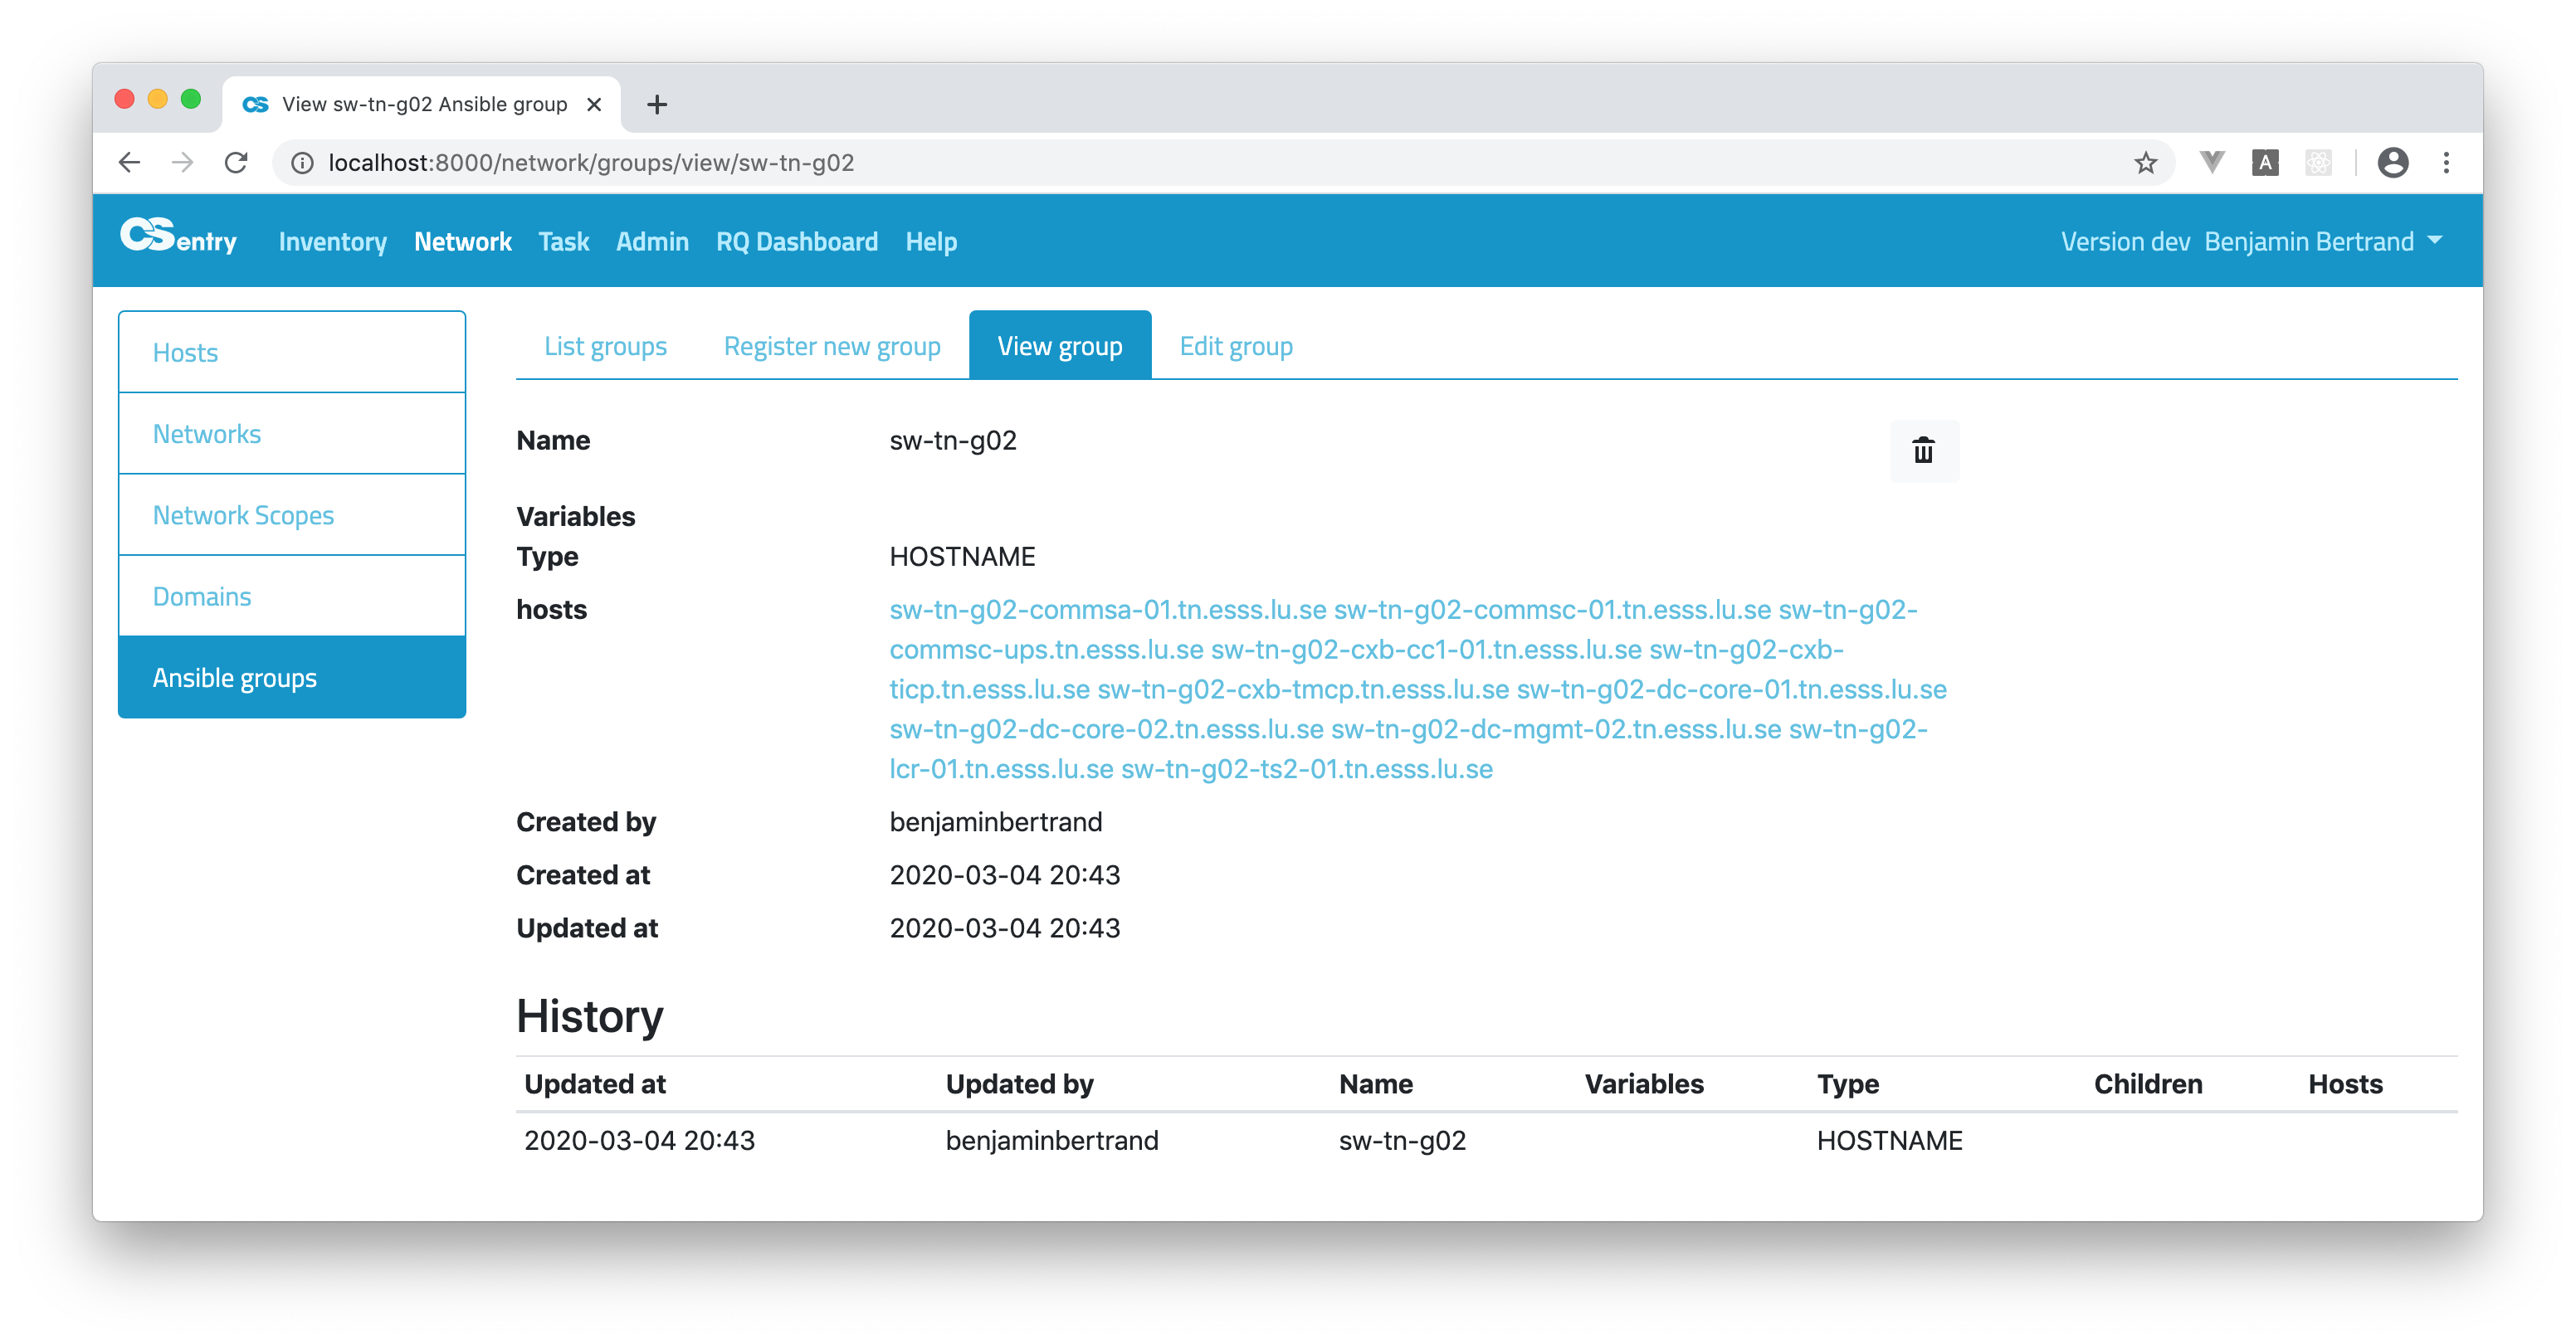
The HOSTNAME type is used to define a group which will include all hosts that start with the same name as the group. The sw-tn-g02 group will include all hosts that start with that prefix:
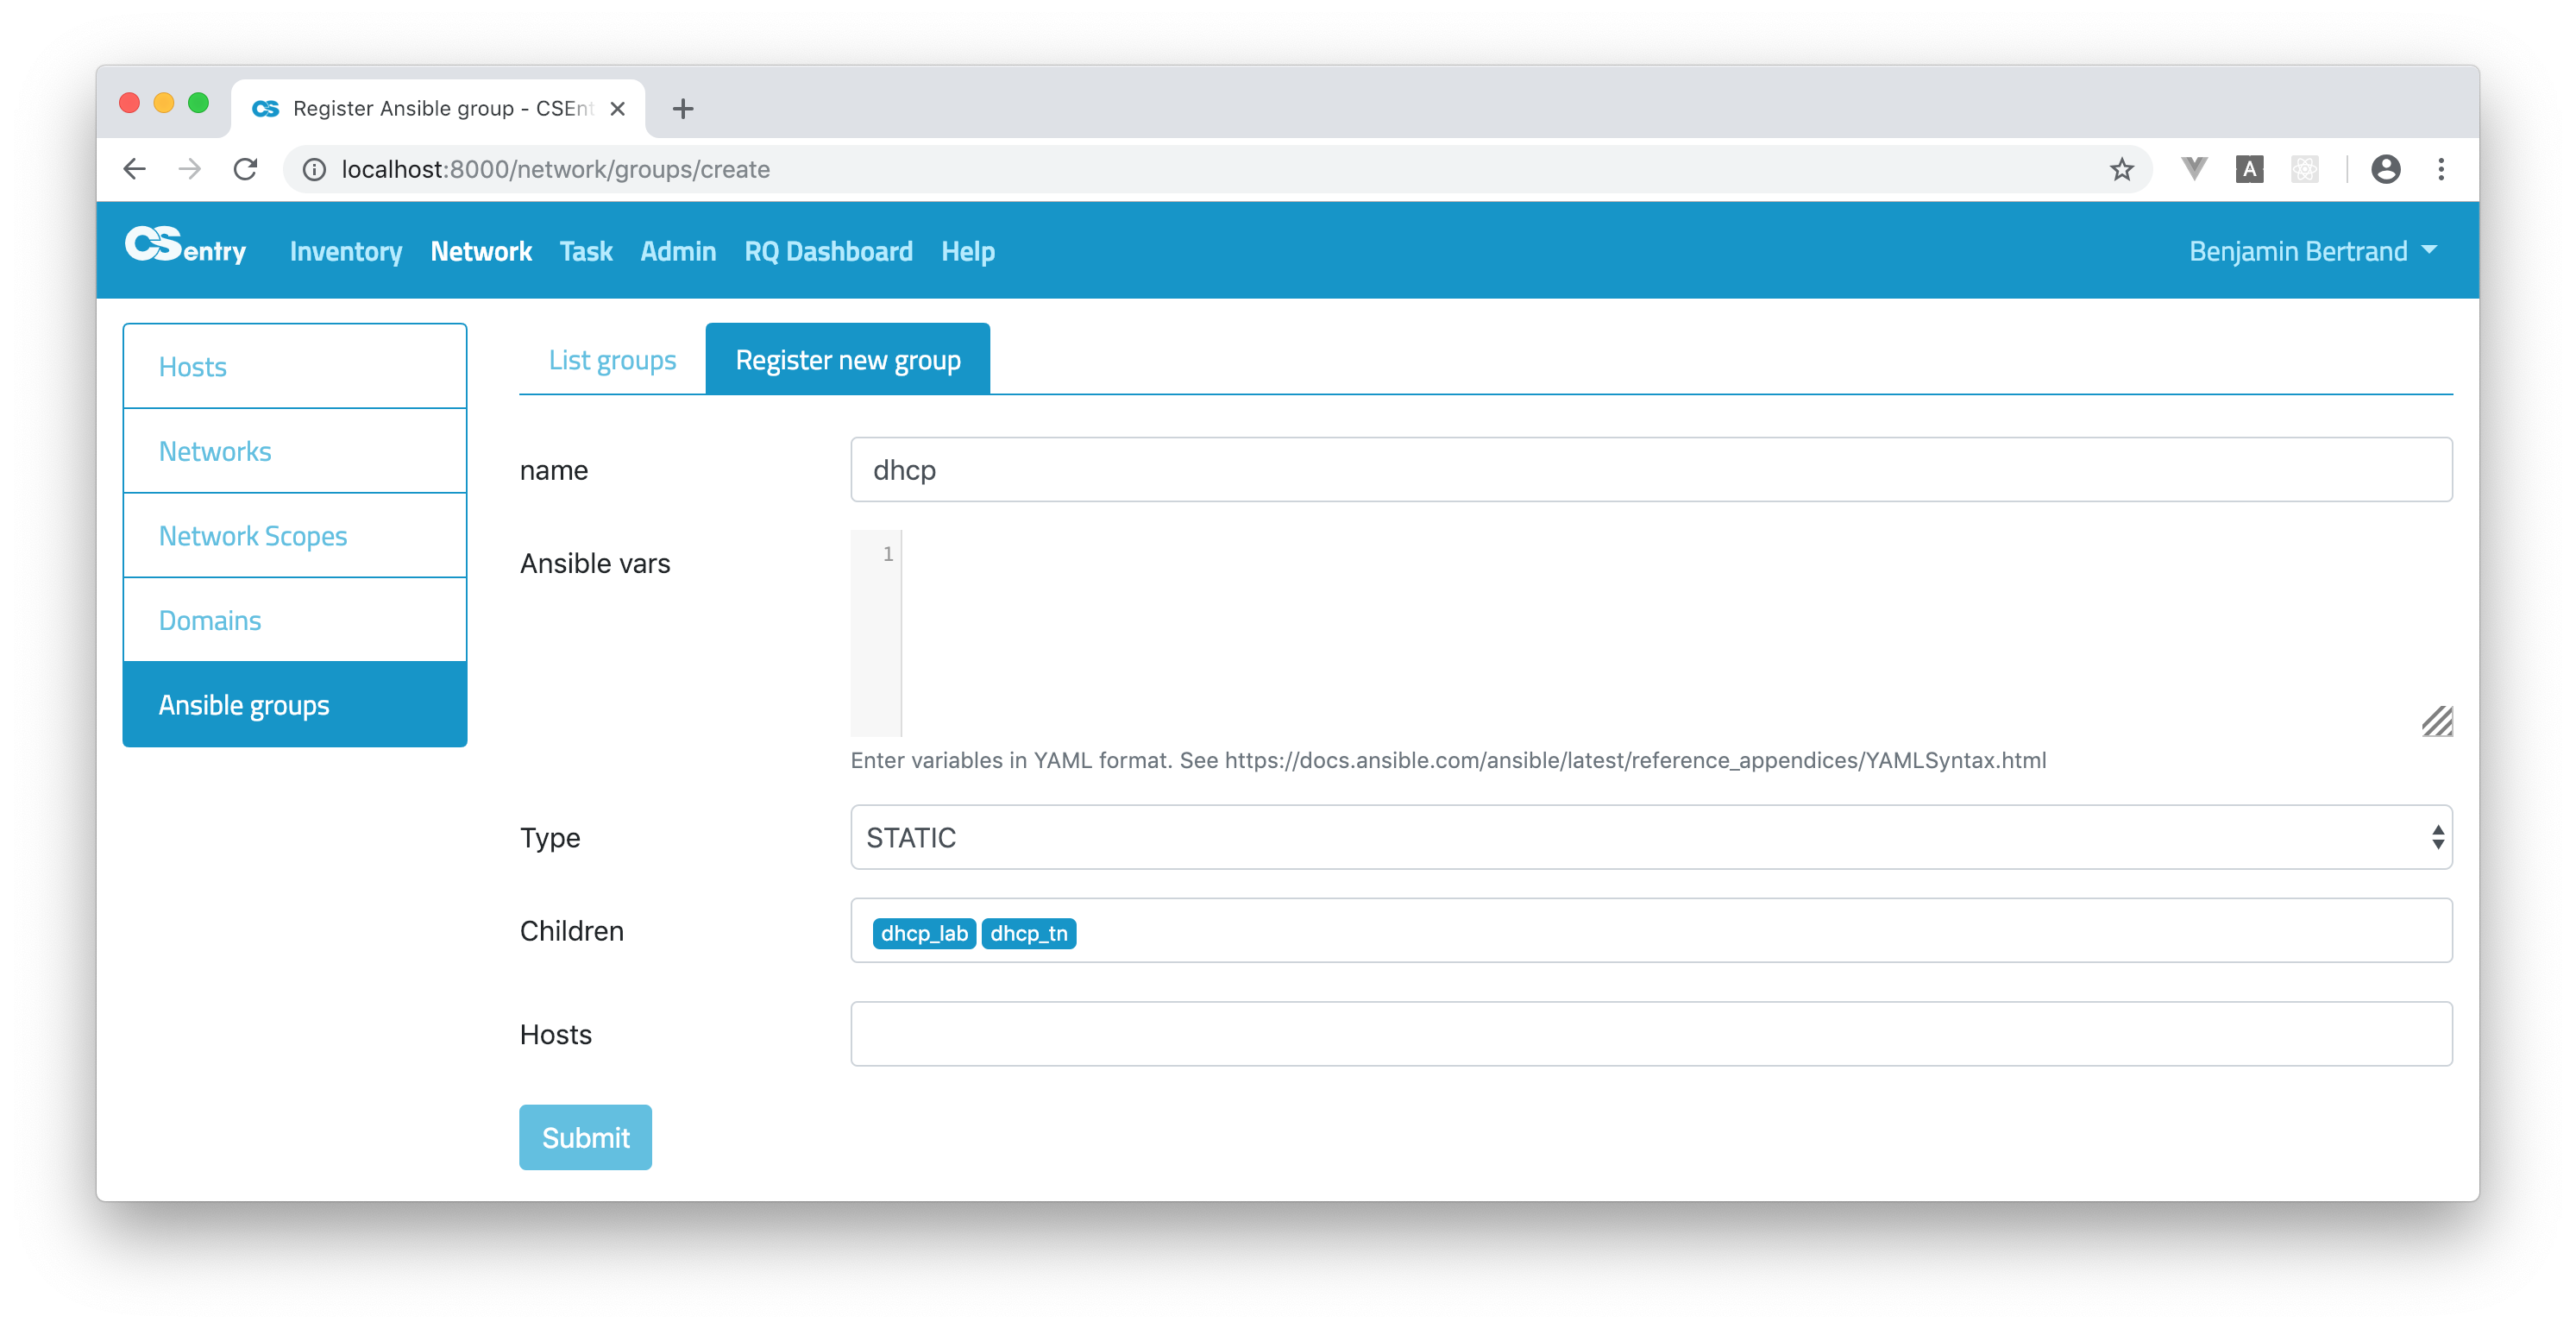
Groups of groups
You can also create groups of groups. To do so, just select the group names in the Children field when registering a new group:
Encrypted variables
Ansible vault allows to create encrypted variables to embed in yaml using the ansible-vault encrypt_string command. In the following example myvariable is the name of the variable and acomplexpassword the secret to encrypt (the content of the variable).
$ ansible-vault encrypt_string -n myvariable acomplexpassword
New Vault password:
Confirm New Vault password:
myvariable: !vault |
          $ANSIBLE_VAULT;1.1;AES256
          35643065323939633063303738656432333664613764326566663132313962363037663637363161
          3435383964313936313365366433633139323363393762310a626338663237313063353462623933
          37336566633161303538323934626162626262356337636565353835393538643564343331306338
          3333316434353931640a386563353131386437376233376362663764633338373530393936353163
          39366637633336316239306466643637383165343936623864386366663631363837
Encryption successful
Note that if you exported the ANSIBLE_VAULT_PASSWORD_FILE environment variable, you won’t be prompted for the vault password.
You can directly copy/paste the result of the command to CSEntry:
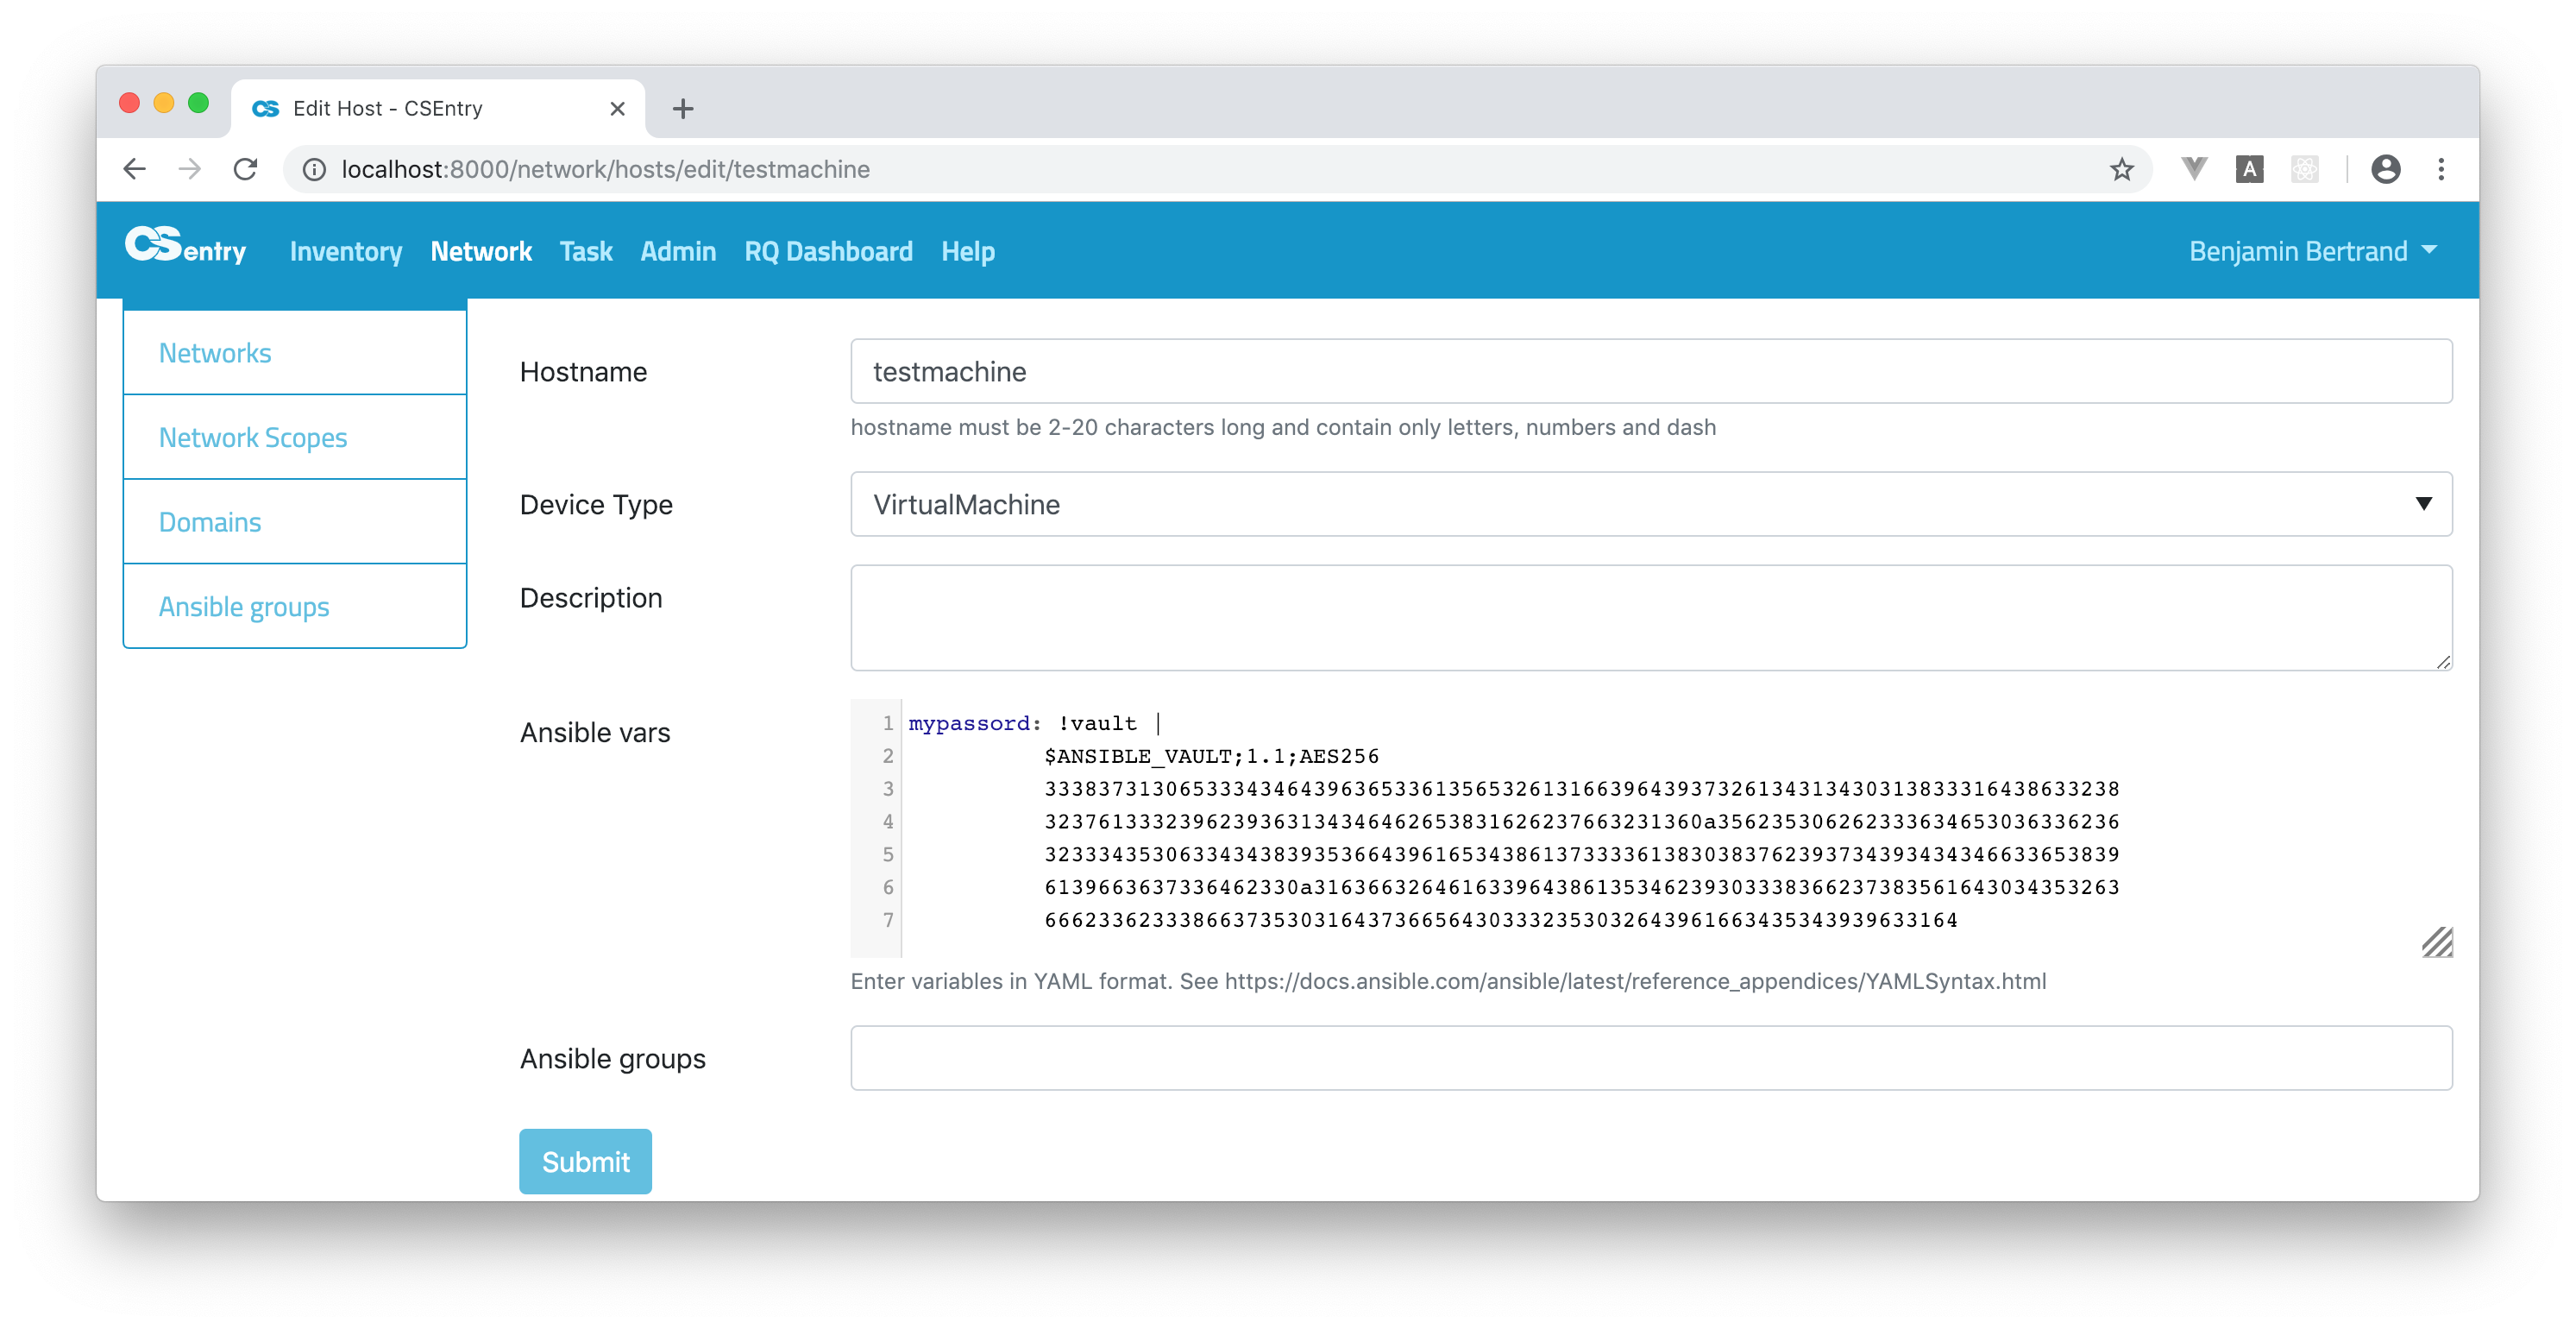
The !vault tag is used to embed encrypted variables in yaml. But variables are saved in JSON in CSEntry as
this is the format used by the dynamic inventory.
The scalar value is thus automatically converted to the mapping {"__ansible_vault": "encrypted_value"} which
is what AWX expects.
So this is what you’ll see when you save the variable:
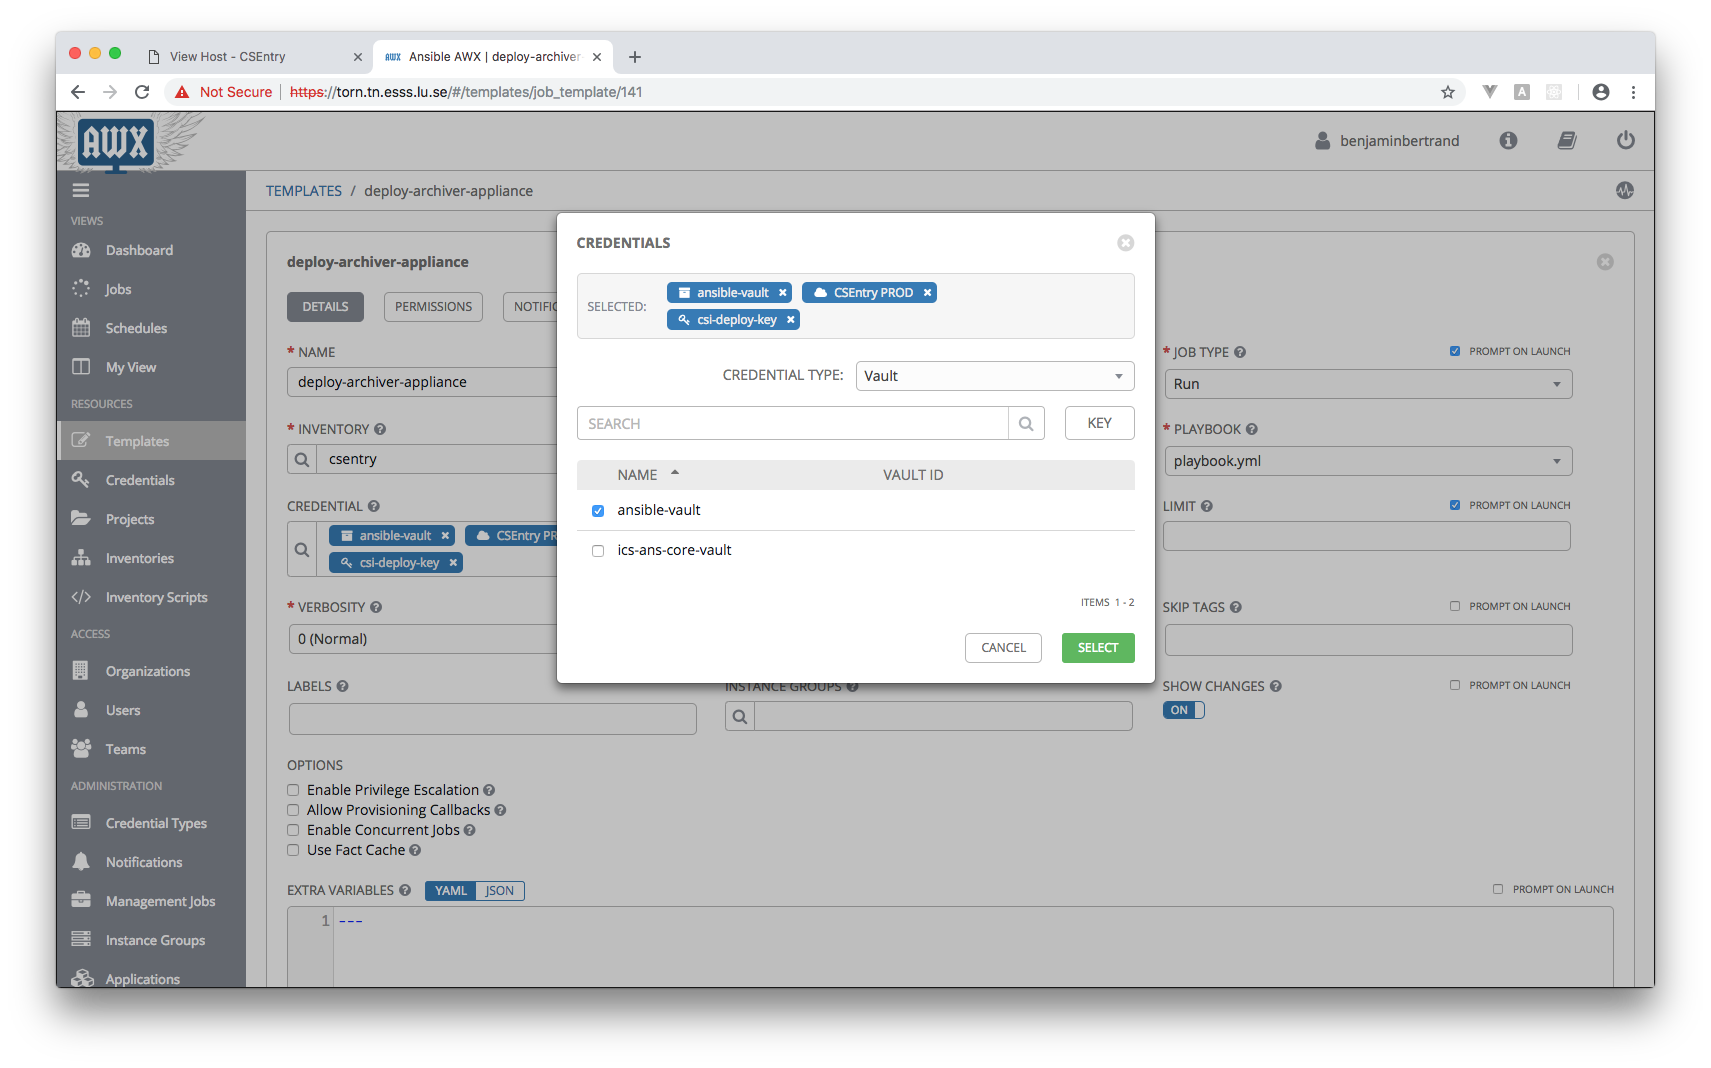
When encrypting variables, be sure to use the vault password that is defined in AWX. And don’t forget to add the ansible-vault credential to your template to allow AWX to decrypt the variable.