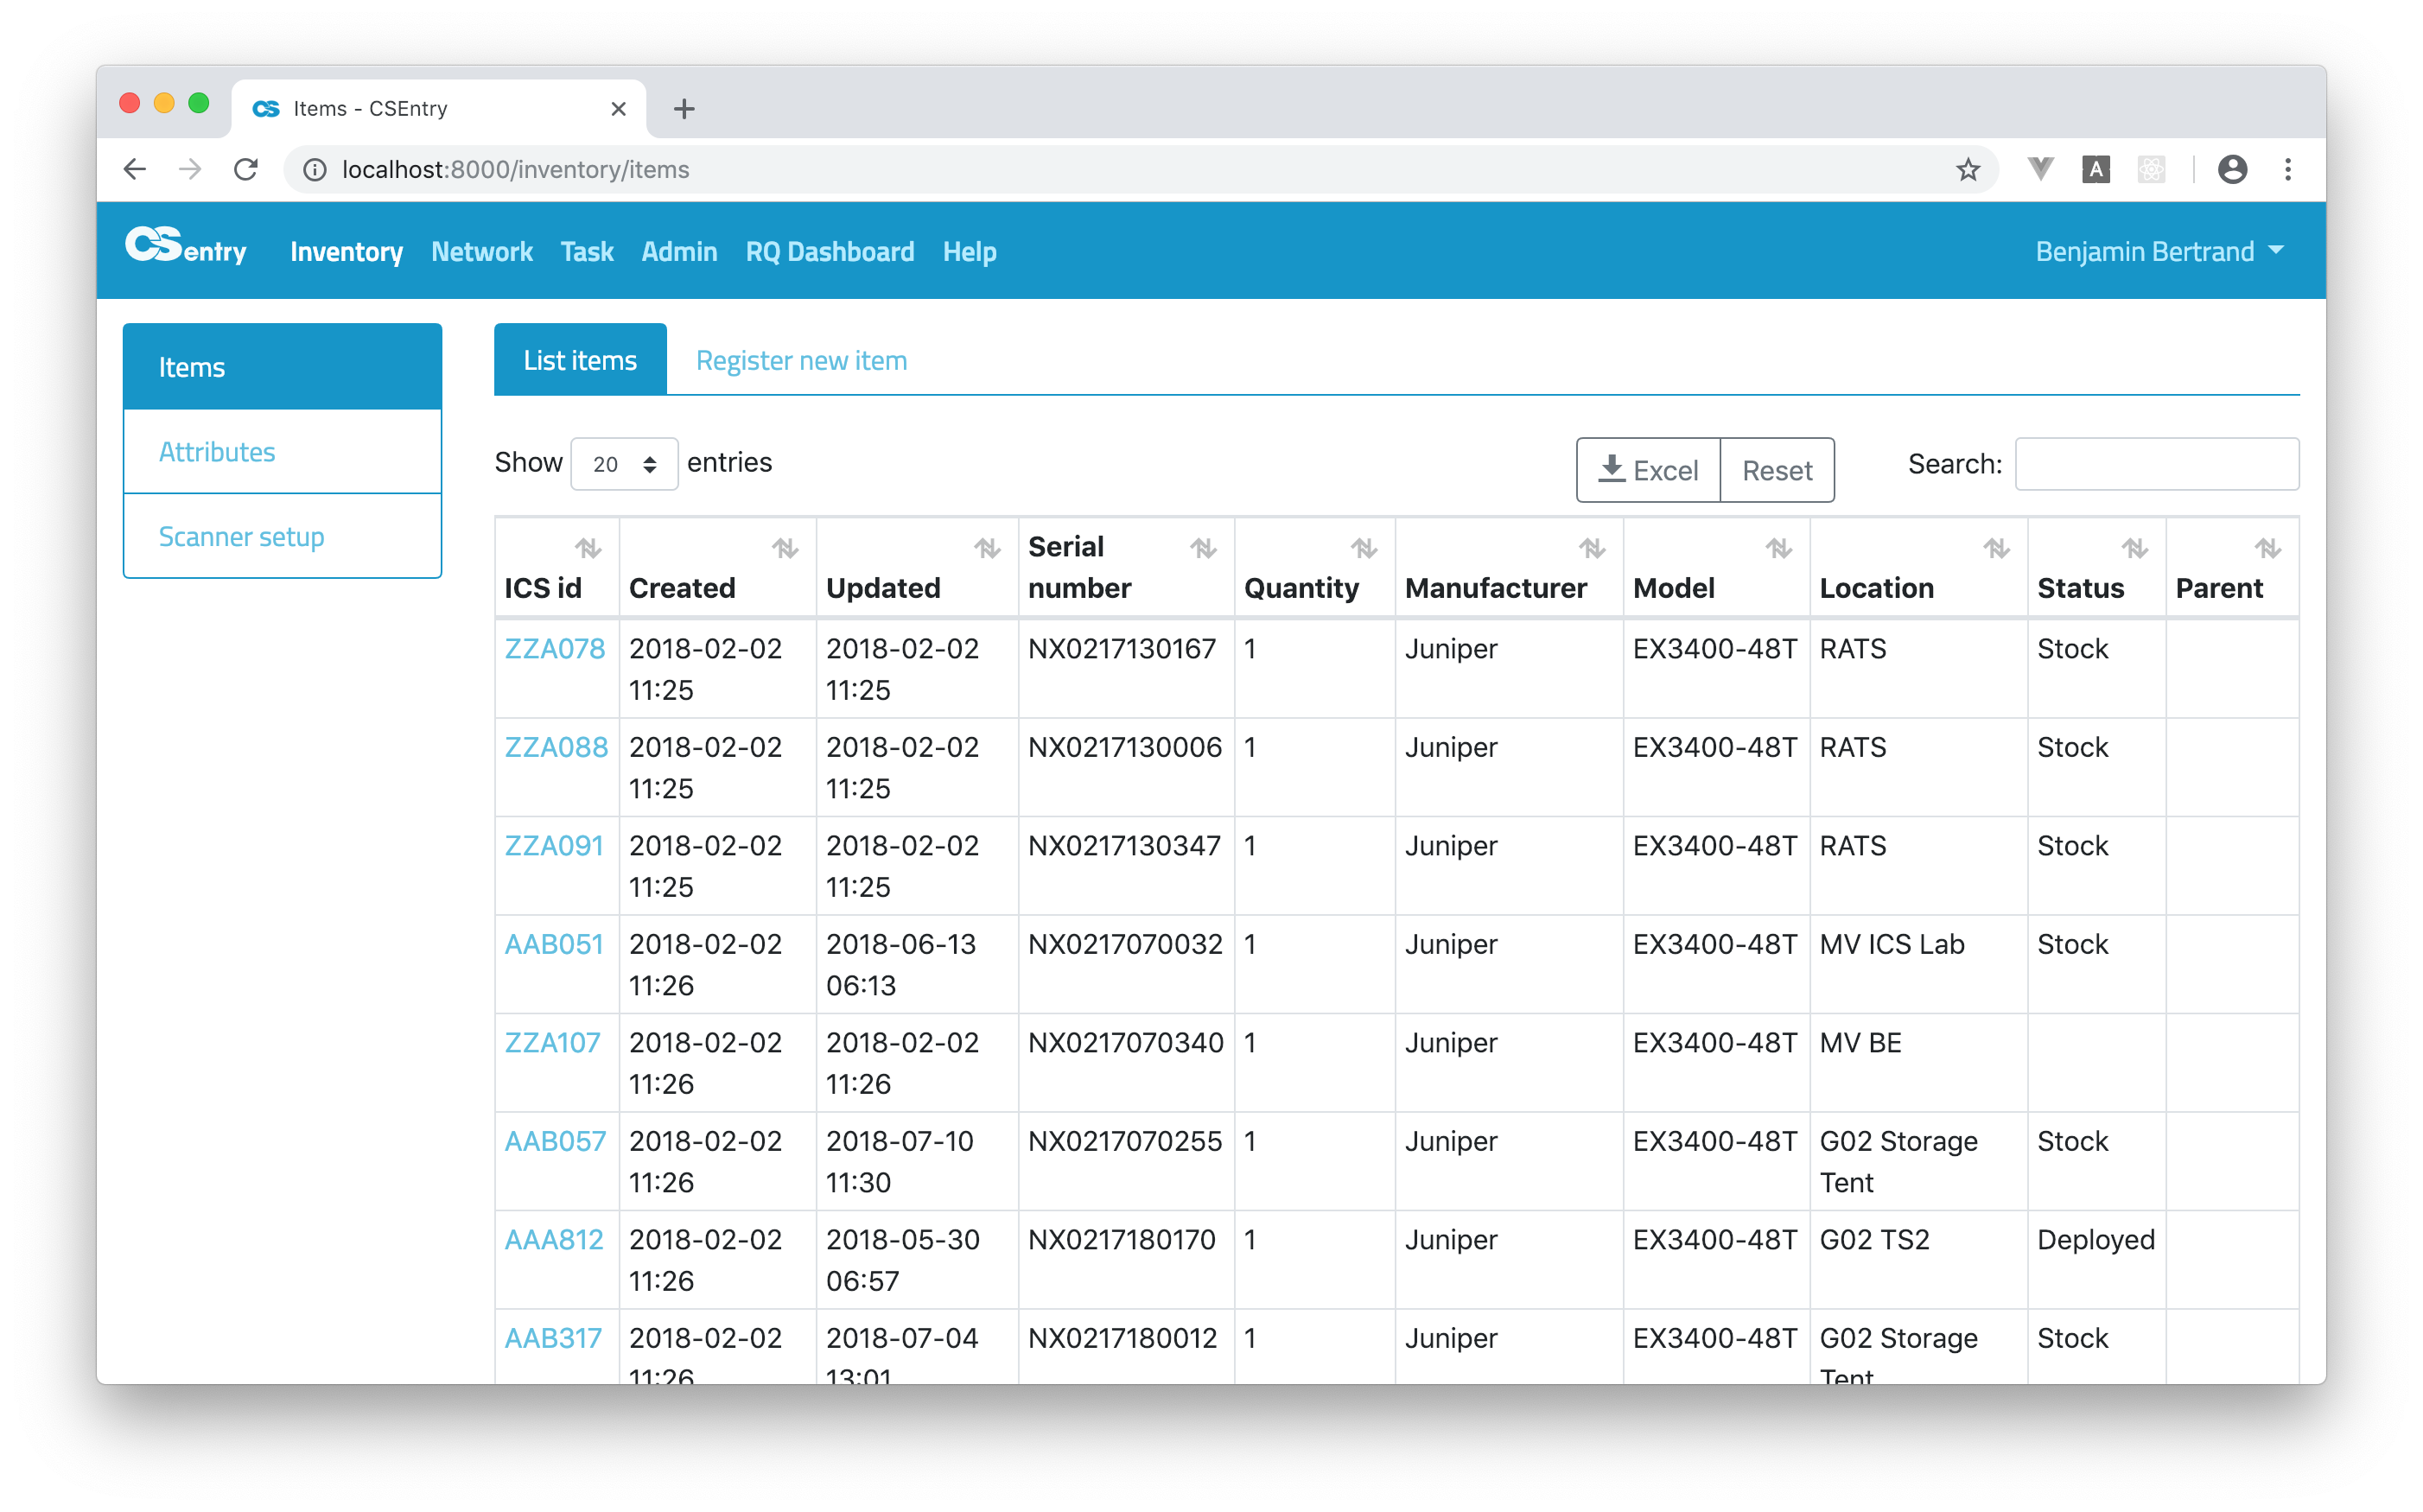
Inventory
CSEntry provides an inventory to track physical items.
Each item is identified by a unique ICS id composed of 3 letters and 3 digits (e.g. AAA001). The item should be associated to an ID by scanning a pre-printed label.
Ids starting by ZZ are temporary ids that are not linked to a label yet. They can be converted to a real id later. Only temporary ids can be changed.
An item can have a parent. Only ICS id and serial number fields are mandatory. The serial number is a free text field.
The items page of the inventory lists all existing items.
Search
You can find a specific item or group of items by using the search box. The search input (as well as column ordering and paging position) is saved locally in your browser and restored when you reload the page. To clear the state of the table, click on the Reset button.
Elasticsearch is used as the full-text search engine and allows to use a query string “mini-language”.
To perform a free text search, simply enter a text string. For example, if you’re looking for Juniper devices, enter
juniper. Notice that the search is case insensitive.

You can search a serial number or ICS id.
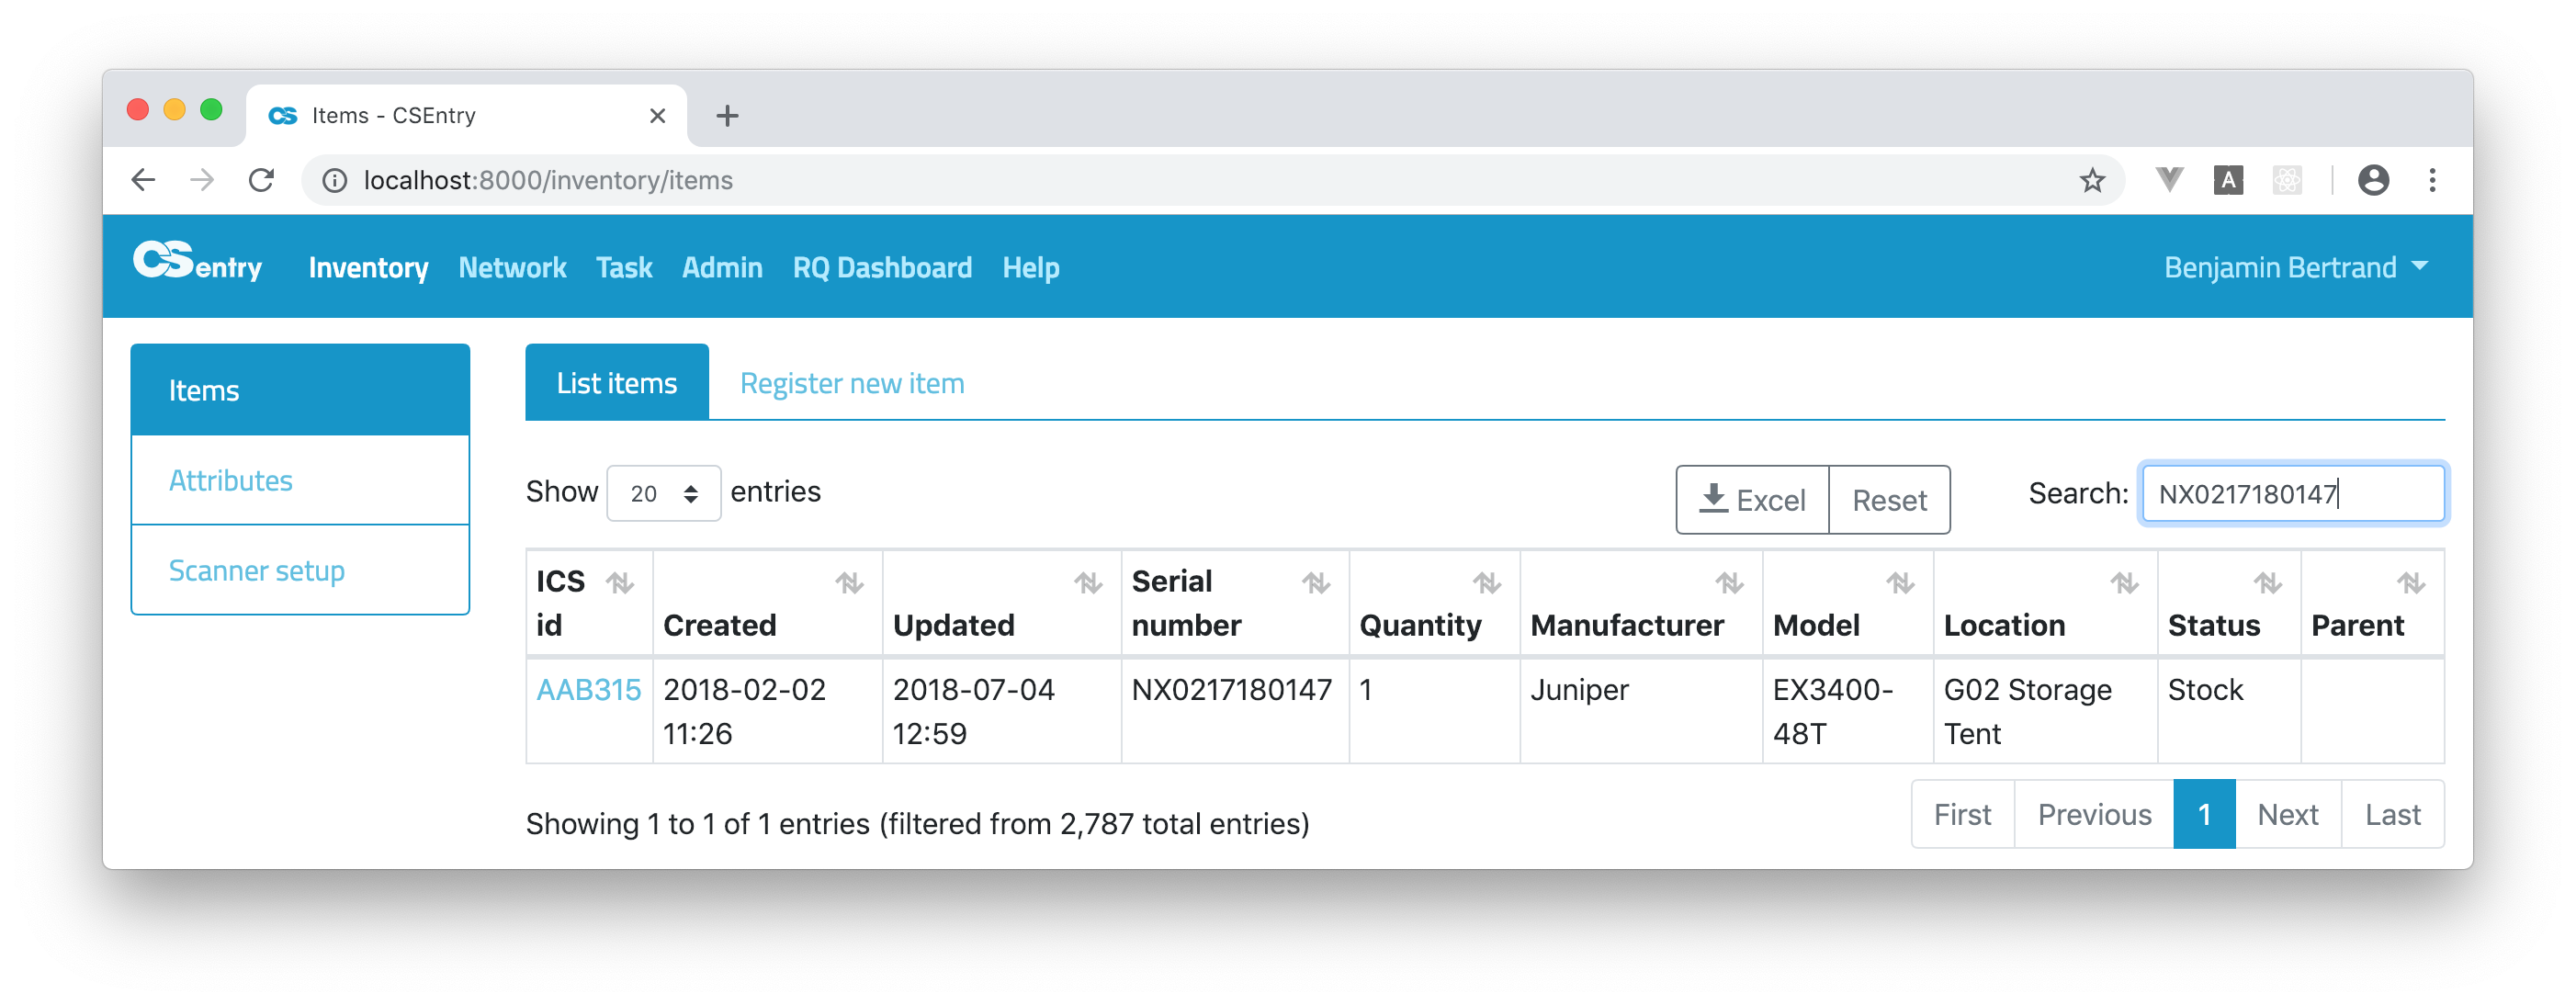

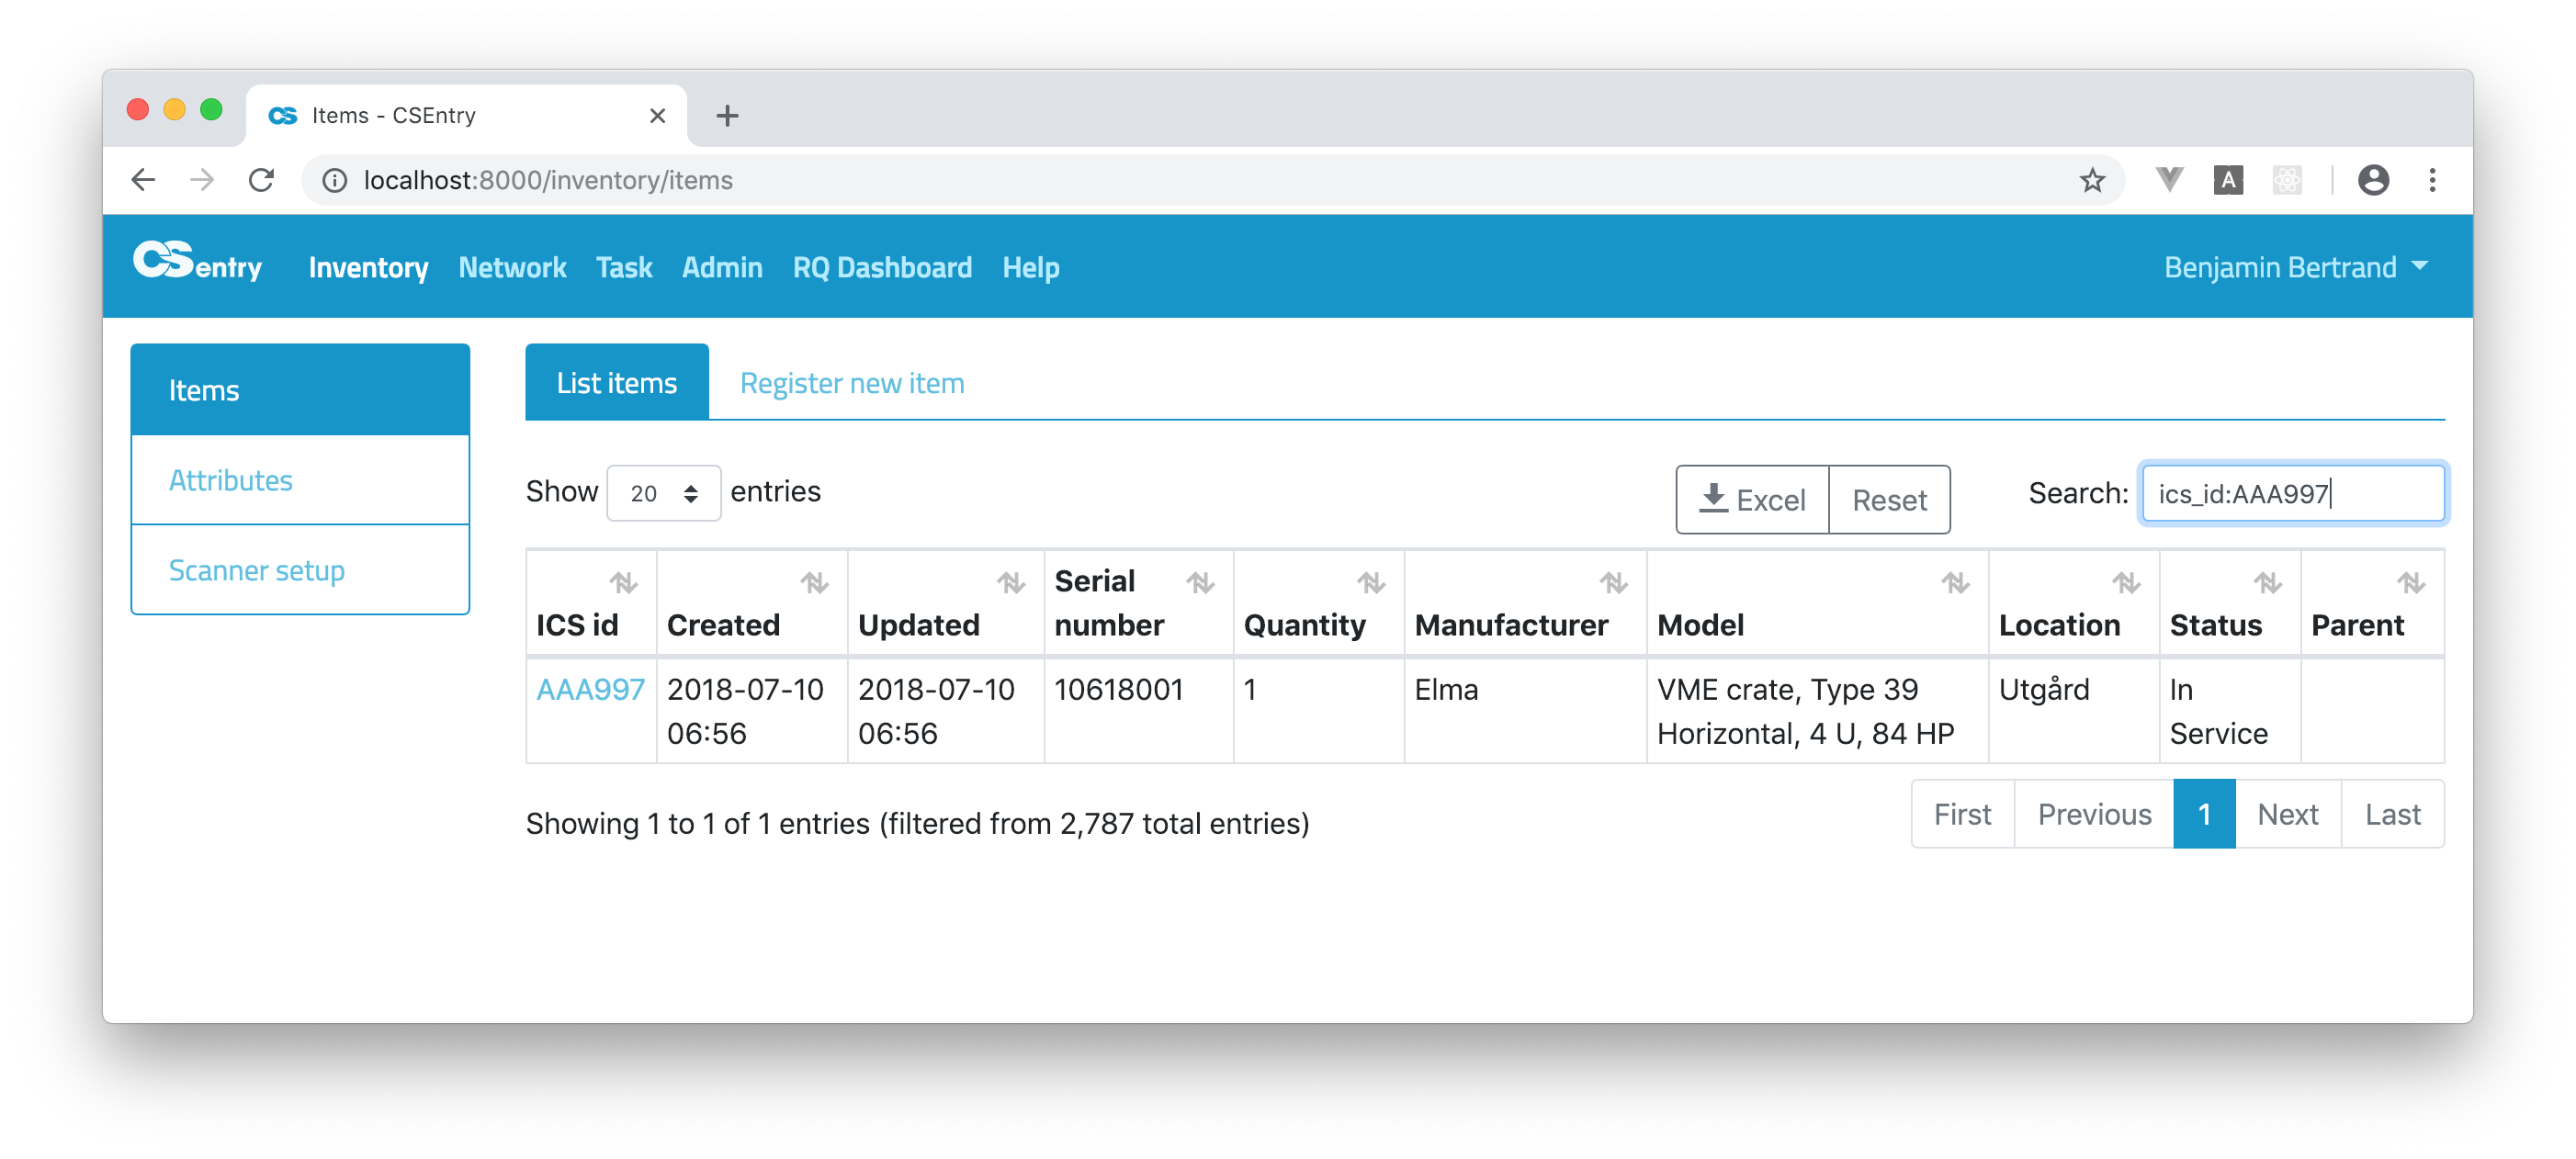
As you can see on the above screenshot, by default the search is performed on all fields. The id
AAA997was found both in the ICS id and parent fields. You can restrict the search to a specific field:ics_id:AAA997
By default, all terms are optional, as long as one term matches. A search for
foo bar bazwill find any document that contains one or more of foo or bar or baz. Boolean operators can be used to provide more control. The preferred operators are+(this term must be present) and-(this term must not be present). For example to search all juniper devices not at RATS:juniper -location:rats

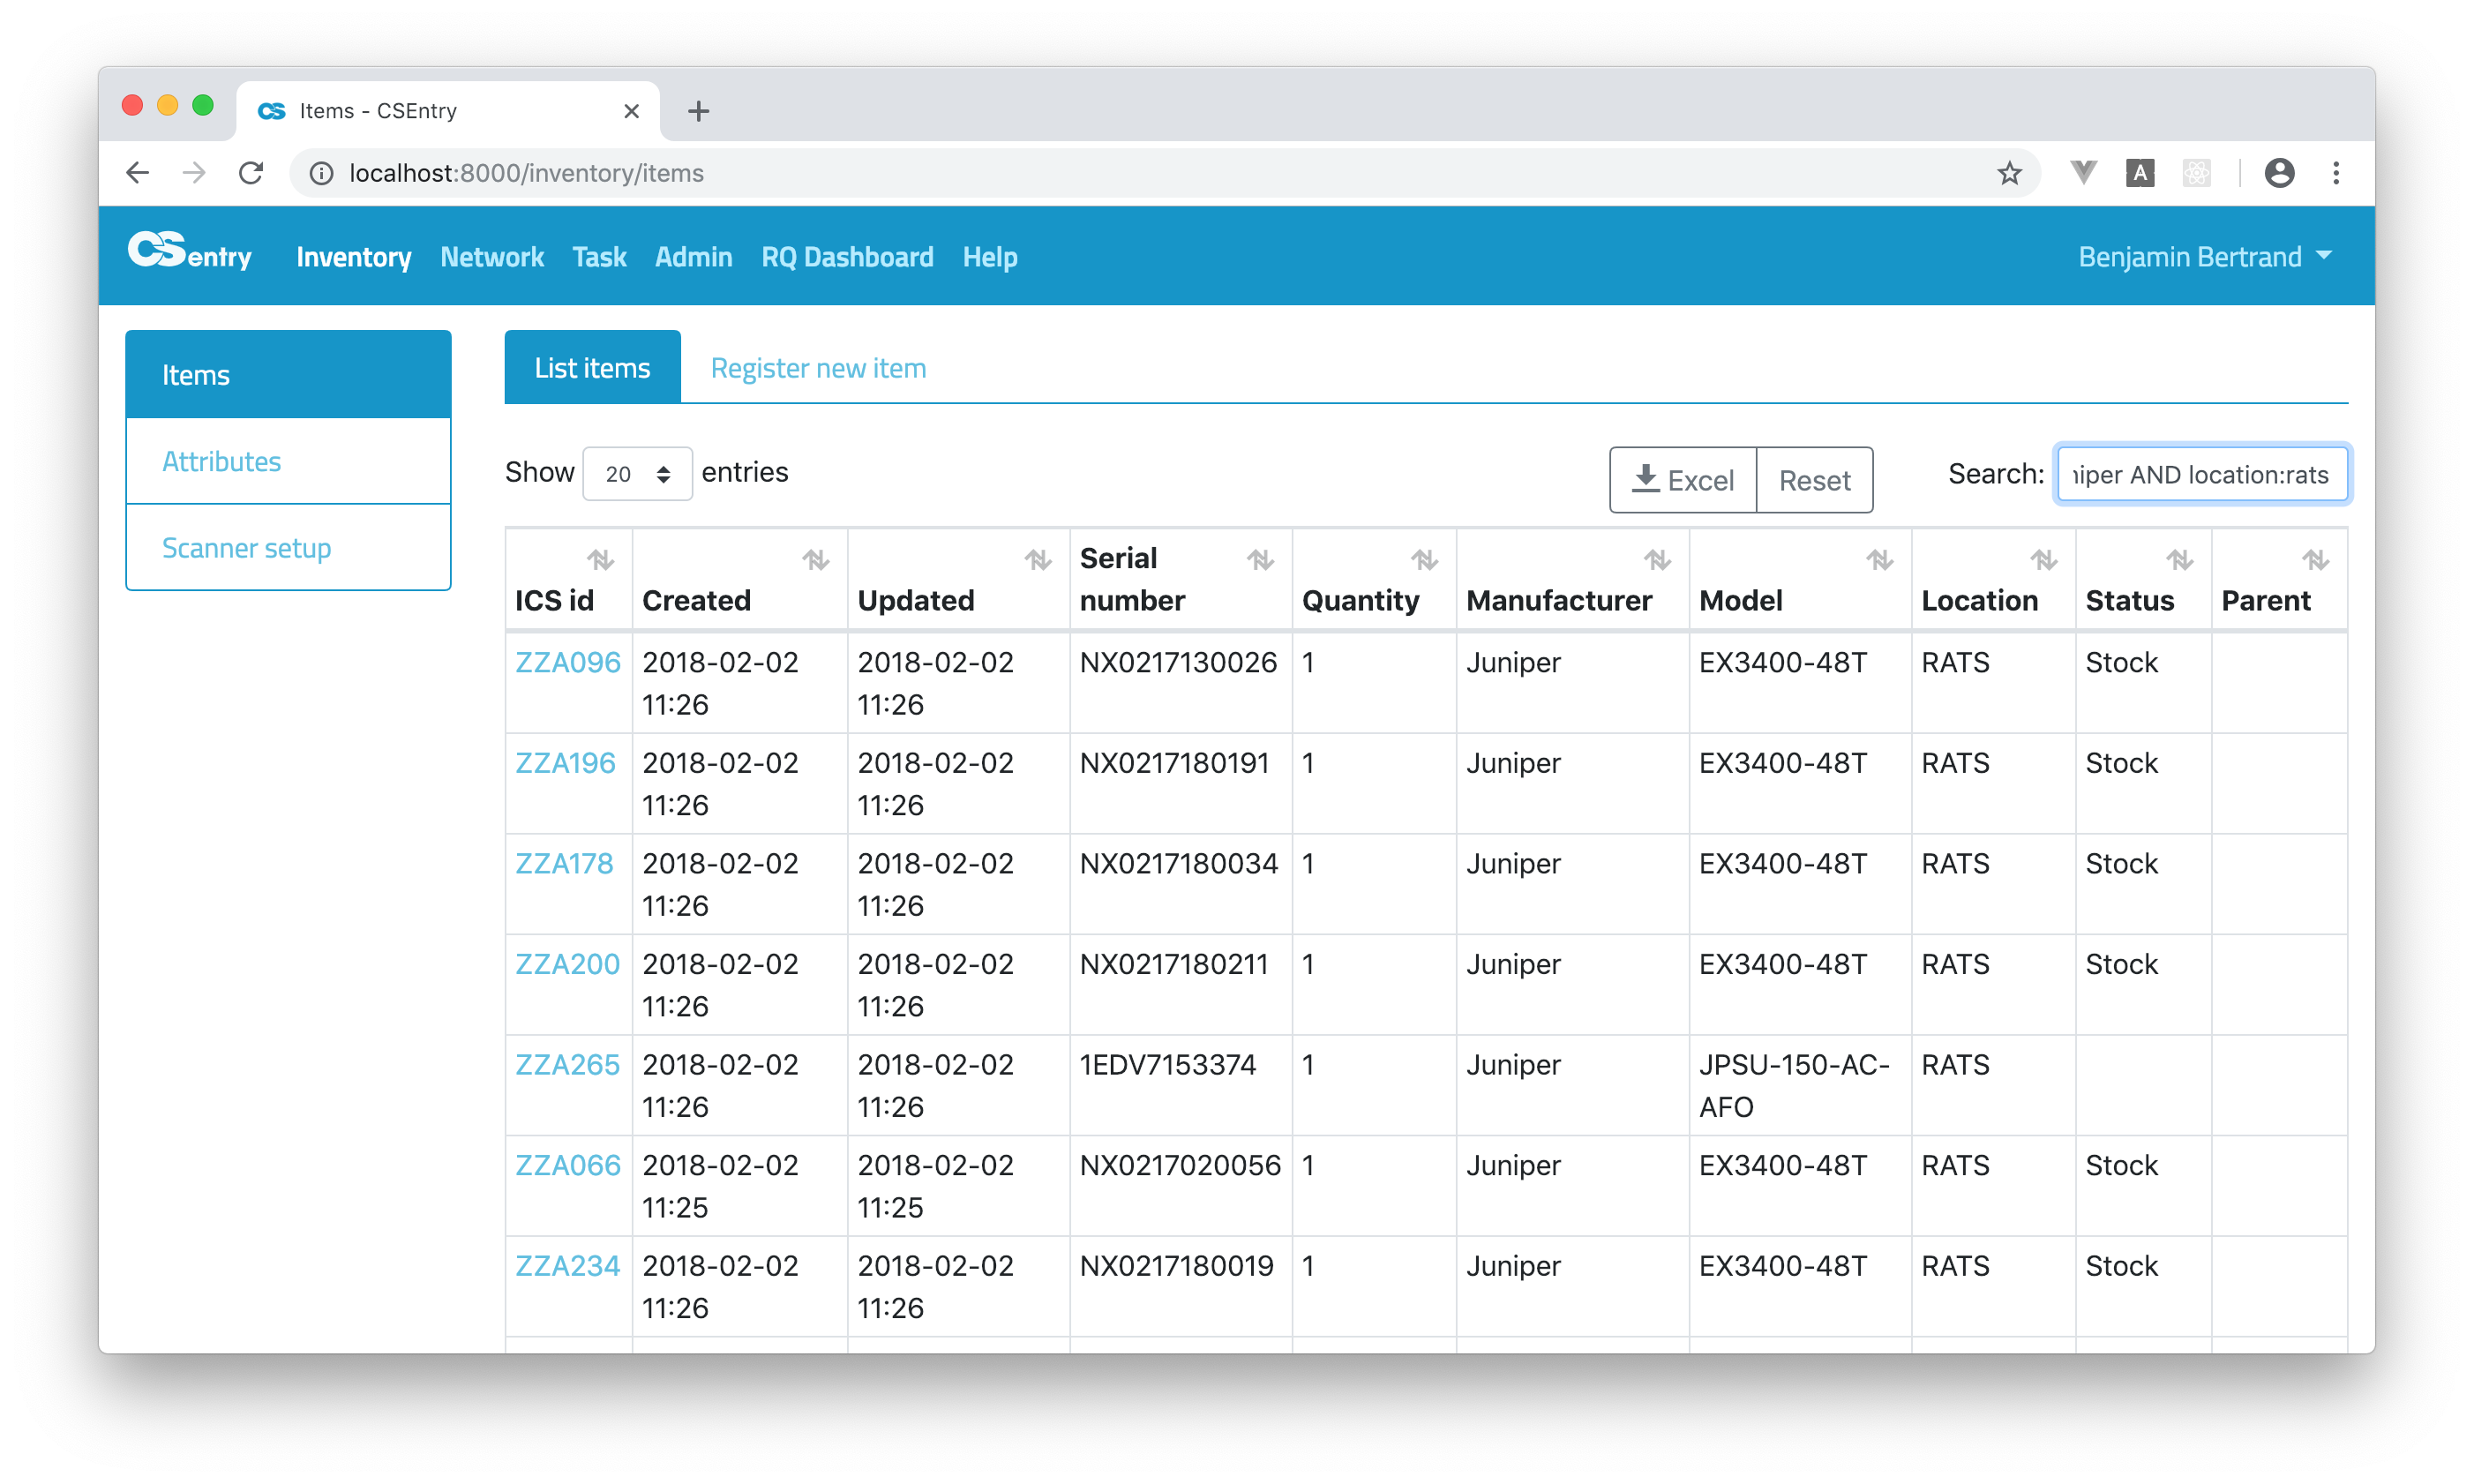
You can also use the familiar boolean operators
AND,ORandNOT(also written&&,||and!). Here is how to search all juniper devices that are at RATS:juniper AND location:rats
Wildcard searches can be run using
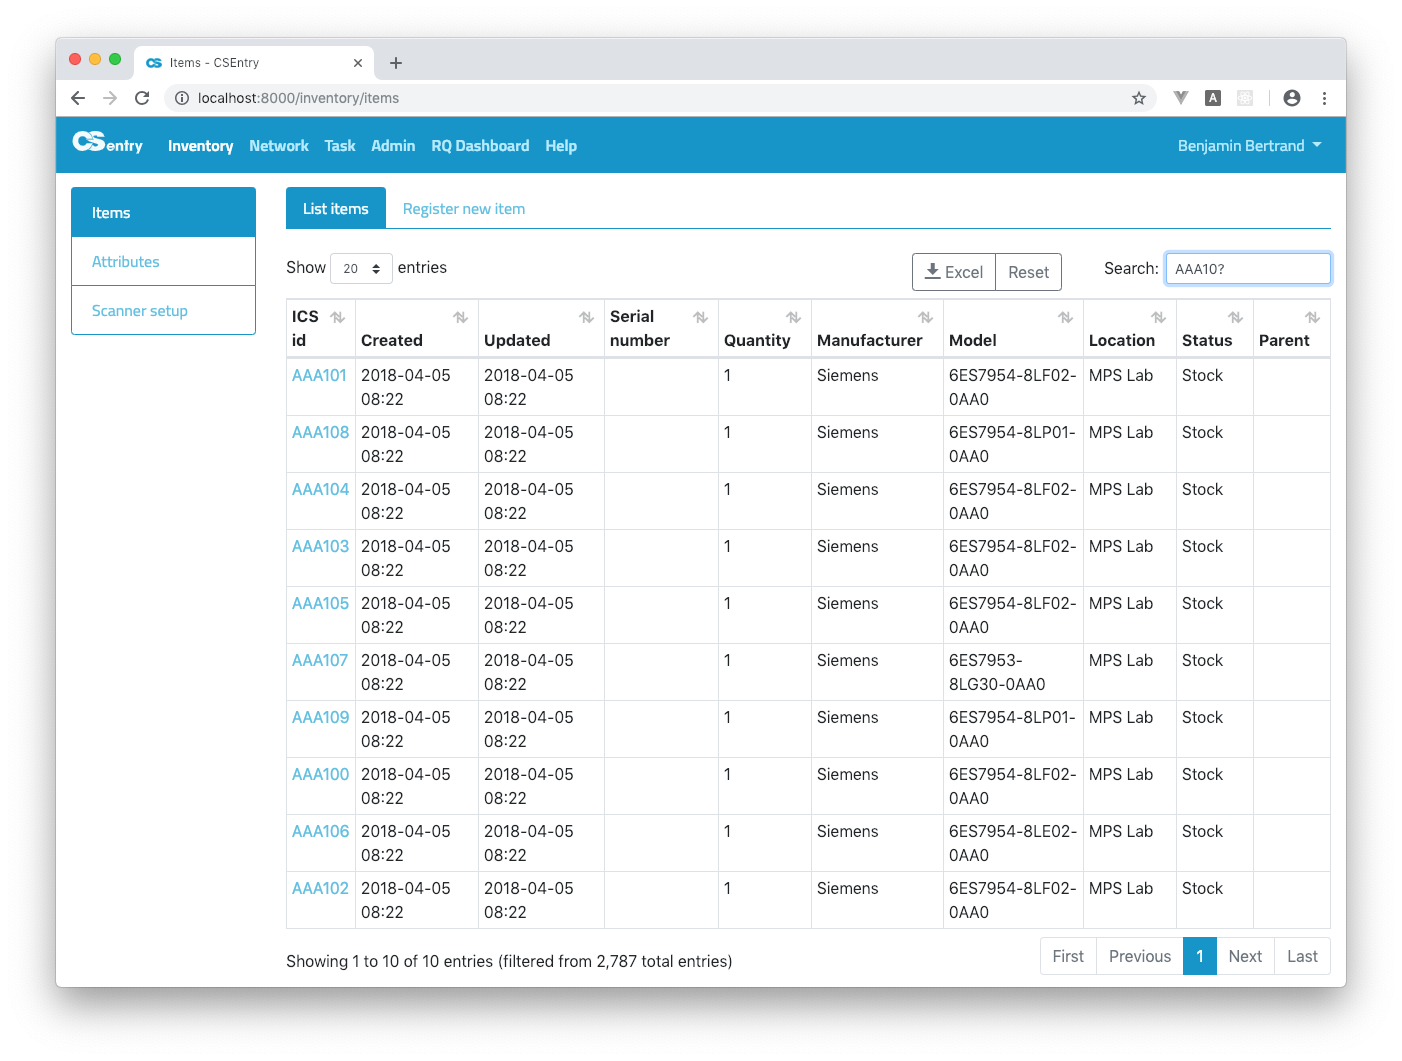
?to replace a single character and*to replace zero or more characters:AAA10?Be aware that wildcard queries can use an enormous amount of memory and perform very badly — just think how many terms need to be queried to match the query string
"a* b* c*".
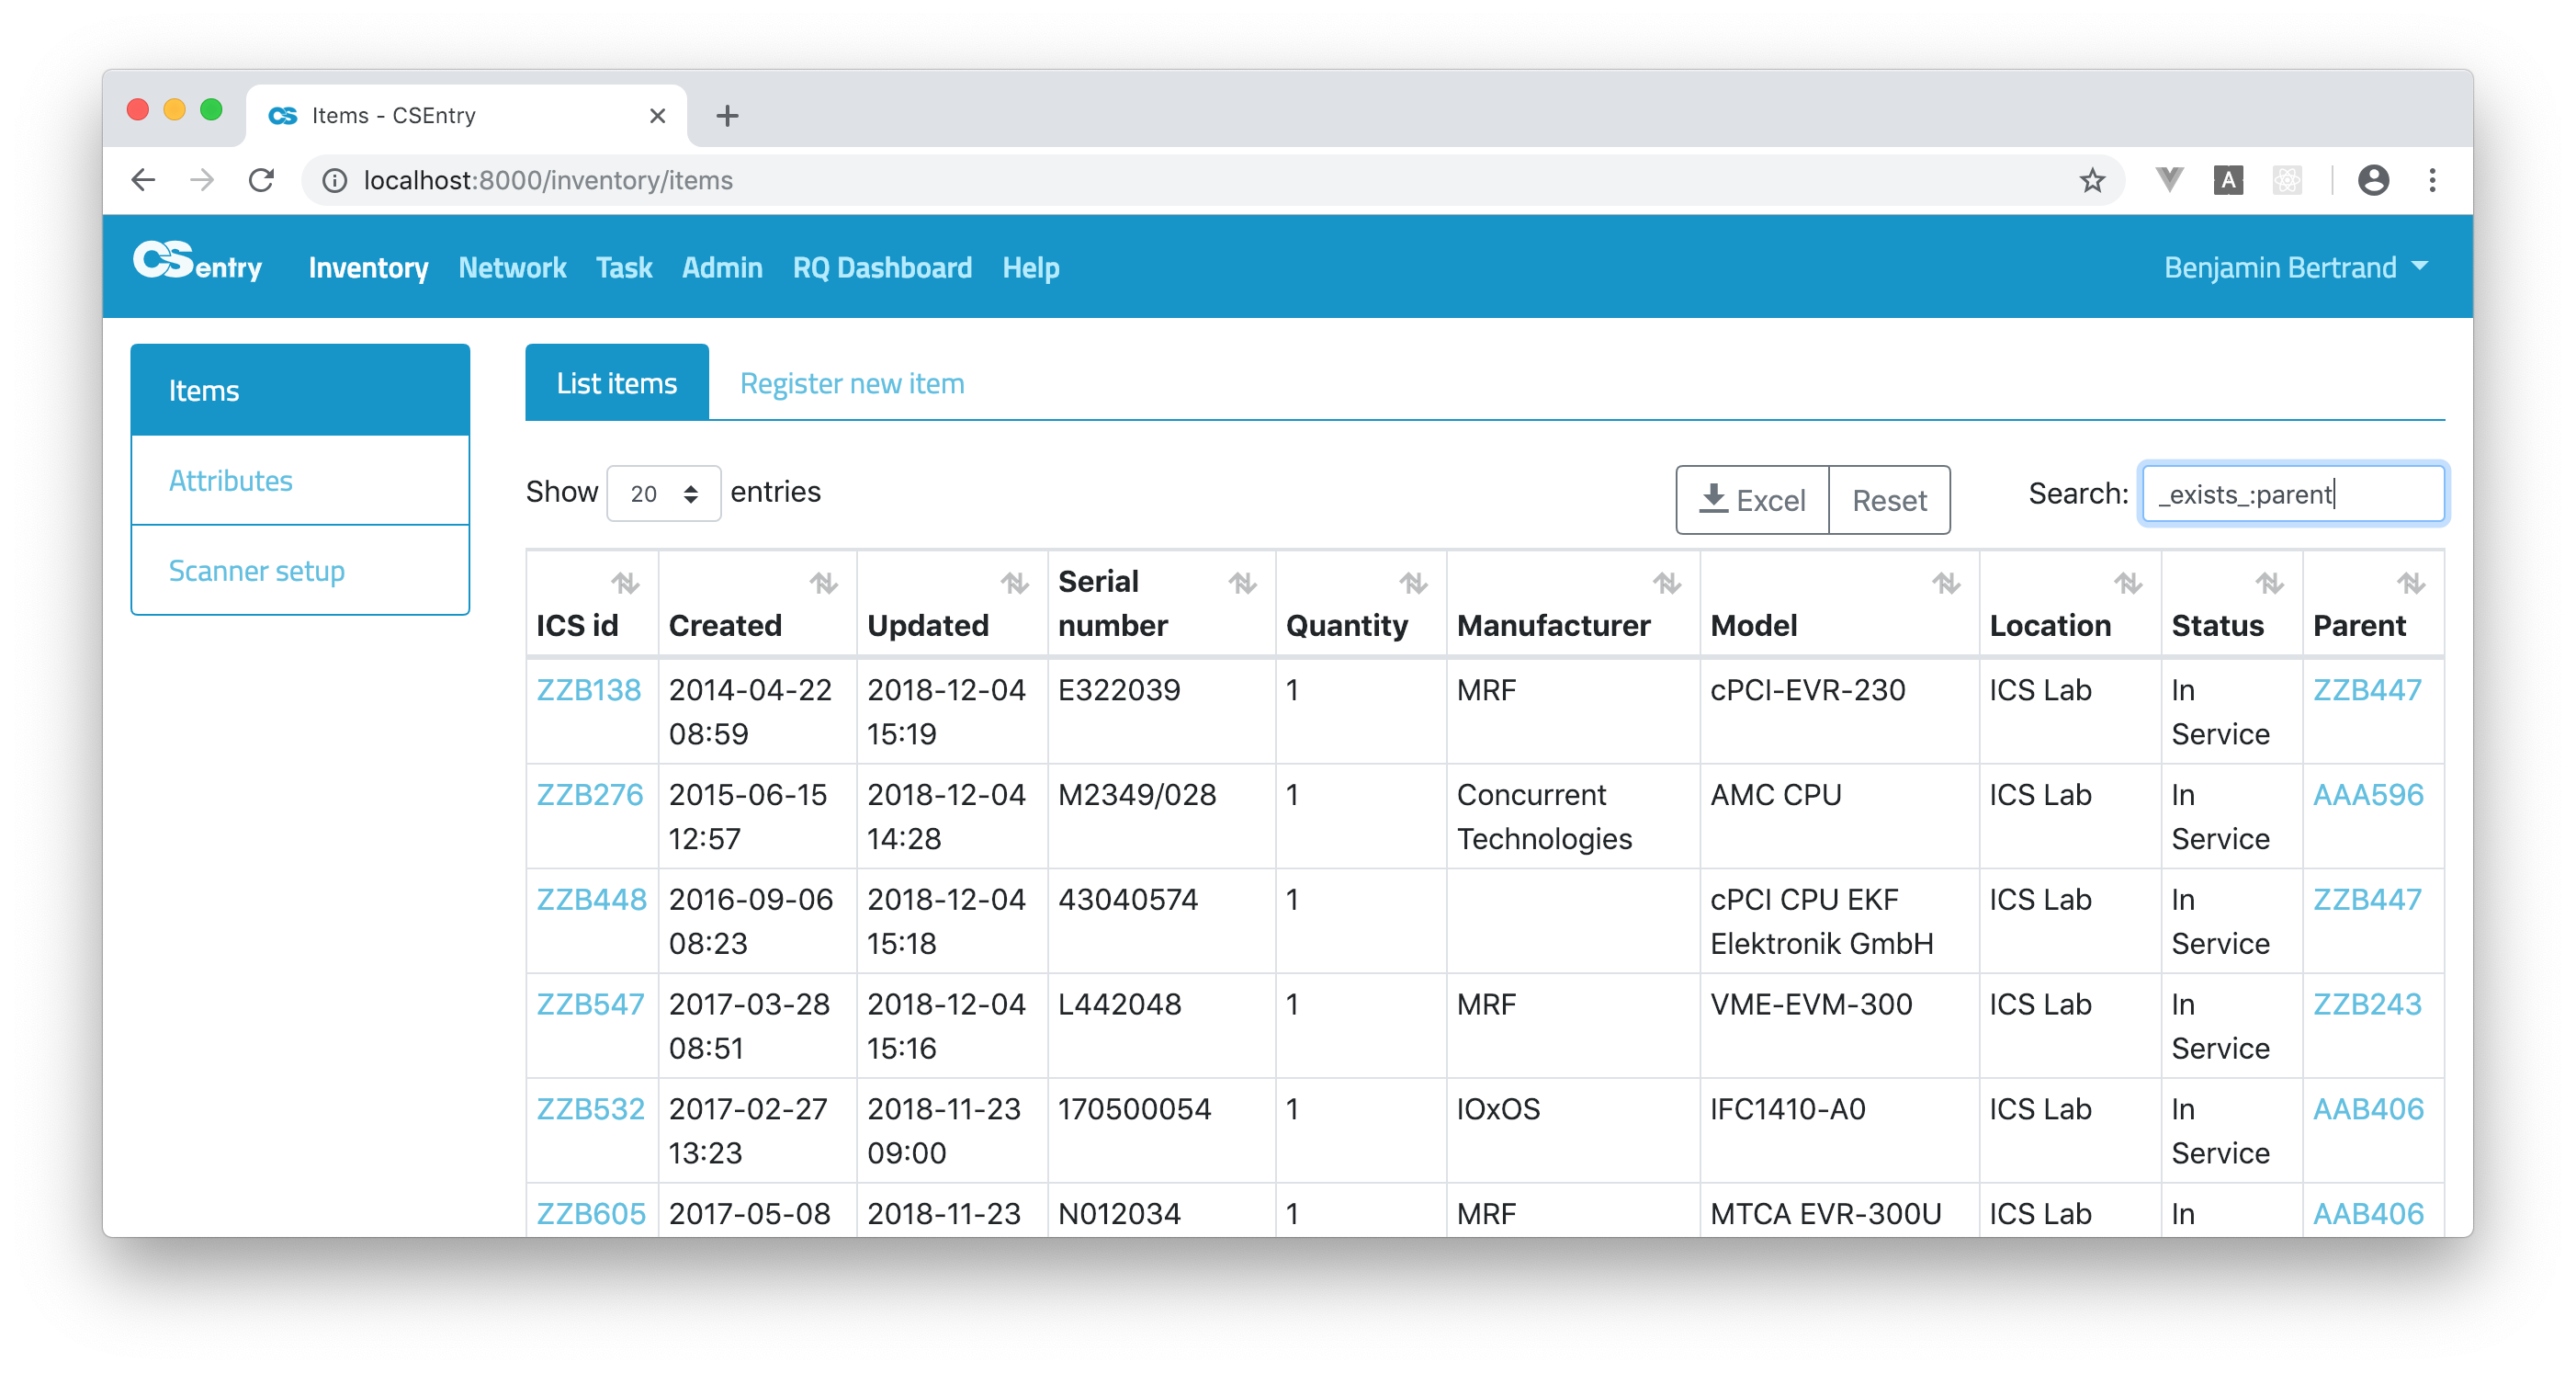
You can search items where a field has any non-null value. To get items with a parent:
_exists_:parent
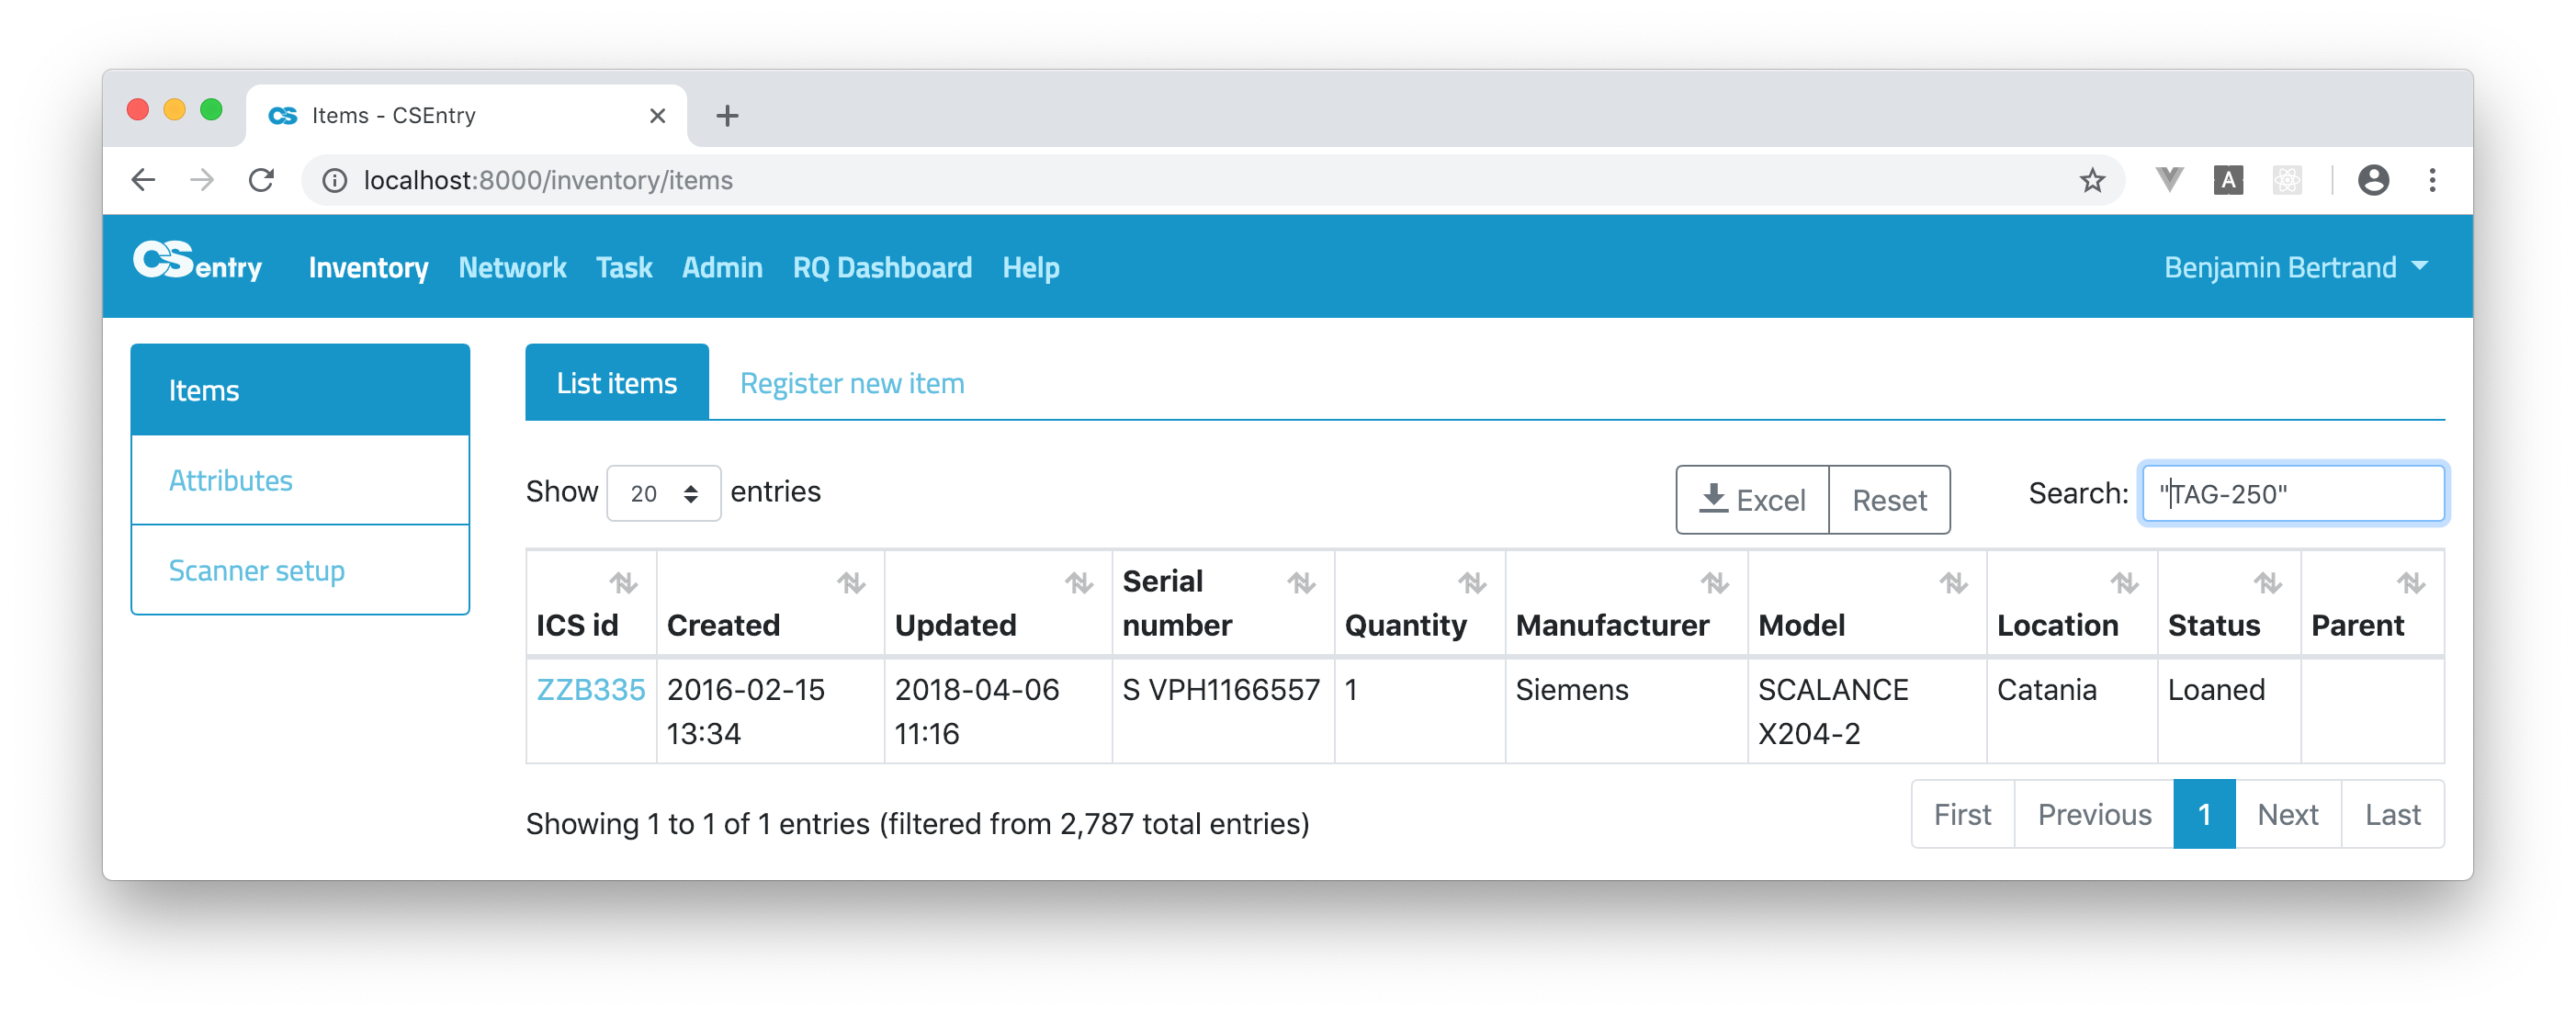
To search a string that includes reserved characters
+ - = && || > < ! ( ) { } [ ] ^ " ~ * ? : \ /, you have to use double quotes. Here is how to search for an old JIRA TAG"TAG-250"or mac adress"7c:e2:ca:64:dd:61".

The complete list of fields that can be searched is the following:
created_at
updated_at
user
ics_id
serial_number
quantity
manufacturer
model
location
status
parent
children
macs
host
stack_member
comments
Check the elasticsearch query string syntax for more details.
Export items to Excel
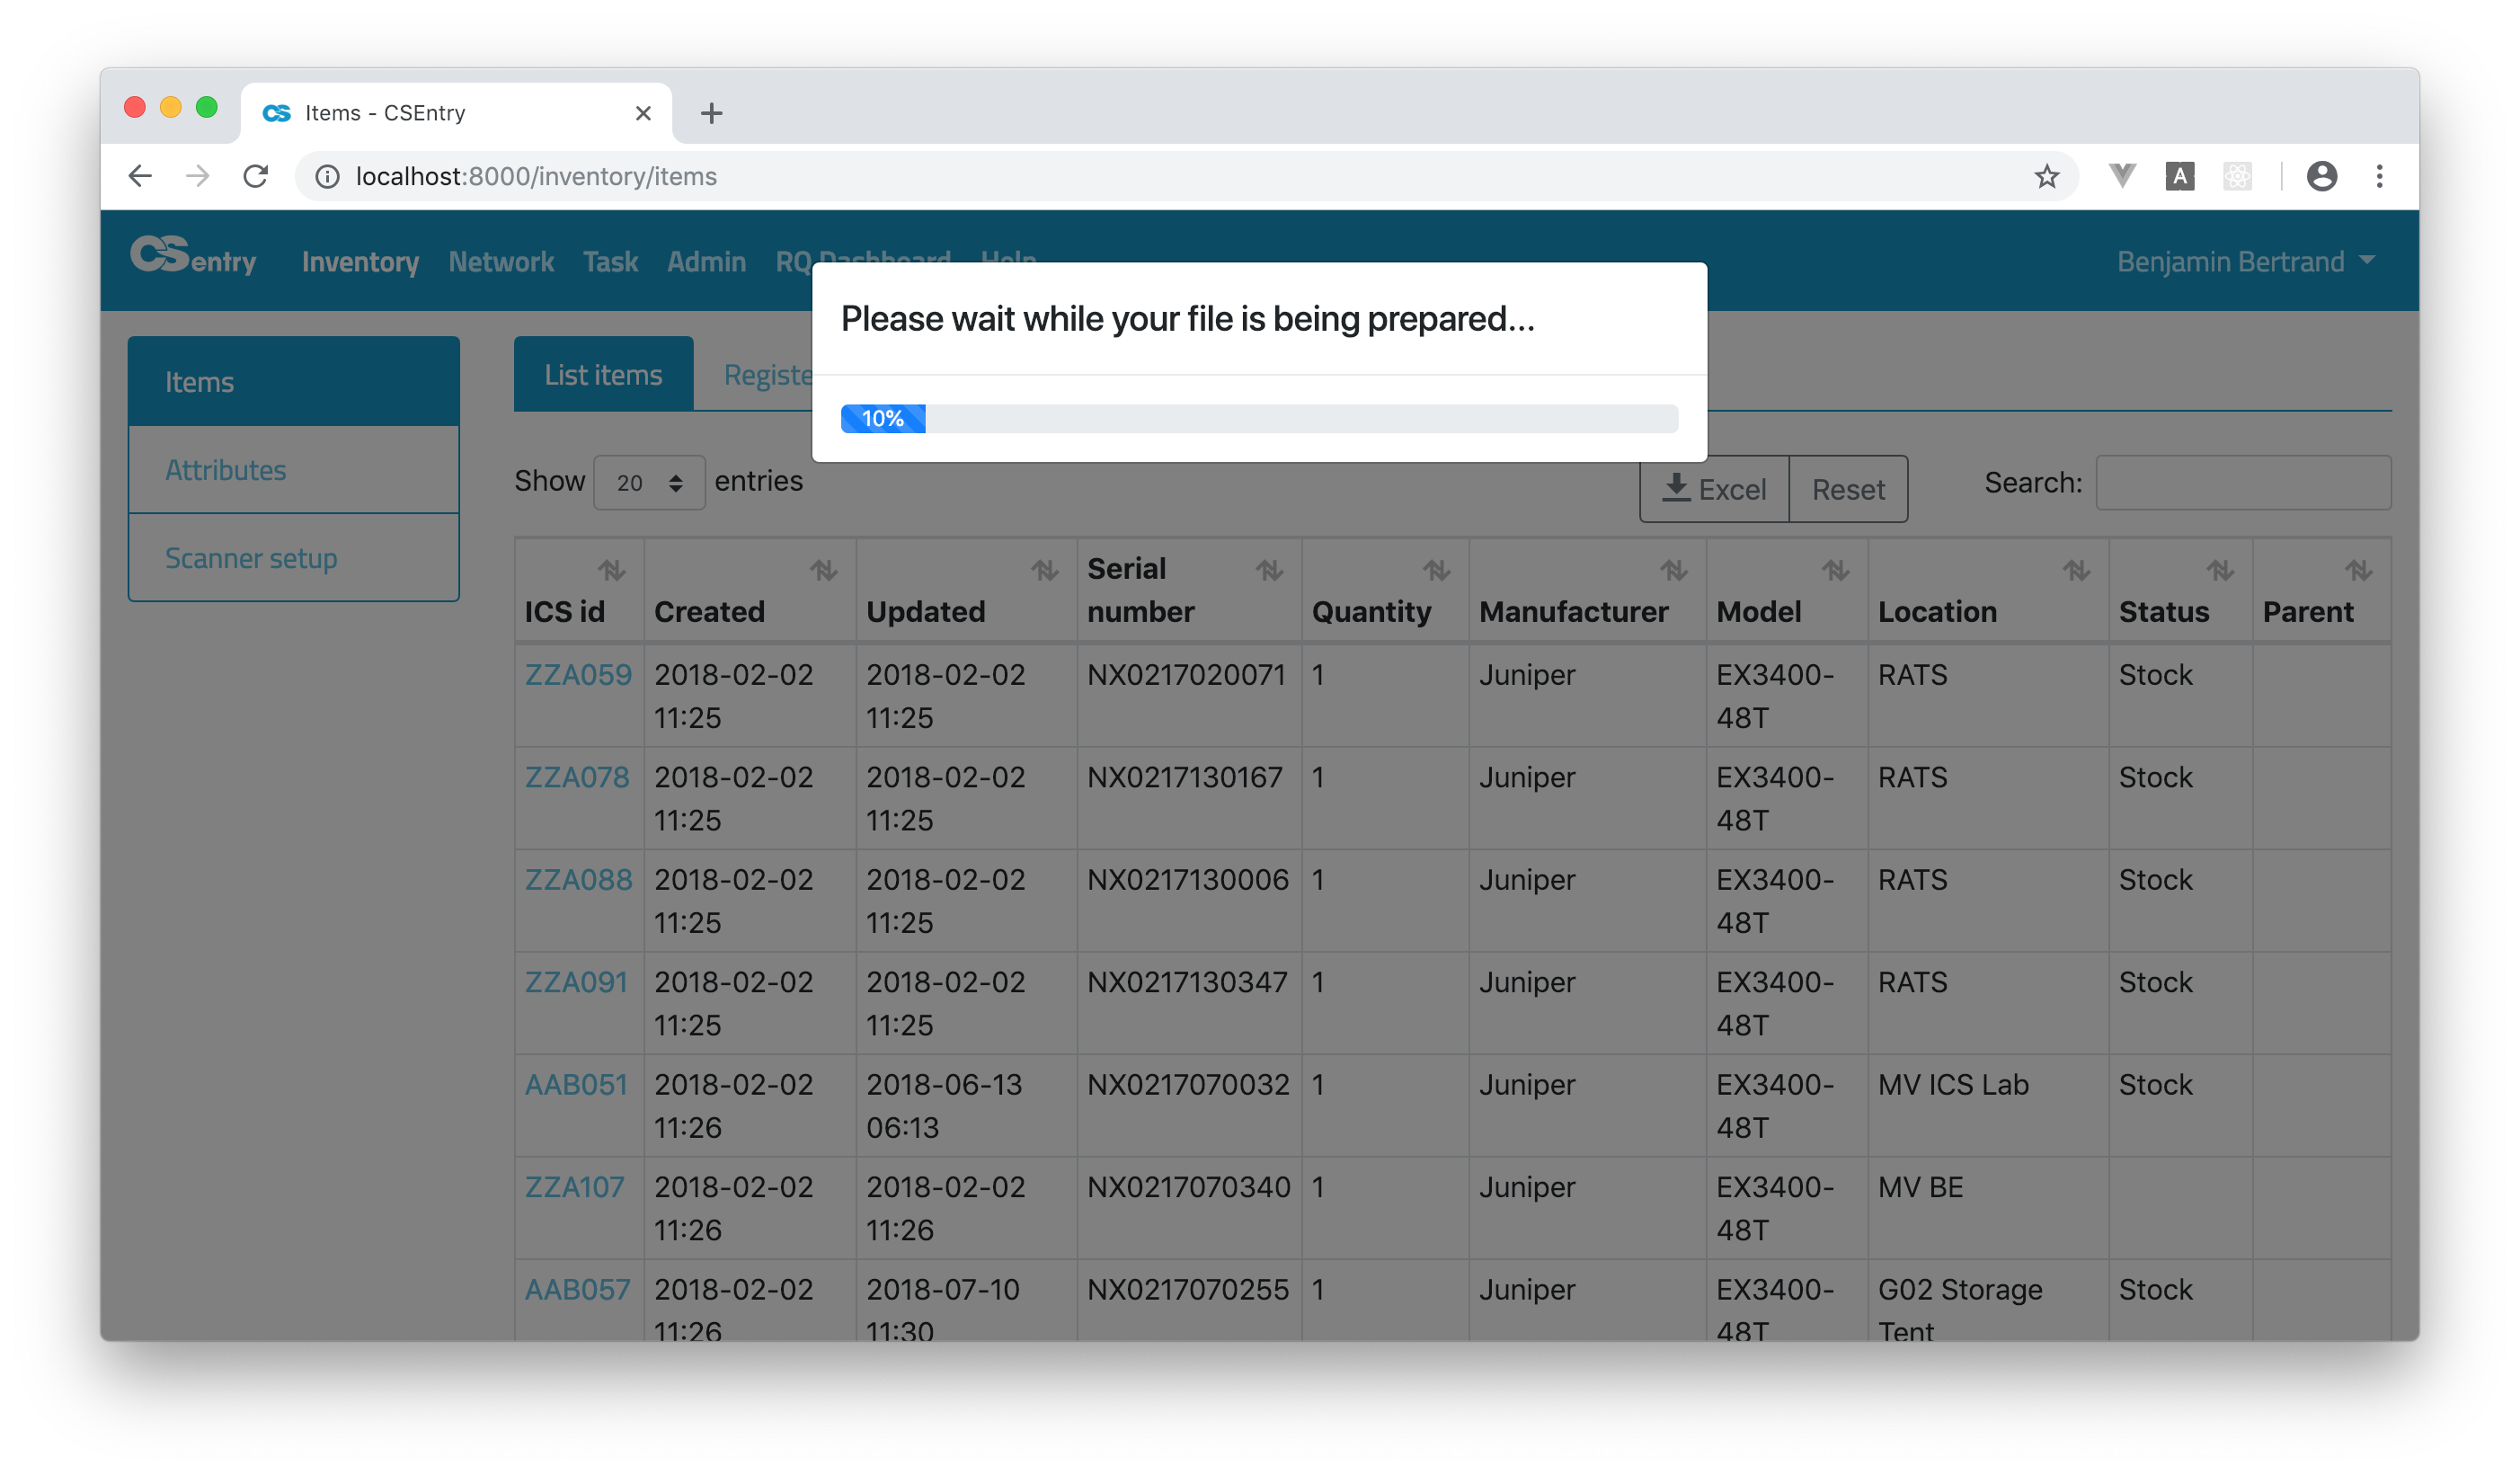
You can export all items to an excel file by clicking on the Excel button. Note that it might take some time depending on the number of items in the database.
View an item
Clicking on the ICS id of an item will take you to the View item page.
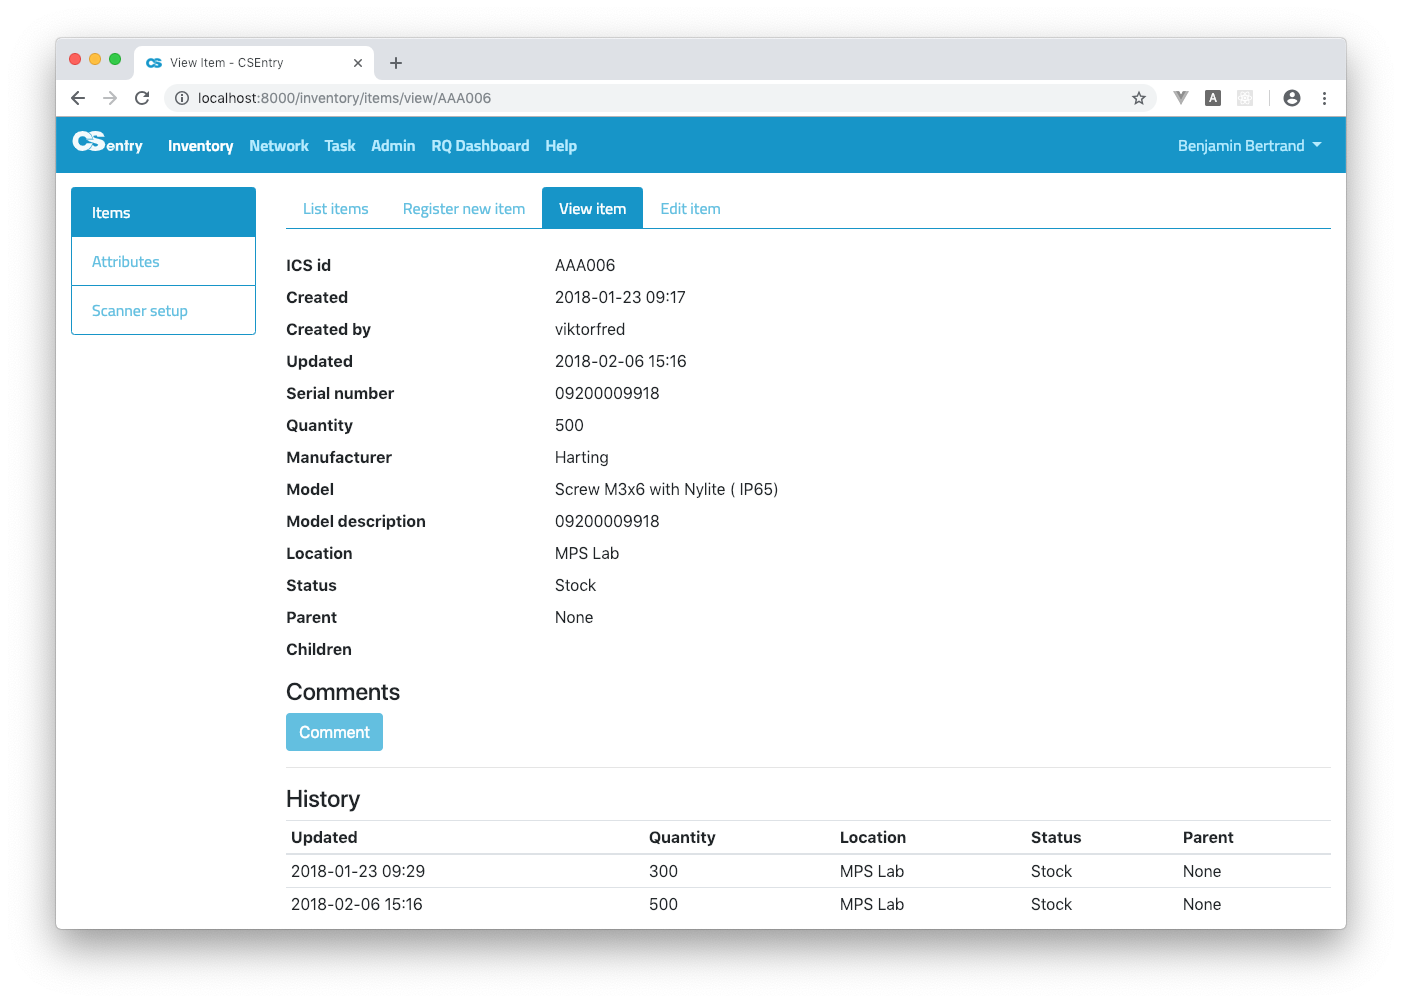
On that page you can see all the item’s details. You can add comments or edit the item.
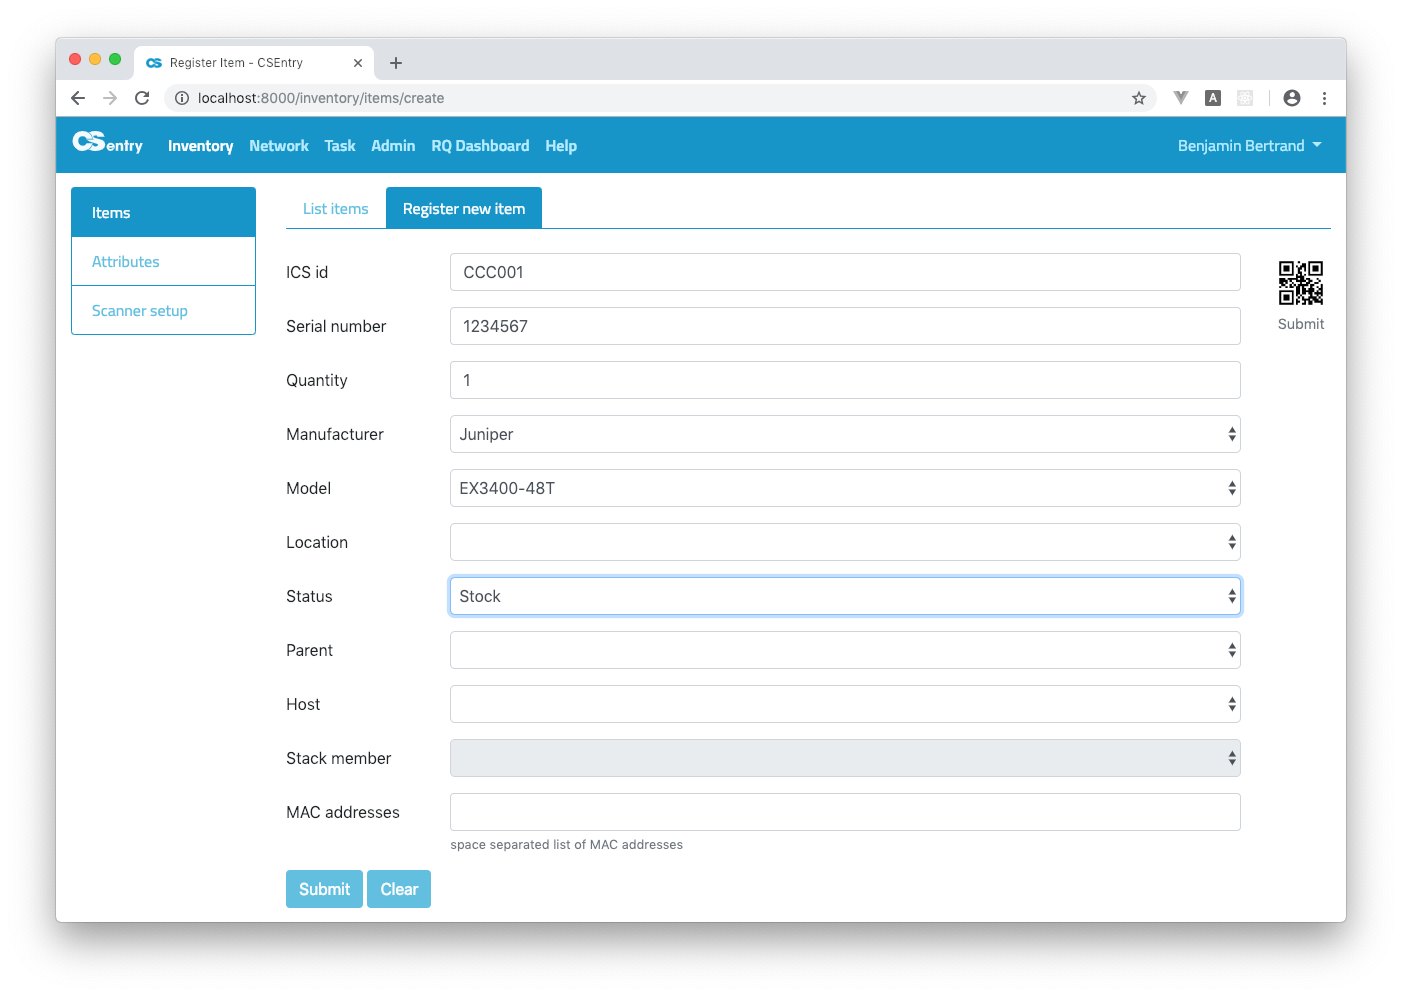
Register a new item
Click on Register new item. You need to enter at least an ICS id and serial number.
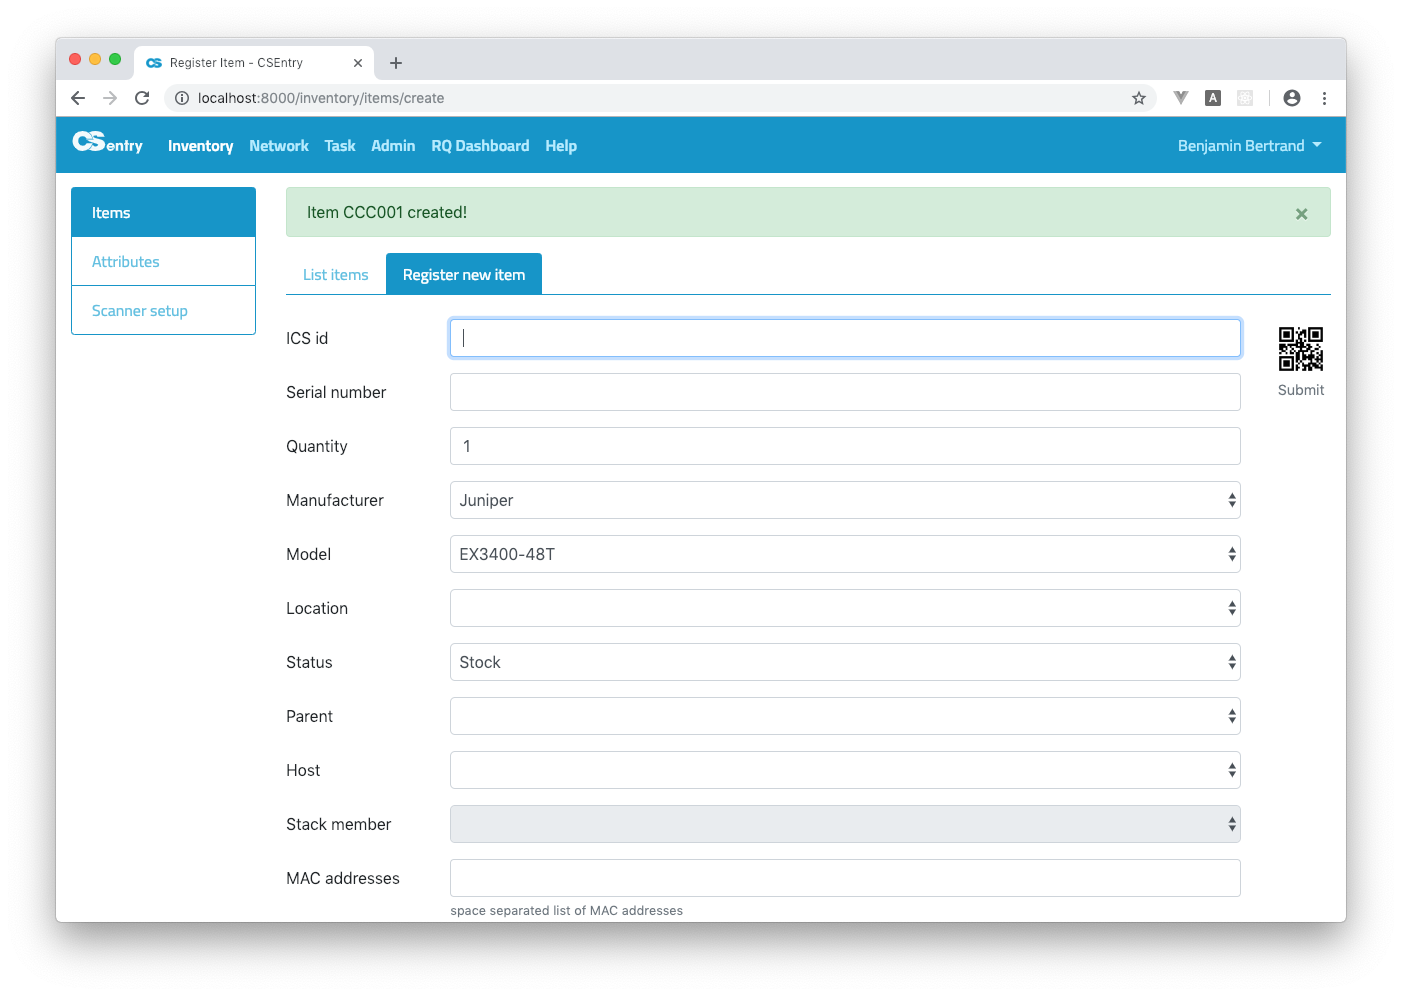
Click on Submit to create the new item:
Note that the last chosen attributes (Manufacturer, Model, Location, Status) are saved to the session. This makes it easy to enter several identical items. You can click on the Clear button to clear all the attributes.
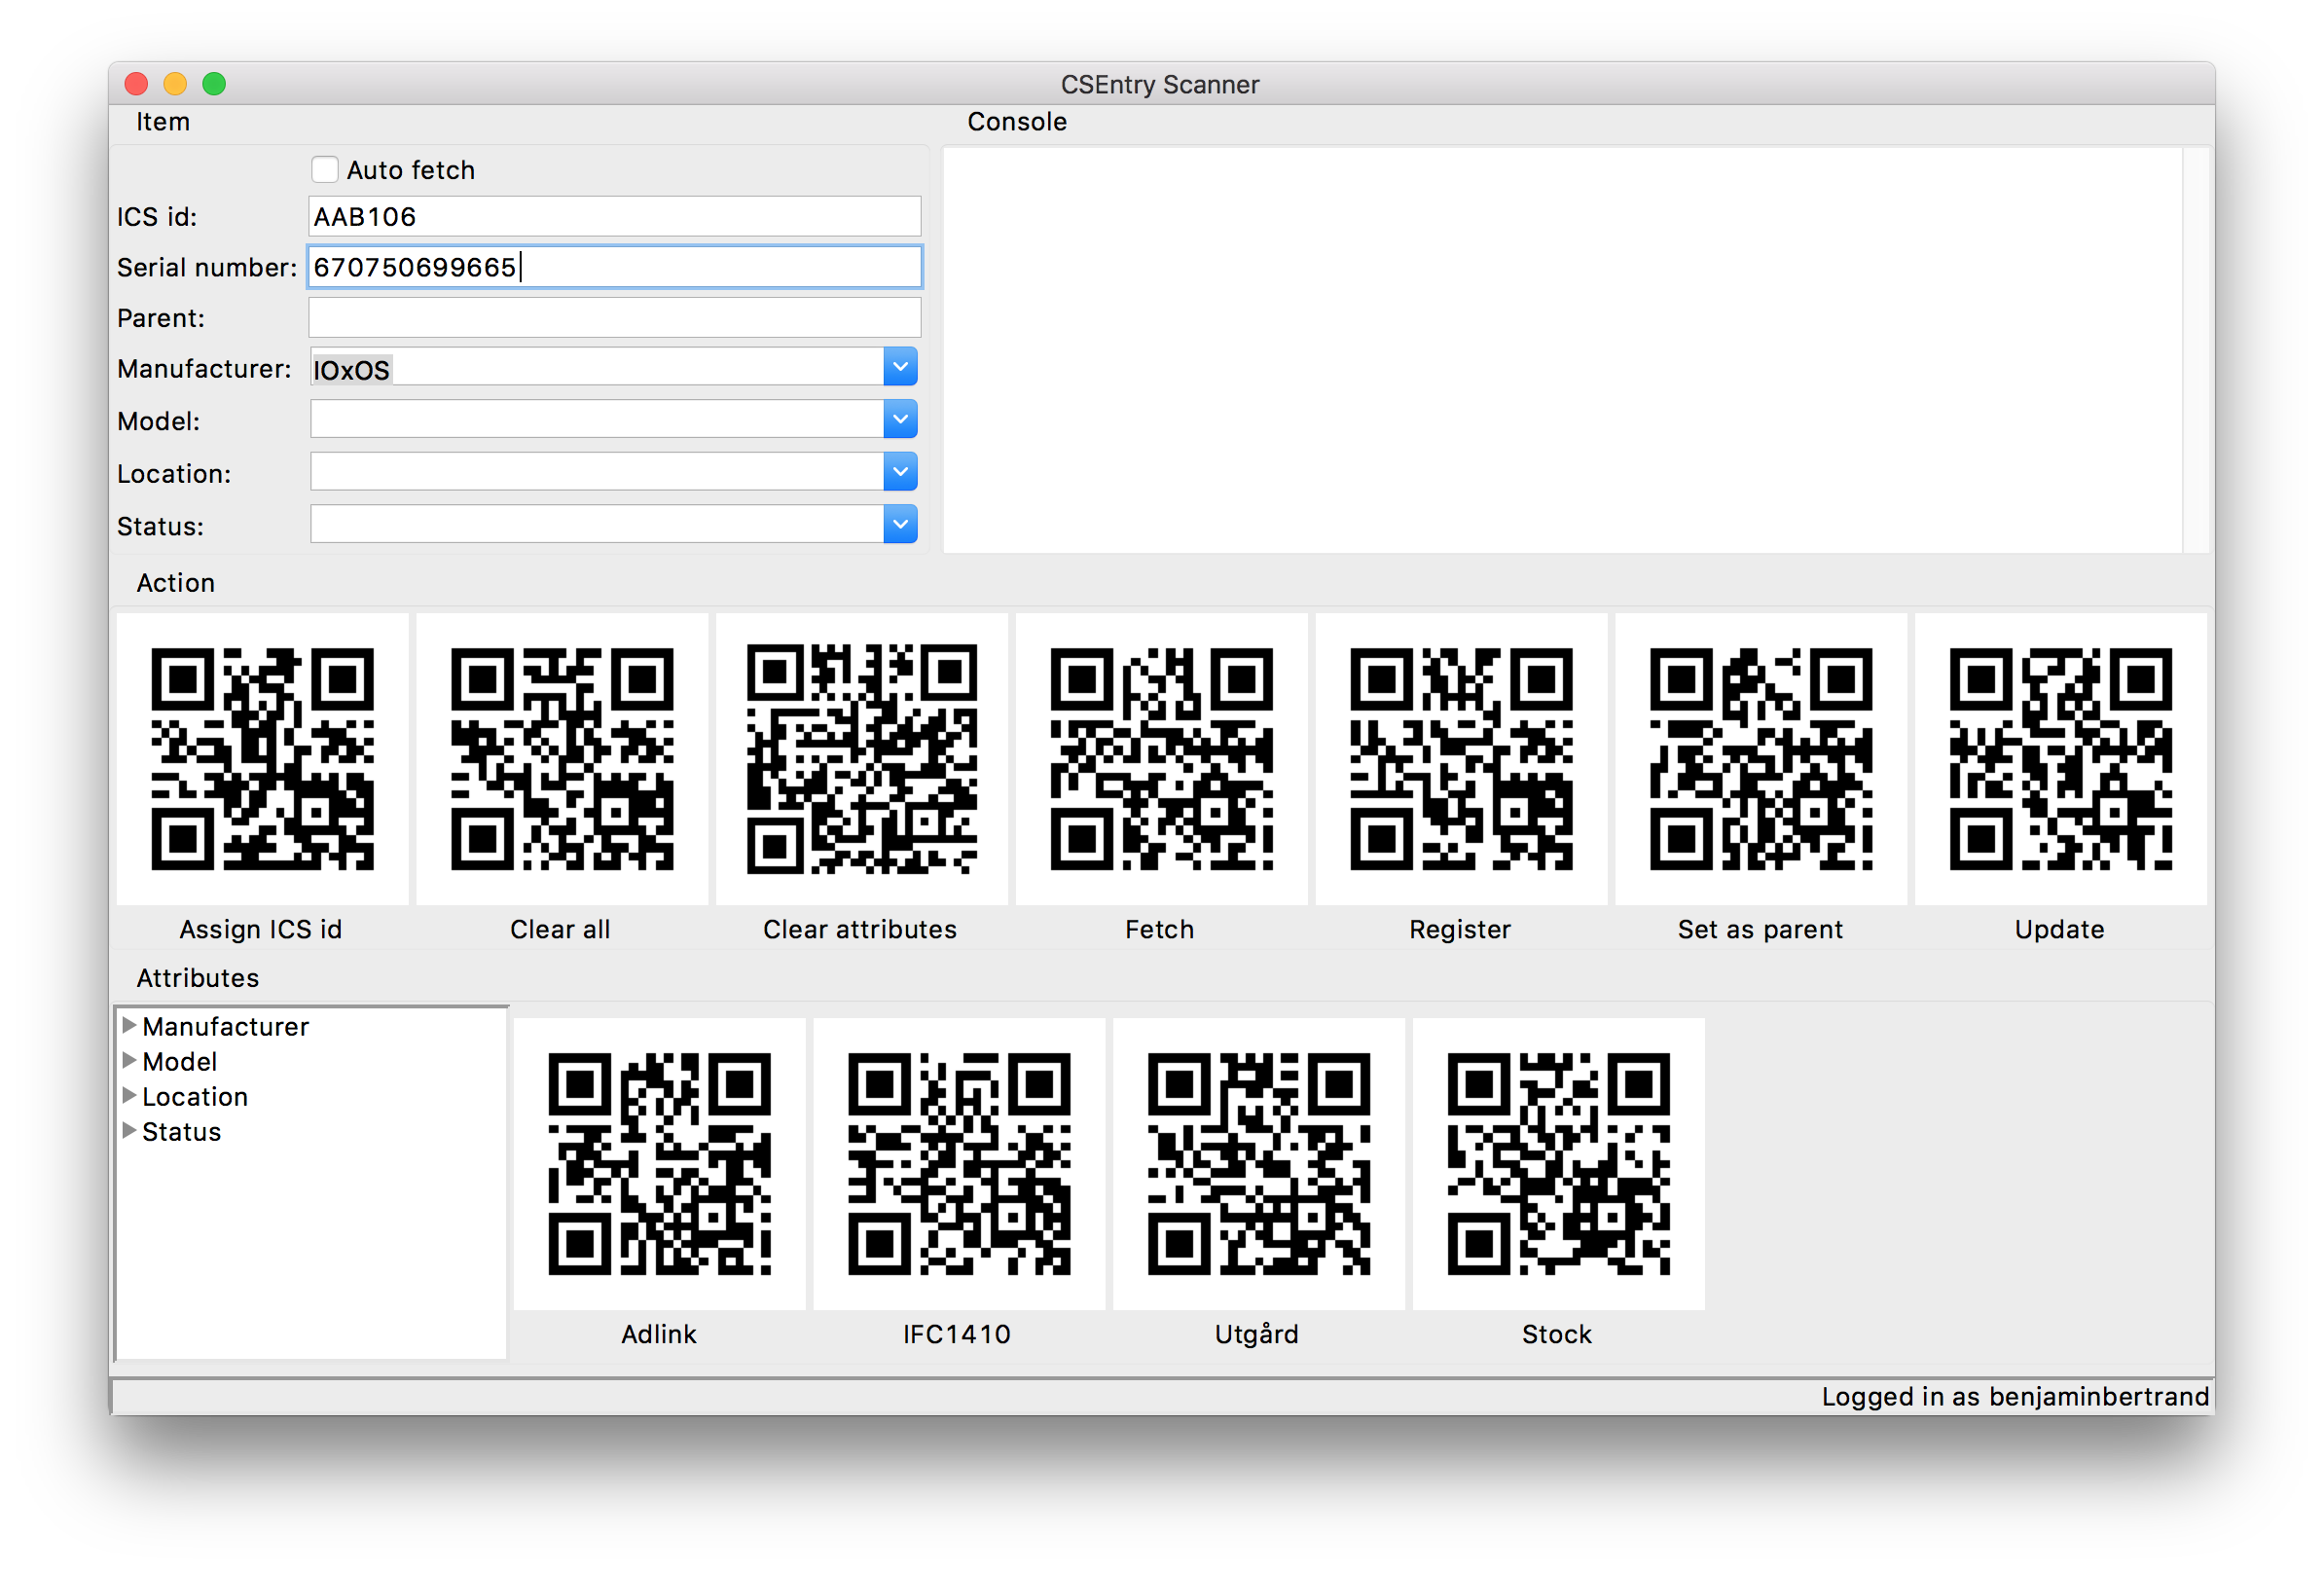
To register new items, you can scan directly the ICS id and serial number in the web UI. See Scanner setup to configure the scanner as a keyboard:
When the page loads, the focus is on the ICS id field. Scan a label. It will set the focus on the serial number field.
Scan a serial number. The focus will be set on the Submit button.
Scan the Submit QRCode on the right of the page. This will submit the form.
For more complex workflows, you can use the cse-scan application. You should configure the scanner as a RS232-based COM port.
Scanner setup
Scan the following codes to change the Xenon 1900 scanner settings:
Activate the default settings:

Optimize the scanner to read bar codes from mobile phone or other LED displays:

Lower or disable the sound. Use one of the following codes:
Daytime Mode (all sounds to on, but to a low volume)

Silent Mode With Flashing LED (all sounds are silenced)

Scan directly in the web UI. Use one of the following codes:
USB keyboard (PC)

USB keyboard (Mac)

Use csentry-scanner application. Use both following codes:
RS232 Interface

USB Serial